
Бесплатно 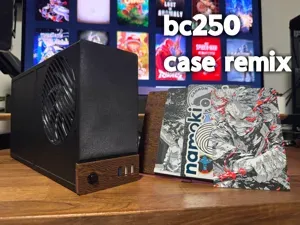
BC250 Case MKUU+ (FSP, Apevia, Metalfish PSU)
MakerWorld


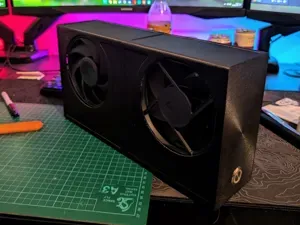
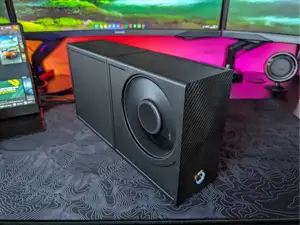
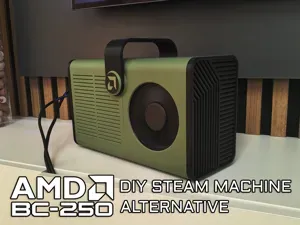
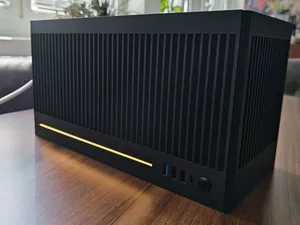
This is a remix based off the work created by the very talented morph91 . This remix project would have not been possible without his incredible original model ! This remix is a large overhaul of almost everything from the original model - with various modifications, additions, and enhancements. I've spent over a hundred hours and printed dozens of prototypes to bring this remix to life. Which is why I decided to name this a "plus" version : )
Case Highlights:
Easy to print
- The entire case can be printed in as little as 3 plates with less than 600g of filament used! Print time without the optional parts is about 20 hours total.
Easy setup
- This case can be used with 0 modifications to the stock heatsink (no messing with the fins required). However, for best performance some easy to do modifications are highly recommended (see more in the Assembly Instructions section and Comparison of all Thermal Improvement Mods section).
Easy to assemble
- The entire case can be assembled or dissembled in a couple minutes. It's also a hardware free design, that does not require you to purchase any screws/magnets/heat inserts/tools.
Wide compatibility
- Dedicated profiles that fit the three most popular flex PSUs for the BC250 (FSP500-30AS, Apevia ITX Flex, and Metalfish Flex). Expanded compatibility to all flex PSUs, via this remix thanks to jinson .
- This model can be printed on smaller 3d printers using the A1 mini profile.
Wide customization
- Upper and lower front plates allow you to change the look of your case. Rear side has mounting points for 40 & 50mm fans. Different fan shrouds allowing you to choose between standard 25mm thick fan or 30mm thick fans. Also created customizable IO shield.
Improved thermals compared to original model
- With slight modifications to the stock heatsink (adding stick on heatsinks and straightening only a small amount of the stock heatsink fins) - thermals improve significantly. This is mostly thanks to the new fan shroud I created that directs airflow in 3 ways: to the stock heatsink, to the stick on heatsinks, and to the backplate. I also created two sizes of shroud extenders that help direct the stick on heatsink airflow to the rear of the case (though they mostly serve to protect your fingers/cables from the stick on heatsink).
Improved usability compared to original model
- I created an internal clip system that helps hold both sides of the case together more securely. As an optional print plate, I created a front half of the case that has an integrated usb hub. Also, I changed the external psu lock to an internal one instead. Which completely eliminates the issue from the original case, where repeat usage would snap the tab.
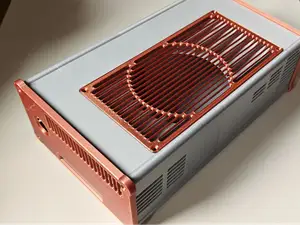
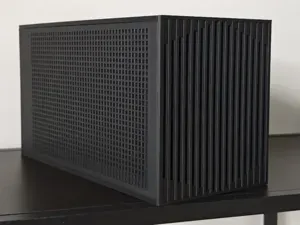
- I created two different fan grills that attach flush to the case to help prevent accidental finger/paw pokes. These grills were designed to have as minimal fan turbulence as possible. Also, the right side of case was redesigned to prevent accidental touches to the backplate. Helping prevent children/pets from accidental burns.
- Fixed fan centering. Fixed fan shroud sliding/wiggle issue.
Important Notes:
- There are multiple different versions of the fan shroud. Please print only one fan shroud plate, that is applicable to your use case. If you are not planning on doing the heatsink modifications like I did (stick on heatsinks and straightening fins) - then choose one of the "original" fan shroud plates. If you are planning on using stick on heatsinks, then choose one of the "heatsink" fan shroud plates. If you are using a standard thickness 120mm fan, then only print one of the plates that say 25mm! If you are using a 30mm thick 120mm fan (5 mm thicker than standard), then only print one of the plates that say 30mm! The shroud extenders are only meant for the heatsink fan shroud models.
- There are two versions of the front half of the case. If you want a front usb hub, then print that version. If you don't plan on having a front usb hub, print the version without one. Same goes with the cover plate.
- The internal psu lock for the Metalfish version has yet to be confirmed whether it fits. The Apevia one should fit, but I used someone's 3d model of the Apevia psu to test fitment. I did my best approximations with the measurements/models I could find online, but I would like to have confirmation of fitment from a real life test. If they do not fit, please let me know and if you can test some prototypes I will have them fixed ASAP. If you rather just use something that screws the Apevia/Metalfish PSUs in place instead of the internal locks then print this remix , credit to jinson .
- I am not planning to remix the dual fan version. This is due to this study , that shows 0 improvement in thermals between single and dual fans. If anything, it showed dual fans are detrimental thanks to the increased noise by +5 to +9dBA compared to a single fan. Based on that study, I chose to increase heatsink surface area with stick on heatsinks - which resulted in actual thermal improvements.
- A high static pressure 120mm fan with good airflow is required! Most regular pc case fans will not provide enough pressure/airflow for cooling. The arctic p12 pro pst is a great budget choice.
- Heatsink modifications while technically optional, are highly recommended to do to get the best performance out of this case.
- The A1 mini profile contains all the models from all the different versions combined into one. Please pay attention to the name of print plates to determine what you actually want to print.
My Part List:
Required:
- PETG Filament for main case
- I personally used: https://a.co/d/0gOMs9rW
- 12mm Latching Button for power on/off
- https://a.co/d/0hZ28ifs , https://a.co/d/098pmkW2
- High static pressure 120mm Fan
- https://a.co/d/0jdT5jNV (cheap but best in class price to performance), https://a.co/d/0ili8ZME (5mm thicker so provides more static pressure and airflow, but more expensive)
- PTM7950 / Thermal Paste
- https://a.co/d/01klDl5Q (recommended for lowest temps), https://a.co/d/0iLAR7Ty (don't go with normal paste unless you absolutely have to)
Optional:
- Stick on Heatsink (120mm OR 150mm version)
- https://a.co/d/038s6cPO (120mm, preapplied conductive tape) , https://a.co/d/0dnULzcw (150mm, no conductive tape)





Названия используются только для указания источника результата. Polyzon не аффилирован с перечисленными площадками.
Комментарии