
Бесплатно 
Framework 12 Retro 486 Case - V2 and V3
Printables


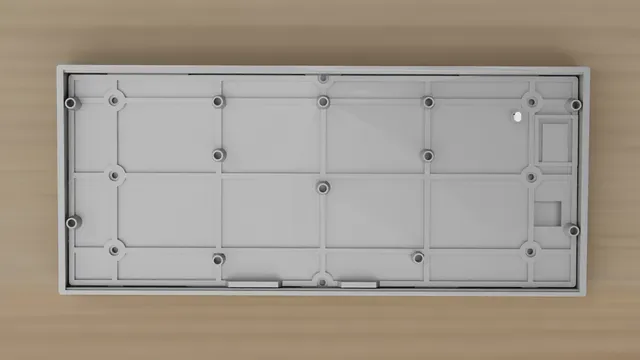

FrameBoard
A keyboard with a Framework 12 mainboard inside. Remove clutter from your desk and integrate your computer and your keyboard.
Key Features
- 70% keyboard with Encoder
- Easily interchangeable Framework 12 motherboard
- Compatible with Framework Expansion Cards
- Accessible powerbutton via mechanical button
- Airflow flows over the rest of the mainboard also cooling the other components, before cooling the CPU.
Bill of Materials
- 20 M3*x*4.5 Heat Set Inserts
- 20 M3*12 Screws
- 74 Cherry MX plate mounted switches
- 70% Keycap Set
- EC 11 Encoder
- RP2040 Zero
- Short USB-C cable
- Misc: Cables and solder for handwiring the keyboard matrix
- Optional (6 Anti-Slip Silicon Feet 12-15mm diameter)
- Supports: Almost no supports needed by design. Only the Right Midplate and Left Keyplate require minimal supports under the gluing surfaces.
- Brim: Recommended for the outer case pieces and the power button.
- Orientation: Print the main case pieces on their respective left and right sides.
Assembly
- 1. Prepare Parts: Glue the Case, Midplate, and Keyplate halves together.
- 2. Inserts: Heat-set the M3 inserts into the Case and Midplate.
- 3. Install Motherboard: Screw the Framework 12 Mainboard into the Case.
- 4. Attach Midplate: Screw the Midplate into the Case.
- 5. Keyboard Wiring & MCU: Wire the key matrix and flash the RP2040 Zero using the setup guide on the [GitHub Repository]( https://github.com/J-Verhaar/FrameBoard/tree/main ). Mount the wired RP2040 Zero on the designated plateau on the right side of the Midplate (tape down if friction fit is loose).
- 6. Internal USB Connection: Connect the RP2040 Zero via the short USB-C cable through the Midplate access hole into the front-right USB-C port of the mainboard.
- 7. Final Assembly: Screw down the Keyplate, put the Power Button in its slot in he top right oval hole. Slot in your Framework Expansion Cards/adapters, attach keycaps/knob, and plug in your cables. Optionally: add silicon feet to the engravings on the case.
- 8. Enjoy!
Keyboard Firmware and Documentation
Detailed instructions, wiring diagrams, and RP2040 Zero firmware files are available on GitHub:
https://github.com/J-Verhaar/FrameBoard/tree/main
AI-Disclaimer
AI was only used for the Readme's and diagnostics, the code and models are handmade.
Attribution
- Office Blender Scene (Renders): [Jorgeferrer on BlendSwap]( https://blendswap.com/blend/26351 )
- Keycap Models (Renders): [Benhop on BlendSwap]( https://blendswap.com/blend/28909 )
- Textures (Renders): [Poliigon] (www.poliigon.com)





Названия используются только для указания источника результата. Polyzon не аффилирован с перечисленными площадками.