
Бесплатно 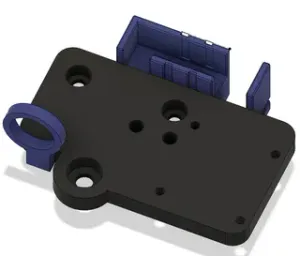
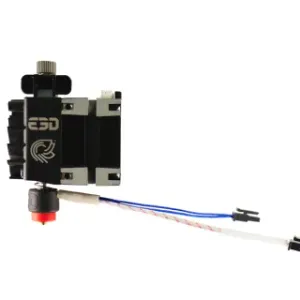
Ender3 Adapter for E3D Revo Hemera (Original/XS) v4
Printables
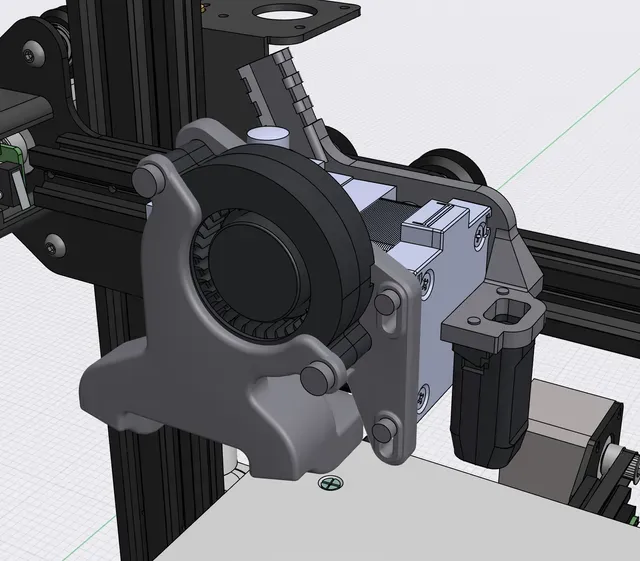

Due to all existing mounting solutions for Hemera to Ender 3 having compromises I don’t want, I decided to design my own.
My aim:
- As little build volume loss as possible - All 4 mounting tabs used - Hemera mounted to metal - Cr Touch and Bl Touch mounting solutions - Tidy wiring - Small, thin and light one part mounting plate
Compromises:
- You will need to drill two holes into the original x-carriage plate
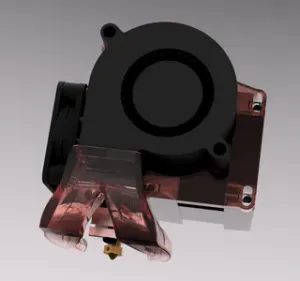
All of these things were accomplished, apart from just 2 not 4 Bolts going through Metal and 2 going to plastic. You will lose 8mm on the x-axis and 13mm on the y, calculated from the 235x235mm build plate (also not entirely used with the stock setup). You can regain this build volume on the x-axis by grinding down the extra length of the upper right v-Roller bolt and the locking part of the locknut and on the y-axis by moving, redrilling and retapping the y-axis aluminium extrusion. For the part cooling I used the very good CFD analysed part cooling by Hangtight on Thingiverse. You are free to use whatever cooling duct you want with this setup, but I will include optional instructions on installing this cooling duct. To mark what’s relating to this duct and therefore is optional everything relating to this part cooling duct will be written italic.
You will need:
Printed parts:
- Mounting Plate either „Mounting_Plate“ or „Mounting_Plate_Bed_Levelling“, depending on wether you plan on installing a BL- or CR-Touch or not. - If you want this part cooling I used you need „Duct_Mount_Plate_V2.stl“ and „Duct_V2.stl“ Get them here. Print the Hemera mounting plate using 0.2 layer height and PETG or better. No support required for the Hemera mounting plate. For the cooling please look up at the Models own thingiverse page.
Hardware:
- 4 x M3x10 bolts (2 For Mounting the Hemera and 2 for the optional part cooling ) - 2 x M3x8 bolts (Included with the Hemera) - 8 x M3 square nuts (all included with the Hemera, 2 of these are for the optional part cooling ) - 3mm metal drill - Also only if you use the part cooling I used: - 5015 blower - 2 x M3 washers - 2 x M4x25mm bolts - 2 x M4 washers - 2 x M4 nuts
Assembly:
Heat up the hotend and pull out the bowden tube in case you want to re-use it at any time.
This assembly guide shows you the easiest way von can do this, but due to the need to remove the hotend to reach the bottom V-roller bolt, this is only possible with the Revo Hemera. If you have the V6 Hemera you will need to firstly put all the rollers on and drill the holes with the x-carriage off the printer(step 4, 5, 7), then screw on the Hemera (step 6) and then slide this assembly onto the x-beam from the right by taking off the belt tensioner and the two bolts holding the beam to the z-axis carriage.
1. Take out the two bolts holding the cooling shroud of the original hotend and your bed levelling sensor, in case you have one.
2. Take out the two bolts holding the hot end to the metal plate of the x-carriage.
3. Now you can put the old hot end and cooling assembly aside and you‘ll only have the bare metal plate. Take out the bolt holding the bottom V-roller and put it aside, remembering the order of the components, you will need to reassemble it in the same way later.
4. Now slide out the belts out the back of their mounting slits and you can take the plate with the two attached upper V-rollers of the printer.
Also unscrew the the top two bolts and put them back in with the 3d printed mounting plate sandwiched between the bolts and the metal plate.
5. Now you can drill the 2 holes into the metal plate using a 3mm metal drill and the mounting plate as a template. Wach out to hold the drill perpendicular to the plate to get the holes lined up and not damage the V-roller.
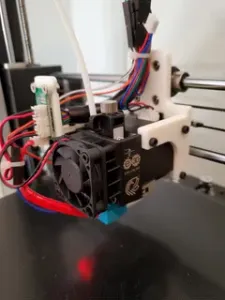
6. Slide in two more square nuts into the back of the Hemera and double check that your bolts are not to long(!!!) before you mount the Hemera to the assemby using 2 M3x10mm bolts through the drilled holes from the back and 2 M3x8mm bolts for the holes in the right of the printed part. If you want to, you can also guide the heater and thermistor wires through the channel in the plate before bolting the Hemera to the plate.
7. Its time to reattach the carriage to the printer, for that take the bottom V-roller bolt, excentric nut and locknut an reattach it to the carriage the same way as you took it out, just thru the plastic part now.
8. Now you can add the part cooling fan and duct. Firstly put 2 M4 nuts into their dedicated spots in the back of the duct mount plate.
9. Then attach the duct mount plate with 2 M3x10mm screws and 2 square M3 nuts.
10. After that slide your fan into the cooling duct and screw this assembly on to the part cooling mount plate into the M4 nuts with 2 M4x25mm bolts. And adjust the duct to sit about 1.5 to 2mm above the nozzletip. For additional information view the original model page.
11. Last hardware install is also optional, installing a bed levelling sensor. Place the levelling sensor underneath the mount for it and hold it in place with the 2 M3 screws it was mounted before, from the bottom to the top.
Now the only thing left to do is tidy up you wiring and rout everything to the mainboard. Simply zip tie the wiring together at the post on the top for that. Don’t forget to adjust your printers firmware accordingly for the Hemera, E3d has extensive guides for that here.
Happy Printing!
Disclaimer: No liability is taken if you damage you, your printer, anything or anyone else following this guide or using the parts and instructions I provide. Everything you do is at your own risk! All information about the cooling duct is taken from its Thingiverse page and not self produced.






Названия используются только для указания источника результата. Polyzon не аффилирован с перечисленными площадками.