
Бесплатно 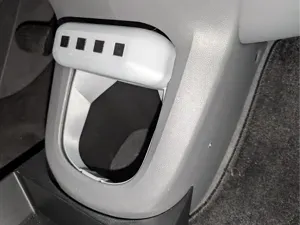
Ioniq5 Carplay/Android Auto USB cosmetic cover
MakerWorld

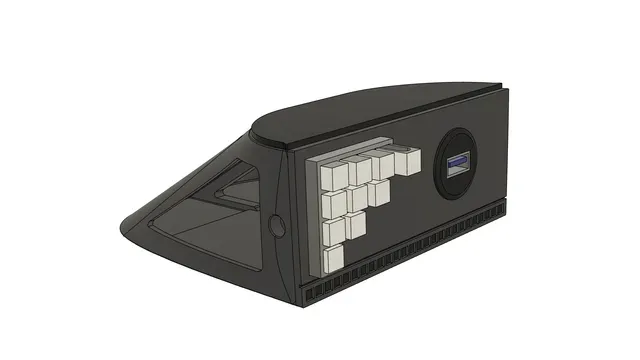
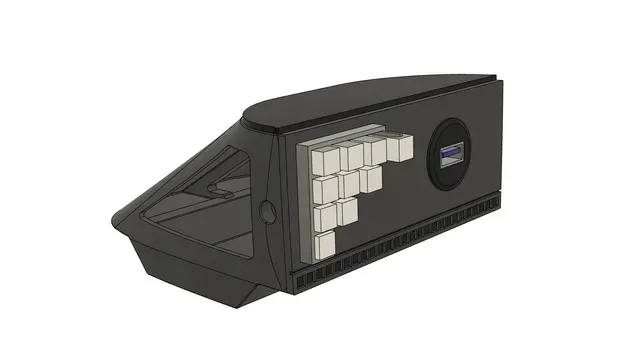
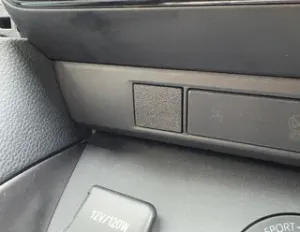
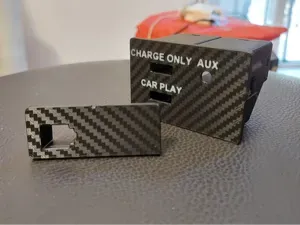
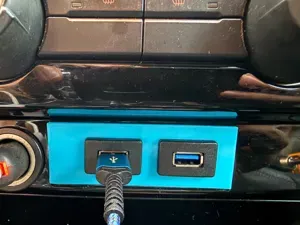
The IONIQ 5 is a great car (in about every aspect that matters to me), but there is one little thing that is a bit annoying: It only features a single USB data port combined with the need of using a dongle for wireless Android Auto / Apple Carplay. While it is quite simple to solve the technical part with a small USB hub to connect a wireless dongle and an USB stick at the same time, to avoid the mess of cables and devices, and also to have the USB port easily accessible, I designed a little tray that fits into the center console below of the USB data port of the car.
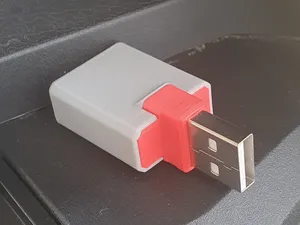
The standard model works with the Android wireless dongle "AAWireless" (that's what I use and can test). Other rather small Android dongles, e.g. the Motorola MA1 should also fit just as easily. For larger dongles and most for Apple Carplay: These dongles appear to be slightly larger so please check the section below to see what the chances are your dongle will fit in the standard compartment (I have the standard version with a similar tested a large USB hard drive before designing the Plus version, and with a bit of origami it all came together nicely). There is also a PLUS mode l that offers an additional compartment in the bottom for larger USB wireless dongles or USB hubs.
If you build the model and you like it, please consider buying me a coffee . I put a lot of effort and test prints into it (after my personal one was ready and in use) to tweak and document it and get this working for you. It would just be great if that paid off for the filament and parts I needed.... and maybe even a car wash for my IONIQ 5 :-)
Model Details
Two tray versions are available, the Tray (left photos) and the TrayPLUS (right photos). The only difference between the two is the extra space for the Plus version, so all other parts fit both.
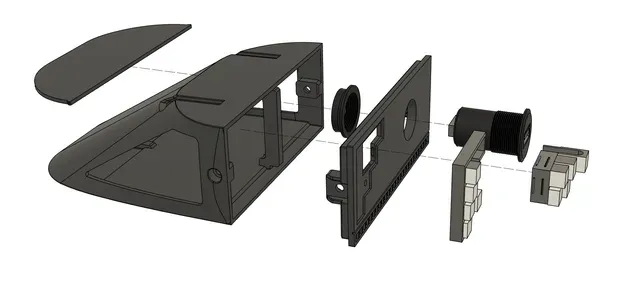
The model consists of the following parts:
A Mount Plate to be attached with double-sided tape to the center console. This part provides two rails to slide the tray and allows you to easily take it out if you need to access the devices.
The actual USB Tray which will hold the devices. It is large enough to fit the devices I used, and provides enough space for the USB cables and connectors. Check my comments below if you want or need to use other devices.
The USB TrayPLUS provides an extra compartment at the bottom to hold larger USB dongles. When installed, it visually retains the look of the standard shelf and also allows access to the center console space below the tray.
The Pixel Plate with the Pixel Plate Insert to provide a USB cable inlet somehow fitting the general Pixel design elements of the IONIQ 5. Both can be printed in multi-color on a single extruder printer by adding a filament change at the correct layer. There are two versions for the Pixel Plate, one to be used with a M3 heat-set insert, and a generic one with just a 1mm hole to be used with a generic self-tapping screw.
There is also an alternative Front Plate without the 22mm opening for the socket. So if you choose to not use a socket (which will give you a lot more space on the inside for fitting larger dongles or USB hubs) or you want to use a socket with a different diameter, just take this one. You should be able to easily add a custom opening in your slicer, or just drill it after printing. I made a 1mm center mark on the inside to help you with alignment.
Parts List
For the tray itself you just need some screws:
- 2 x M4x8 cylinder head screw and nut
- 1 x Heat-set insert M3x4.0x5.0 and M3x8 cylinder head screw and washer
- Alternatively: Any small self-tapping screw; use a little drill bit if needed for the screw to fit without breaking the part
Electrical Parts
There is one important detail you must know about using AAWireless with an USB Hub in the IONIQ 5 (and this is probably also true for other dongles and for Carplay): You must connect the the AAWireless to port 0 of the USB hub. On other ports it will power up but not connect to the car.
- A small USB Hub: Manhattan 4 Port USB 3.2 Gen 1-Hub
- Angled and short USB-A extension cable to connect the USB Hub: USB 3.0 Male Adapter Cable 90 Degree (UP/DOWN)
- The wireless dongle: AAWireless
- The USB Socket outlet with 22mm diameter: TRU COMPONENTS USB-08-BK 1243949
- Short USB Cable to connect the socket (for the socket above it is a male-2-male version): SUNGUY USB 3.0 Kabel 0.3M
Apple Carplay and Other Wireless Dongles:
Standard Tray
At the moment I do not have any Carplay wireless dongle to test but checked a bit the specs in the web and made a test with a small USB drive sized similarly (10.5 x 4.5 x 1.4 cm; 12cm including USB cable at 90°) ... and after some time playing Origami I found a way to make it fit in the standard tray. For any dongle, if it is
- not longer than 12 cm (including USB cable bent 90°)
- not much wider than 5 cm (there was still some space in that direction)
- not taller then 16 mm
chances are good that you will make it fit. Keep in mind that you will need to use short USB cables. If it is getting tight, maybe some angled USB cables will help you out. Anyways, if you check the pictures I made from wiring everything you will get an idea what you will need and if it is worth a try.
And if you do not want to use a USB hub but only what the tray as a nice compartement for your wireless dongel, the standard tray version should work for you. Use the Front Plate without opening.
Tray PLUS
For those of you who don't want to bother putting everything in the standard compartment, I've designed a version that has an additional compartment on the bottom for the dongle to fit, and this will provide plenty of space for the USB hub and cables in the rest of the tray.
If you want to use other electronics here are some hints:
- For the USB Hub and the wireless dongle, at least one of them should fit under the USB socket outlet. The Manhattan USB hub is ~14mm in height, and that fits perfectly (there is ~16mm of space between the bottom of the tray and the installed USB socket outlet.
- I only tested the AAWireless, but from the specs the Motorola MA1 should also fit into the standard version. The e.g. CarlinKit dongles (and similarly sized dongles) should also fit, check my comments and wiring section to decide whether to try the standard tray or the PLUS.
- The USB Hub should have both of the usb ports to be used (with one of them being port 0!) on the same side so that there is enough clearance for standard USB cables. Of course you can do some trial and error with angled connectors that will help a lot if you have them in the correct configuration.
- The USB socket outlet I used is quite short but with a USB cable with a standard straight connector it actually requires the full spacing to the back of the tray. So if you opt for another socket outlet, be sure it fits with a USB cable attached. Or you can also check for USB sockets with a short (!) fixed cable (which will save space), or opt for some angled connector cables. Checking on AliExpress will give you some cheaper options as well. As a reference, check the drawing of the TRU Components socket with USB A Female connector (there is also the datasheet if you follow the link in the parts list).
Other Parts:
Double-sided adhesive tape: tesa POWERBOND transparent 19mm




Названия используются только для указания источника результата. Polyzon не аффилирован с перечисленными площадками.