
Бесплатно 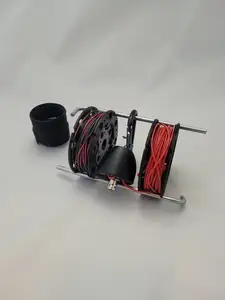
QRP Reel Antenna for 20M
Printables


Overview
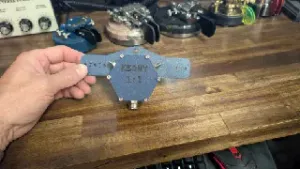
This is a QRP balun housing I've been working on. It's nothing new in terms of what it can do, but it's a nice, compact package that requires only minimal hardware and is easy to assemble. I'm planning to use this in conjunction with my QRP Reel Dipole System so I can have color coded reels with elements cut for different bands.
Parts List
Note: Parts List does not include what will be needed for the antenna elements.
Printed Parts
- balun-housing-body.stl - balun-housing-screw-ring.stl - balun-housing-disc-insert.stl Note: .2mm layer height has produced the smoothest working threads for me. Additionally, the mesh for balun-housing-screw-ring.stl has been scaled up by .5% to improve thread function.
Non-Printed Parts
- M3 16mm socket cap screws (x2) - M3 nuts (x2) - M3 washers (x4) - M3 wing nuts (x2) - Panel-mount BNC connector (x1) - FT-140-43 toroid (x1) - 22-16 AWG ring connector (x2) - 22 AWG power wire (~2ft) - 4in zip ties (x2)
Assembly
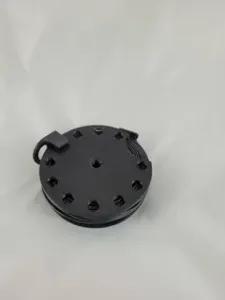
Begin by installing the BNC connector into balun-housing-disc-insert.stl as shown in the pictures.
Once the BNC connector is installed, wrap your toroid with 10-13 turns of wire, using the zip ties to secure it if desired. (Mine has 14 turns in the pictures; I've read more than 13 turns can cause parasitic capacitance, but it's been working fine for my needs. This is more about the assembly of the housing than construction of the balun itself.)
Next, split the wrapped wires apart at one end, strip them, and crimp on the ring connectors. I trimmed some of the insulation from my ring connectors, but I don't think it's necessary after having assembled it. Alternatively, non-insulated ring connectors could be used if you're concerned about space.
Split the wires apart at the other end, strip them, and solder them to the BNC connector (one to the center and one to the ground)
Finish assembling the disc/toroid portion of the housing by mounting the ring connectors using the M3 hardware; put one ring connector on an M3 screw, a washer on after that, and put it through the inside of one of the mounting holes. Secure it on the other side with a washer and nut and tighten it down. Finish this side by adding a wing nut and repeat the process for the other side.
Once the disc part is complete, put the wrapped toroid into the housing body and seat the disc in the indentation for it. Screw the ring down over the disc and tighten down to complete the balun housing.




Названия используются только для указания источника результата. Polyzon не аффилирован с перечисленными площадками.
Комментарии 0
Загружаем комментарии…