
Бесплатно 
Tarmo5 cover / body skull and wing
Printables


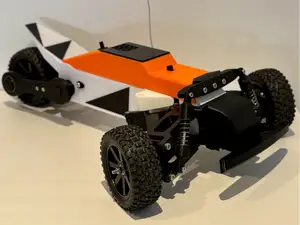
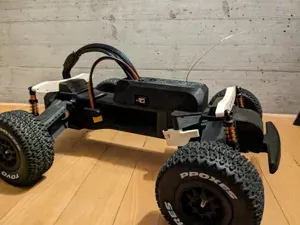
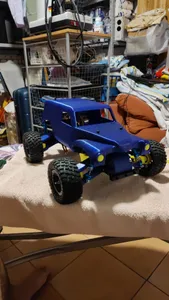
Tarmo5 is a great project by Engineering Nonsense. Now, my build is robust and powerful and also resistant to my son's driving skill.
→ if you are looking for my cover and wing, the page moved here : https://www.printables.com/fr/model/477310-tarmo5-cover
A 6 years old boy is very good at crash testing a car. Everytime my son crashes it, I redesign some pieces to make it stronger. After so many months of fun and broken parts, I did a lot of modifications on tarmo5 and I was requested to publish it.
If you want me to keep updating this page with new models PLEASE LIKE IT / COMMENT / post your make → it is the only way for me to know if its usefull or if it's a waste of my time
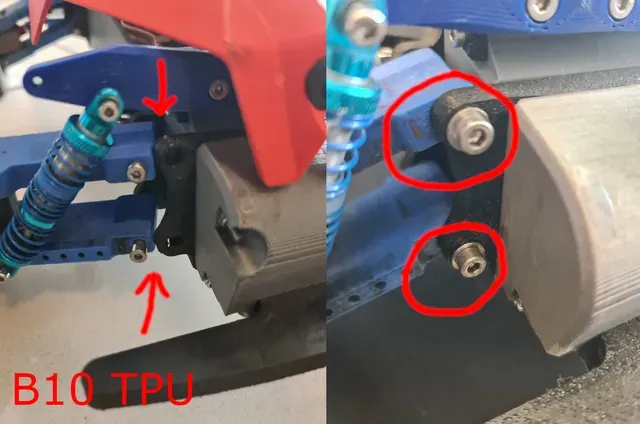
→update on 2023/06/09: FRONT IMPACT PROTECTION by reinforcement of B10 TPU part + larger front bumper (see bellow). Improved printing advices (see at the end of this page)
→ update on 2023/05/10: I got relaly good results optimizing the printing parameters for my prusa mk3s+. See a the end of this document the settings to use.
→ update on 2023/05/09: the existing tolerance between the MAIN GEAR HUB and the CV GEAR HOUSING caused some friction, partialy melting the CV GEAR HOUSING and after a while the TORQUE DUMPER broke causing a friction between the GEAR HOUSING and the upper CONTROL ARM. To avoid this, I modified the MAIN GEAR HUB, reducing the internal tolerance by 1.5%. The part is a bit stonger and the smaller tolerance reduces friction. I tried unsucessfully other mods that I finally abandonned.
I suggest you print the CV GEAR HOUSING in a visible color like red because when the torque damper will break this part may fall. Normally the color is not visible anyway.
Files to use
- MAIN GEAR HUB - C06_tolerance1.5p.stl
CV WHEEL HOUSING - CV INNER RACE - CV CAGE
At the beginning, my tarmo5 was frequently losing steel balls or breaking CV CAGE. I tried to reinforce the CV CAGE: see 3 versions on the picture : normal (blue), +4% (white) and +5%(red). I actually fusioned the original stl with a +2% and with a +5% version on prusaslicer.
The +5% version fits and seemed better at the beginning but the problem was not completely fixed.
I also reinforced CV WHEEL HOUSING enlarging the external part even if there was no visible problem. → abandonned on 23/05/10 see bellow
After a post in reddit and many very nice answers, I finally found the solution :
The tolerances of this project are globally too high for my printer. Thanks to u/cobblepots99 I could verify that it is well calibrated. After many tries I ended up printing the 3 parts in contact with the steel ball as follow:
- wheel housing fusioned with a XY -1.5% scaled copy of itself - CV cage fusioned with a XY 1.5% scaled copy of - itself - CV inner race fusioned with a XY 1.5% scaled copy of - itself Those parts are available here.
NOTE: my CV WHEEL HOUSING - C01_ corrected_reinforced_reduced_1.5p.3mf edit on 23/05/10: I removed the external reinforcement because it's not necessary and in some cases it can cause friction.
is modified as follow:
- "corrected" : the hexagonal part in contact with the wheel was too small, I increased the size so it fits perfectly with my wheels (the recommended model). - “reinforced” : the external part is a bit larger to make it stronger → abandonned - "reduced" : fusioned with a XY -1.5% scaled copy of the botom part of itself (the part in contact with the balls) previous version renamed : old_CV WHEEL HOUSING - C01_ corrigé_renforcé_réduit_1.5p.3mf
new version : CV WHEEL HOUSING - C01 - corrected_reducedLT.3mf
After mounting the 3 parts with the balls, If it is a bit too tight, I suggest you decrease to 1% in priority the scaling of the CV CAGE as the 2 other parts are important to hold the stell balls in place in max extension position (when shocks are fully extended).
I tried using silicon grease but now I prefer dry PTFE lube.
CV GEAR HOUSING
The same 1.5% modif was applied to CV GEAR HOUSING - C02 ajusté 1.5p.3mf
SHOCKS improvements :
My shocks were not hard enough for the weight of my car.
It came with 4 springs per shock (2 longs & 2 shorts). The idea was to use either ones or others but I combined 3 of them and I designed a piece to connect the springs.
Raccord ressorts v1.3mf
Now it is perfect.
Those shocks are cheap but really good and you can adjust it to fine tune.
https://fr.aliexpress.com/item/1005003230553475.html?spm=a2g0o.order_list.order_list_main.64.4f3e5e5bfwPVnv&gatewayAdapt=glo2fra
Please note that the springs do not have the same elasticity. First make a test to identify the harder ones. Check on my picture to see where is the softer one.
EDIT on 23/05/10 if you use the last version of the enclosed gearbox by flyntm, you should order 1cm longer shocks for the rear.
The wheels direction is not enough firmly maintained
So I redesigned following pieces. After many tries I found the right percentage of modification for those parts :
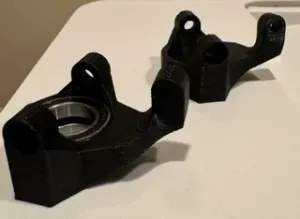
- Steering Link - A10 - tolerances 104p.3mf 104% - FRONT BEARING HUB - A05 - tolerance 86p.stl 86% - FRONT BEARING HUB - A06 - tolerance 86p.3mf 86% - END CHASSIS - B04 - tolerance 92p.stl 92% EDIT on 23/05/10 : now I replaced the steering link with a metalic adjustable one.
HEAD ON COLLISION / FRONT IMPACT
Head on collision (front impact) is absorbed either:
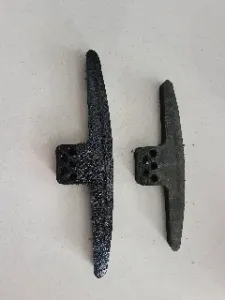
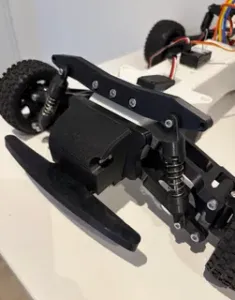
- by the bumper: use Bumper - B07-T-largeLT here - by the front wheels. In this case the shock is supposed to be absorbed by the TPU B10 part that will break after a while. 1. Front bumper:





Названия используются только для указания источника результата. Polyzon не аффилирован с перечисленными площадками.