
Бесплатно 
Skadis T-Nuts Mounting System for Ikea Skadis Pegboards
Printables
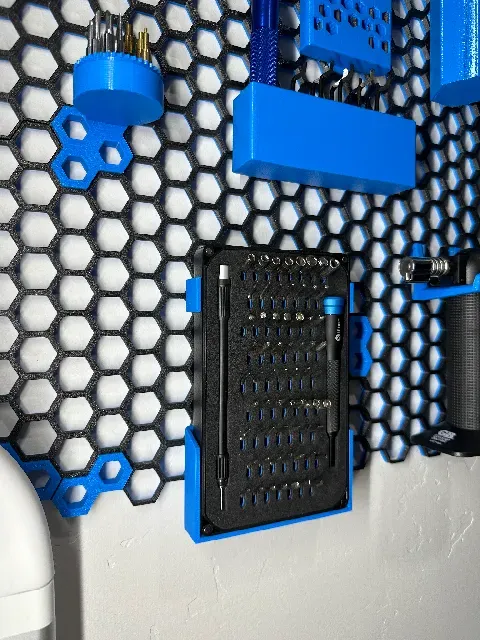
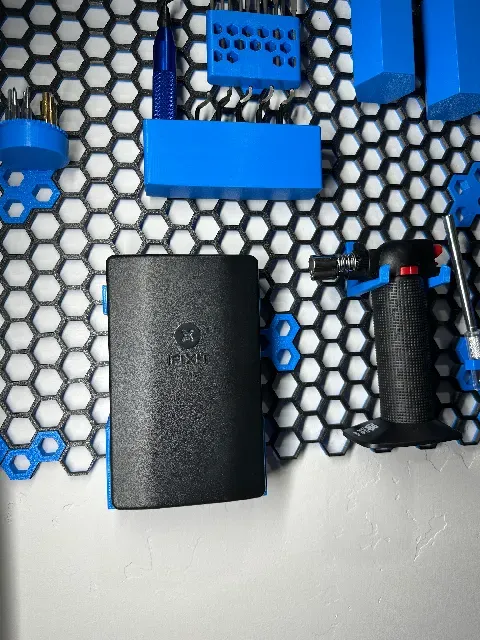
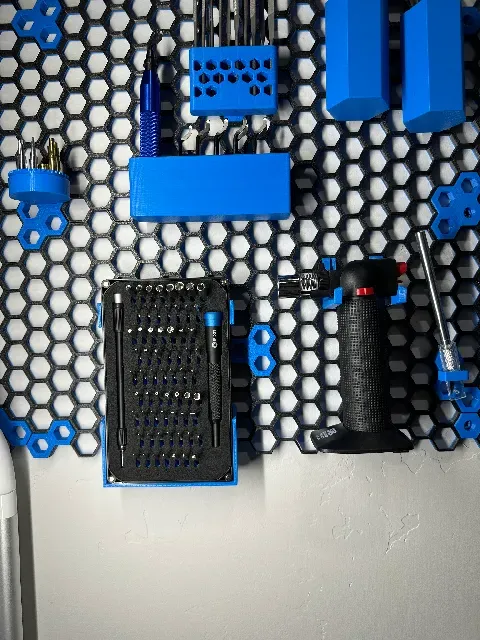
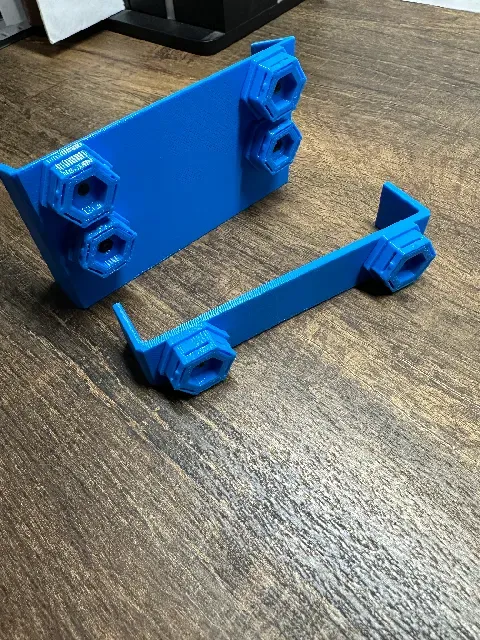
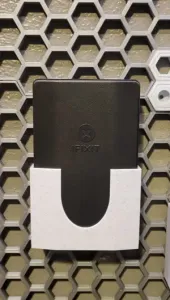
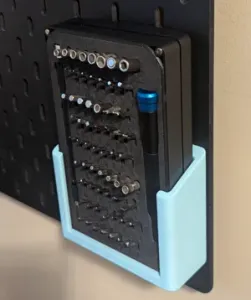
I loved the excellent model by @JohnD920 for mounting the iFixit Mako Driver Kit to the Honeycomb Storage wall—but I wanted to be able to (optionally) leave the lid off the kit, and be able to just choose driver bits directly from the wall without taking the kit down from the wall. But of course, I also wanted to maintain the option of quickly and easily removing the whole kit when I need to.
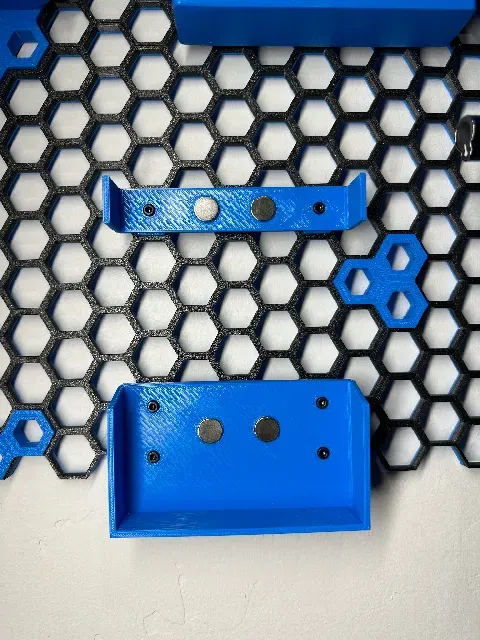
I had the idea of using magnets to mount the kit to the wall, since the back plate of the iFixit kit is metallic. So I designed this remix, and I think I'm in love with how it turned out!
I purposely designed this to work equally well with OR without the lid for the iFixit kit.
I chose to use 12x3mm magnets, just to ensure they'd be strong enough to hold the kit to the wall without issue—while also being stronger than the magnets that hold the kit's lid in place, in the event that you're storing it with the lid on. That makes it easy to remove the lid with one hand, since you don't have to worry about the whole kit coming off the wall when you pull.
---
Print settings that I used:
- PETG (in the pictures, it's Overture “Digital Blue” PETG) - 0.3mm layer heights (with a standard 0.4mm nozzle) - 10% infill is plenty (there's not much by way of infill anyway) - Prusa Textured Steel Sheet on the print bed - No supports needed - Brim optional—if you're having issues with the corners peeling up - I actually increased the print speeds somewhat compared to the default PrusaSlicer profile, after the first layer. Print both brackets with their back side down on the print bed.
With these settings, I printed both mounting brackets along with six of the M3 honeycomb inserts… in just 2h 36m.
Just for convenience, I've also included the stl for the M3 honeycomb insert along with this model (it's unchanged from the file included with the original Honeycomb Storage Wall design). Alternately, you can use this model with an M3 brass heatset insert if that's your preference, instead of the included version that requires hex nuts. (I actually used some of both, since I already had a few of each sitting around).
---
Using this design with the Honeycomb Storage Wall requires:
- 12x3mm neodymium disc magnets (x4) - Strong glue, to stick the magnets to the printed parts (I used “Gorilla Glue”) - Honeycomb Storage Wall M3 inserts (x6) - M3 cap-head screws, 8mm in length (x6) - M3 hex nuts (x6) (not needed if you use an M3 heatset type of honeycomb insert)
To install:
- Glue the magnets in place, and allow things to dry. - Then screw the brackets to the honeycomb wall inserts, making sure to line up the hexagons with the correct orientation for your wall. - Also, make sure you've tightened down the screws enough that the heads stick out LESS prominently than the magnets do. Only the magnets should make contact with the iFixit kit when it's all in place. - Mount the bottom bracket to the wall first - Attach the kit (magnetically) to the bottom bracket after it's on your wall - Use the attached kit to help determine where you want to mount the top bracket—and then mount that to the wall, too.
You can also choose to secure things with only 4 screws (2 on bottom, 2 on top), instead of 6. I just found it nice to have it secured extra well, so I don't have to worry about the brackets coming detached from the wall when pulling against the magnets to take the kit down.
---
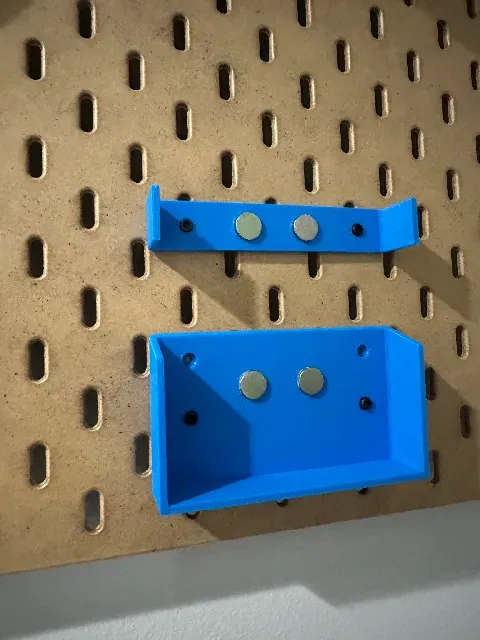
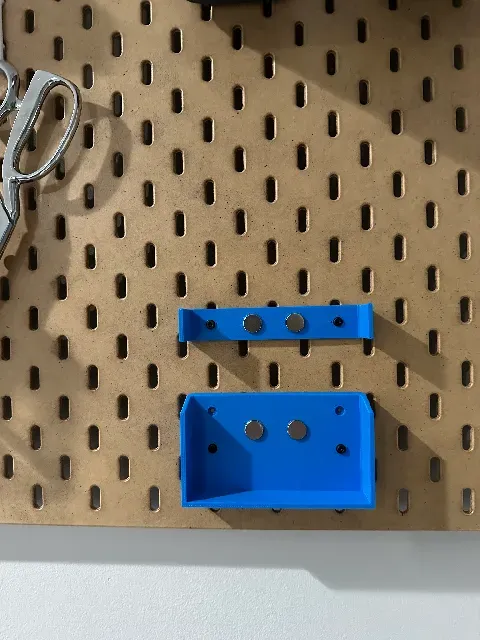
As of June 23, 2023, I've also added a slightly altered version of this design that makes for easy mounting to the Ikea Skadis pegboard, if that's your preference over the Honeycomb wall! (The files for this version have “Skadis” in their name)
Using this design with the Ikea Skadis pegboard requires the same magnets as above, but slightly different mounting hardware. Based on a recommendation from @LittleJoeMuc in the comments, a great way to mount this to your Skadis board is to use the Skadis T-Nuts Mounting System by @6d6178 . In total, here are the parts you'll need:
- 12x3mm neodymium disc magnets (x4) - Strong glue, to stick the magnets to the printed parts - M2.5 cap-head screws, 12mm in length (x6) - M2.5 hex nuts (x6) - M2.5 Skadis T-Nuts - printable - (x6) - M2.5 Alignment Guides - printable - (x6) For convenience, I've also included the stl files for those last two parts along with this model (they are unchanged from the files included in the original Skadis T-Nuts Mounting System model). Make sure to go “like” that design as well, if you use it!!
For the bottom bracket, you could also choose to just use the top 2 holes, instead of all 4, if that's easier.
To install:
- Glue the magnets in place, and allow things to dry. - (optional) the M2.5 Alignment Guides can also be glued onto the back of the brackets if you choose to. You don't have to glue them—but doing so can make it easier to mount/unmount from the Skadis board, if you think you'll do that often. Just make sure to line them up carefully with the screw holes, and keep the guides in the correct orientation, to match up with how you'll mount them to the Skadis board's slots. - Insert the M2.5 Screws through the front of the screw holes on each bracket - Then, from the back side of the brackets, add the rest of the parts onto the ends of the screws: - the M2.5 Alignment guides (if you didn't glue them on) - then the Skadis T-Nuts - then the M2.5 hex nuts - Tighten the screws most of the way , ensuring that the Alignment Guides maintain their correct orientation (relative to how they'll mount on the skadis board). - Hold the brackets against the Skadis board, with the Alignment Guides and T-Nuts fitting into the slots. - Finally, tighten the screws enough that the T-Nuts “lock” into place behind the Skadis board. DON'T over-tighten the screws! Take a look at the detailed instructions (with pictures) on the original Skadis T-Nuts Mounting System model page, since my instructions are far less clear than theirs :)







Названия используются только для указания источника результата. Polyzon не аффилирован с перечисленными площадками.
Комментарии 0
Загружаем комментарии…