
Бесплатно 
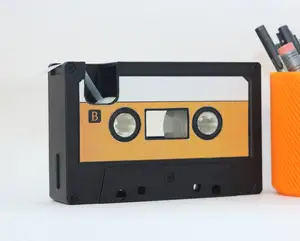
26mm/1in Scotch Tape Adapter for Singh Design's Tape Dispenser Automatic Tape Cutter
Printables


I was thinking a normal tape dispenser relies on its hefty weight and rubbery bottom to keep it in place. However a clamp could be used to secure a tape dispenser to a shelf or table even better than the dispensers weight.
It is based off of am old general purpose clamp design of mine that you can see here:
https://www.printables.com/model/509859-dual-screw-multi-ratio-geared-clamp-with-various-j
The parts from this clamp are compatible with the tape dispenser too if you want to mix things up. You can change the drive gear ratio or use a different jaw1 piece if you like (The dispenser takes jaw2's place)
The dual screw design gives it a more stable design than relying on a single point.
Instruction Update: After having messed with making this on my Ender 3 some, I recommend printing it without support on the threaded parts (I set my support to 80 degrees). Once printed run the tap tool through the threaded holes a few times to clean them up and smooth them out before assembling the parts.
Assembly is as follows:
- Insert the drive gear into the center hole in jaw1. - With the knob perpendicular to jaw1 insert one of the two screws. - Now, insert the second screw, but it is important to make sure that before you engage the second screw with the drive gear it must be aligned exactly the same as the first screw. If you haven't engaged the correct tooth it will thread wonky. Use the little holes on the outside of the screws to ensure proper alignment. If the first screw is aligned at six-o-clock then the second screw must also be aligned at six-o-clock when viewed from the same perspective. - Simultaneously start both screws threading into the bottom of the tape dispenser by turning the drive knob clockwise (screws will thread counterclockwise) being careful not to let either screw disengage with the drive gear. Once the threads are started it doesn't seem to have a tendency to disengage anymore. - Push your roll of tape onto the chamfered side of the tape wheel. the wheel should flex a little to hold the roll tight. - Put the tap wheel on the pin then place the pin into the slot in the tap dispenser such that the tape unrolls sticky side down when pulled towards the cutter. Once in the slot push the roll down then toward the cutter to secure it. Tip: When I first printed it,, I found that the cutter didn't work too well, but it worked a lot better if I lightly sanded the front of the cutter teeth since my printer didn't print the sharp points too well.
There is a left and right oriented tape dispenser that change which side of the clamp that the dispenser is on. The jaw1 part can just be turned around and go either way.
If you use support and struggle to clear out the threads use the tap tool. Print it at 100% infill and remember that it threads counterclockwise.
I designed this in Solidworks.





Названия используются только для указания источника результата. Polyzon не аффилирован с перечисленными площадками.
Комментарии