
Бесплатно 
*SMALL* Collapsing Lightsaber - Double Bladed or Single Bladed
Printables


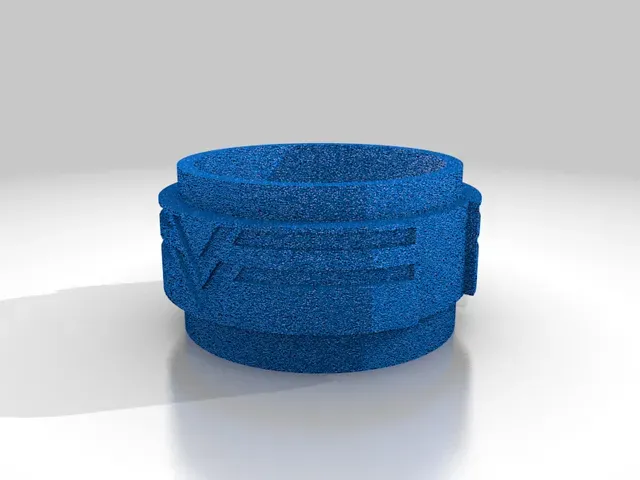

After some boredom and not finding what I wanted, I decided to try learning Blender so I could "kitbash" or remix some STLs and put together a custom Lightsaber. I was slightly successful but wanted an original design. After about five obsessive days, a hoard of YouTube videos and Google searches, a few naps, and lots of caffeine and frustration, I managed to make something from scratch. This is the second remake of the second Lightsaber design. (Mk I has to be remade)
I wanted something that could print and go together in sections (more convenient to print, and that's how I turn my saber parts on the lathe), and I wanted something I could slip over a section of 1.25" aluminum tube and squeeze some electronics into. This is the Mark II.
Print Settings
Printer Brand:
Creality
Printer:
Ender 3 Pro
Rafts:
No
Supports:
Yes
Resolution:
0.2
Infill:
15%
Filament: Hatchbox PLA
Silver (195d C)
Notes:
Moved out of WIP status. All parts are printing fine at 0.15mm layer height in Hatchbox Silver PLA at 195 C. My support angle is set to 80 in Cura.
I don't know why my models are coming up "not water tight" in Cura, it's something I have to figure out.
All of the sections will need minimal support, except the buttons, which need a brim (they're tiny). I specifically wanted the sections to press-fit together and slip over a 1.25" OD aluminum tube (haven't test fit it yet) and decided minimal support was reasonable.
The button has a scaling issue which happens no matter how I export the model to STL or my settings in Blender, so it will need to be manually scaled and multiplied in your slicer until I can figure out what's causing it. The correct dimensions are X: 7.34mm, Y: 7.34mm, Z: 4.75mm for the dual-button setup.
Despite a "scaled up to 1,000,000 percent" error, all the other models load up in Cura at the correct scale (Top Grip is 4.09 cm OD by 4.99 cm long; scale the other models from that if your slicer doesn't like them). There are also two heights of couplers: a high profile and a low profile. I decided to include them both, despite favoring and using the low profile coupler, myself; you could use either height coupler, but whichever one you use, you will need two.
UPDATE: 11/12/2020 4:20 PM
Completely remodeled the pommel and bottom section. Love them. As of now, all parts are manifold and should print properly, despite getting a "not water tight" warning in Cura. I'm taking this out of WIP status. I think she's complete.
UPDATE: 11/12/2020 1:43 PM
Updated the top grip and button files again. Top grip has two holes instead of four, with a button diameter of approx 6mm, which is closer to the size I'd have machined from brass if this were made from metal. I up'd these as separate files so you can use them optionally if the 4 smaller buttons are preferred.
UPDATE: 11/11/2020 8:30 AM
Updated the top grip and button files. The width of the button tip is about 3mm.
UPDATE: 11/11/2020 8:30 AM
I have successful prints. The pommel and second section need to be remodeled and are in the process thereof. I misjudged the diameter of the buttons, those should be closer to 1/8" and not 1/16". I'll get the holes on the top grip section and buttons tweaked and up'd later.
UPDATE: 11/10/2020 6:30 PM
Don't remember if I uploaded the resized couplers or not. Reverted couplers back to original size, they fit the new main grip perfectly at original OD. The smaller OD was too small. I did drop the vertical scale by 0.01 cm so it fits the sockets better. Only takes about half an hour per coupler to print, which isn't bad. I prefer the low profile coupler, it's closer to the profile of the cuts I make on the lathe when machining parts. The new grip looks great, it took something like 3-5 hours. Going to remodel the pommel now.
UPDATE: 11/10/2020 12:30 PM (No, I don't sleep. Ever.)
Be advised: The new Cura 4.8.0 just came out, and it does not like any of my models; all of my models are invisible and just a shadow on the build plate in Cura 4.8.0. Went back to Cura 4.7.1 and all is fine.
Rechecked all models (except pommel, I'm remodeling that later) with 3D Print Toolbox in Blender, all of them are manifold and cleaned up. Re-exported all to STL and re-uploaded here. Things are printing successfully now. Also tweaked the OD of the coupling surface on the couplers and button(s), still have to test that to make sure they fit. I flipped the emitter, it's best to print it top-down with minimal support, otherwise Cura throws support all the way up to the top rim, which is just unnecessary.
My Cura settings: 0.2mm LH, 3 walls, Print Thin Walls, Infill is 15% Cubic, 195d C using Hatchbox Silver PLA, various speed tweaks that work for me, supports with 80d support angle, and a brim on the button (4x, Uniform Scale X to 2.89mm).
UPDATE: 11/10/2020 5:15 AM
I tried using the 3D Print Toolbox tools in Blender, I tried a Remesh (kicked up the file size; sorry), and some other tweaks/cleanup. Then I saw the option in Cura: Print Thin Faces. That did it. The pommel is almost done printing and the walls are printing fine, everything manifold but not water tight. I also set it to 2 walls and I'm printing at 0.2mm LH, with my speed settings tweaked. So far so good. I plan on sanding, priming, and painting, so I don't care if mine are not printed at a super fine setting. I'll update again once all the parts are done printing.
UPDATE: 11/9/2020 5:15 AM



Названия используются только для указания источника результата. Polyzon не аффилирован с перечисленными площадками.