
Бесплатно 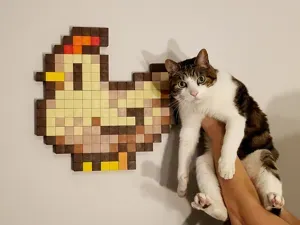
3D Penny-Powered Pixel Art Blocks - Video Game Art
MakerWorld








Less than 10 percent of people who download an item click the “like” button. Be the 10 percent. Click the “like” button and show your support.
If you find this model useful, feel free to buy me a coffee .
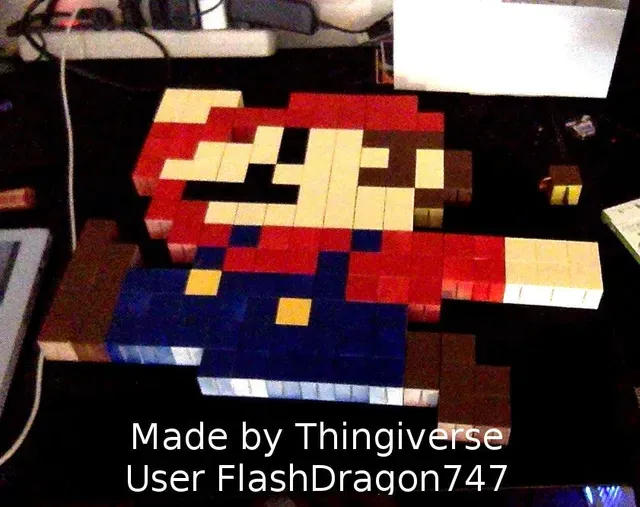
Inspired by the wood block pixel art of Etsy user BodegaCatCo and others, I designed some 3D-printable plastic blocks that connect together with American pennies.You can make flat wall art, such as the Stardew Valley chicken featured in my pictures, or 3-dimensional art by stacking blocks on top of each other. These blocks measure 23.8mm / 0.94 inches cubed.
Steps:
Find a pixel art drawing of your favorite video game character. A good resource is pixelart.com.
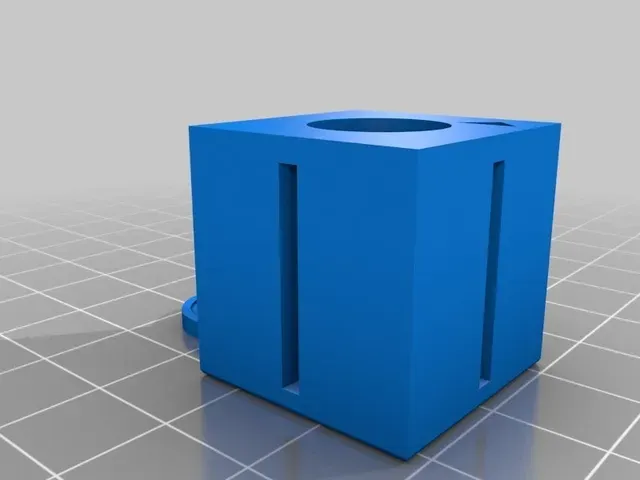
Print 2 test blocks of "PennyPixelBlockArtStandard.stl." You'll probably need to print several tests to get the penny grip just right. It's essential that you use Cura's setting "horizontal expansion" to tweak the penny grip (or another slicer's equivalent).
Map out the amount of blocks and their colors. You can print all in one color of plastic and then paint, or you can print in various colors of plastic. If you're making 2D art and you don't mind seeing the penny holes on the exposed sides, all you need is "PennyPixelBlockArtStandard.stl". If you want the sides to be solid, you'll need to use several of the .STLs. If you want to hang the art on a wall, print two of "PennyPixelBlockArtHanger.stl" and place them appropriately. These special blocks allow you to hang a nail on the back.
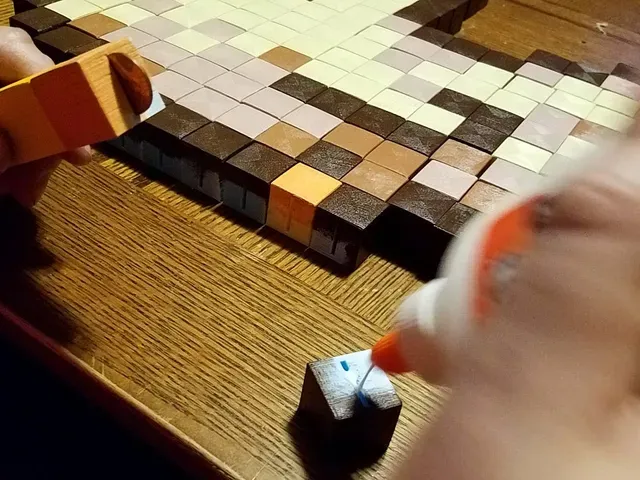
Print and connect. I use a little Elmer's Glue in the penny slots to make a solid connection. Once complete, I tape the back side to make it hold better.
The directional triangles on the backside of the blocks help you maintain polarity. I highly recommend keeping all triangles facing the same direction. This will help if your printer prints the block length slightly different than block width. You won't always be able to maintain the same direction with blocks with exposed faces, but it shouldn't matter too much.
Cat for scale. ;-)
Print instructions
Layer guide:
Bottom layer (which will become the top of the block): 3 layers (.6mm) Top layer: 2 layers (.4mm)
Sides: If some sides will be on the edge of the artwork (exposed): 2 layers (.8mm) If all sides are hidden in the body of the artwork: 1 layer (.4mm)
Use the Horizontal Expansion setting to get the penny grip just right.
%2Fhttps%3A%2F%2Ffbi.cults3d.com%2Fuploaders%2F14936297%2Fillustration-file%2F6469fe45-1da6-464c-aae8-9b27b9302a65%2F20180901_112649.jpg&w=300)




Названия используются только для указания источника результата. Polyzon не аффилирован с перечисленными площадками.
Комментарии