
Бесплатно 
Hinged lid for adding MMU2S to Original Prusa Enclosure
Printables


Overview:
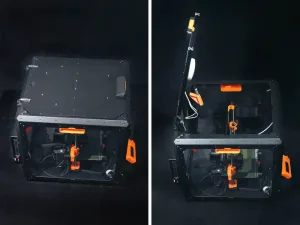
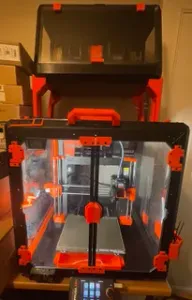
I am pleased to introduce the revised upgrade for the Prusa Enclosure - making it possible to open the lid of the enclosure automatically using gas springs. With a simple push of a button, the lid can be opened easily and allows direct access to the inside of the Prusa Enclosure.
After the alpha release, I completely revised the Prusa Enclosure Upgrade. The handle has been changed to a simple push button, which makes the closing function even better.
The lid, which bent quite a bit in the Alpha version, has been reinforced with aluminium profiles. This has reduced the bending to a minimum.
Assembly:
Additional parts
pc. Name Norm Info
2x Gas spring 120N eBay link
4x M6 x 45 mm - socket head screw ISO 4762 pivot points
4x M6 hex nylock nut ISO 10511 pivot points
4x M6 hey nut ISO 4032 gas spring and Joint head
2x Aluminum profile 20x20 groove 5 I-type - 460 mm long example link
2x Aluminum profile 20x20 groove 5 I-type - 290 mm long example link
1x M3 square Nut DIN 562 handle
1x ø 10 x 10 mm Spring handle
some M3 hex nut ISO 4032
some M3 socket head screw (different lenghts) ISO 4762
Printed parts
pc. Name Info
1x Left pivot point on housing
1x Right pivot point on housing
2x Cylinder mount
2x Joint head
1x Left pivot point on lid
1x Right pivot point on lid
2x Angle bracket for aluminium profile
1x Handle
1x Push button
6x Slot nut 22_5 22,5 mm hole distance / pivot point lid
4x Slot nut 32_5 32,5 mm hole distance / Angle bracket
2x Slot nut - cross brace in 290 mm long alu profile
Assembly of the frame:
Firstly, the hinges must be mounted as described here .
After that you can start assambling the frame.
To do this, first insert the M3 nuts into the slot nut - cross brace and then slide them into the shorter aluminium profile. The slot nuts should first be loosely screwed to the brackets. They can then be pushed into the aluminium brackets.
When the frame is mounted, 3 mm holes can be drilled through the aluminium profiles.
I glued the frame to the lid with double-sided adhesive tape. To do this, the frame must first be unscrewed again. Then the adhesive tape can be applied to the frame and then the lid can be screwed back onto the cover. You can get the exact position by using long screws and then using them for positioning like you can see here:
Mounting the handle:
First insert the square nut in the handle.
The spring can then be inserted into the handle together with the handle pusher. The spring does not have to have the exact dimensions specified, only the diameter must not be larger than 10 mm.






Названия используются только для указания источника результата. Polyzon не аффилирован с перечисленными площадками.
Комментарии