
Бесплатно 
Extension Ring to Auto-Lock Spool Holder with Magnetic Brake for Original Prusa Enclosure
Printables


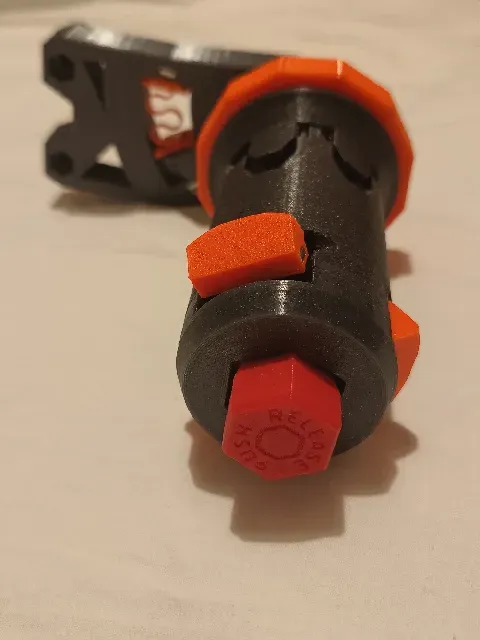

I wanted to solve the problem of self-unwinding of the filament and at the same time I wanted to clamp or release the spool with one hand. Another requirement was the use of commonly available connecting material. It was a challenge to integrate the entire clamping system into a diameter of 49mm with an acceptable overall length. Of course printable and without supports and the hexagonal core proved to be the winner. And it works.
Videos of function:
Thanks for yours posted prints and likes.
Features:
- automatic locking by inserting the spool - operated with one hand - magnetic brake against unwinding of the filament - wide range of settings - no supports needed
Recomended:
- print of PETG - layer 0,2mm, 3 perimeters, 20% infill gyroid, random seam position - fan enabled for bridges - outer_body_49 print with brim inside Instructions:
- print orientation as the parts uploaded - lock_arm and lock_lever must be printed 3 times - - all bolted and sliding parts must move smoothly - insert the magnets fully into the holes
You need:
Neodym magnets:
31pcs 10x6x2mm block
3pcs 20x6x2mm block
3pcs 5x5x2mm block
4pcs 6x2mm cylindrical
2pcs 6x4mm cylindrical
(note: 5x5x2 magnets can be replaced by attaching the cover_ring part with glue.)
Screws:
1pc bolt M8x125mm with cylinder head for Allen key 6mm
7pcs M3x4mm
1pc M3x8mm
3pcs M3x20mm
3pcs M3x12mm
3pcs M3x35mm
Nuts:
1pc self-locking M8
1pc M3
Bearings:
3pcs 608-2Z
Assembly instruction:
- https://drive.google.com/file/d/1MXKVDAgGqpj_q3hpU_lAMTzfOWWz4cTa/view?usp=sharing - in the first step, don't insert the magnet into the bs_holder part - continue according to the instructions - finally screw to the Original Prusa Enclosure using the fasteners used to attach the original bracket. - All 10x6x2mm magnets can be removed thanks to the prepared holes by pressing out with a 1.5mm Allen key (except for the magnets in harmonica_damper ). The 20x6x2mm magnets can be pushed out with the help of a 2mm Allen key.
Inserting the spool and setting for a specific width of spool:
- screw the adjustment_ring towards the angry_holder, but at most up to the distance where the adjustment_ring touches the magnet_ring (for the possibility of full locking mechanism) - clamp fully(second click) the spool into the holder - screw the adjustment_ring pointing to the spool so that it does not rotate in the holder - done
Note:
- the brake is designed to fit on the right side of the Original Prusa Enclosure - the brake works even without the harmonica_damper part, but with an unwanted clicking sound






Названия используются только для указания источника результата. Polyzon не аффилирован с перечисленными площадками.
Комментарии 0
Загружаем комментарии…