
Бесплатно 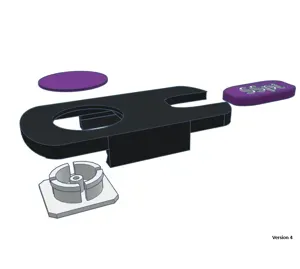
BoboVR M2 - Quest 3 - Printable conversion kit
MakerWorld


This is a free model, if you want to compensate my work feel free to use my referral codes for meta quest games):
- You'll receive 25% off and I will receive up to 5$: - https://quest-referrals.silvio.cloud/ ----------------
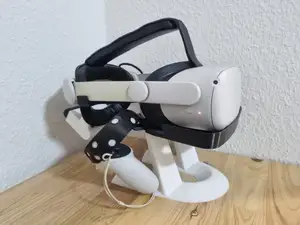
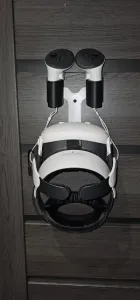
This is an original model to convert a BoboVR M2 Pro strap to be compatible with a Meta Quest 3 .
Changelog
v4 - 2023/10/14
- Added more tolerance on the brace so the TPU can be used to adjust add more grip (without forcing the arm), changed the tpu placement *you might want to use pliers to put it in place{ - Removed part of the arm brace to allow it to move forward on quest's arm (for people without glasses it might me a good possibility
- Added a ‘blob’ you can customize (if you don't need the space added (previous bullet point))
- Added inserts for tpu on the back of the M2 clip (Part 2) so you can add more grip (if needed) v3 - 2023/10/13
- Fixed the mesh (reduced triangles to simplify the model) - Increased the lock height on part 2 (to clip easily without being forced) - Reduced the size of the part 2 sizes 0.1mm (to help with tolerances) - Added two versions of caps for the screw (might need some glue for it) v2 - 2023/10/12
- Fixed ‘grabber’ to used a mesh based on a scanned Quest 3 v1 - 2023/10/11
- Initial Release
Recommended Printing Settings
Supports : No, place the flat surfaces on the bed
Printing Material : Part 1 - PETG or PLA | Part 2 - PETG
Infill: 20%
Layer height: 0.12mm to 0.2mm
Tips: You can print the caps with 999 walls, no infill, 0 top layes, 0 bottom layers (you'll have a circular finish on your print:
Since you'll slide the Quest 3 lateral straps into the ‘Part 1’ you should press-fit TPU (you won't print it, just need it for added grip), check images for more details :)
Instructions
Disassembly instructions
Instructions to disassemble the original M2 (without breaking it)
- Remove the screw covers (silver circles) (it's glued, you can lift them with a screw driver) - Remove the screw from the arm - Lift the arm cover (white part where the screw was), without lifting it you can't execute the step 4 - Pull the black support part you are replacing (it will come off), try jiggling it to help - Remove the arm cover (white part), you might want to use a credit-card like tool to detach it Assembly instructions
- Prepare everything: - Printed parts (Part1+Part2) - 10cm of TPU (to press-fit in the holes)
- Insert TPU in the inserts (on Part 1) Tip: You can try to fit your quest into it, if you feel it's stiff enough you won't need the TPU
- Fit the Part 1 inside the Part2
- Place the rubber ring on the Part 1
- Fit it on the M2 arm
- Place the original white cover and the screw, and you're done!
- Test it
- If it's working fine, put the screw cover and post your make :)




Названия используются только для указания источника результата. Polyzon не аффилирован с перечисленными площадками.
Комментарии