
Бесплатно 
IKEA 365+ Drybox & Auto rewind Storage Box for 2 Spools supporting eSun, Extrudr, Spectrum, R3d and more
Printables







Why Yet Another Drybox Design?
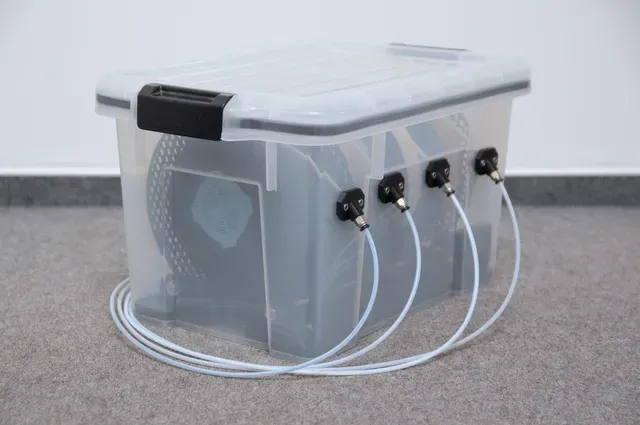
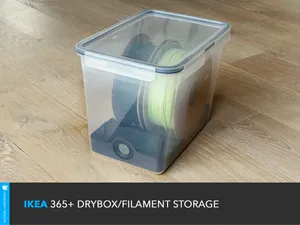
I was looking for a storage solution for my filament, but the popular designs I found weren't right for me in terms of size or didn't meet all of my needs. I finally found some storage containers on Amazon (see parts list below) with perfect outer dimensions, so I started designing the necessary parts to turn it into a new drybox design.
What is special about this box?
- It has a small footprint of only ~46cm (width) x 26cm (depth). This means it fits in a cupboard (inside width ~46cm), can be stacked in a row (one behind another, which takes ~53cm) and of course stacked on top of each other.
- A filament path with an angled filament outlet that does not require additional space to allow for this stacking.
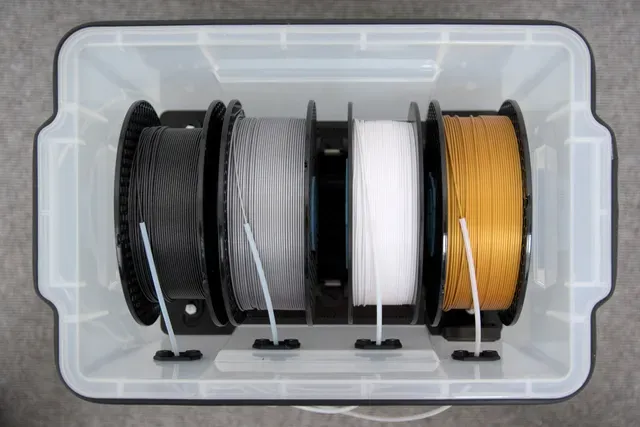
- With this small footprint it still offers a capacity of four spools of 1kg filament. Alternatively, 5 smaller filament spools will also fit.
- Special caps for the reverse bowden tubes, with labels and a gripping mechanism that prevents the filament from slipping back into the tube.
- The angled path of the PTFE tube allows for a bit of "pull back": When the filament is changed in this reverse bowden tube setup and a few cm of filament is pushed back into the PTFE tube, the PTFE tube retains a bit of tension on the filament and it will not loosen around the spool.
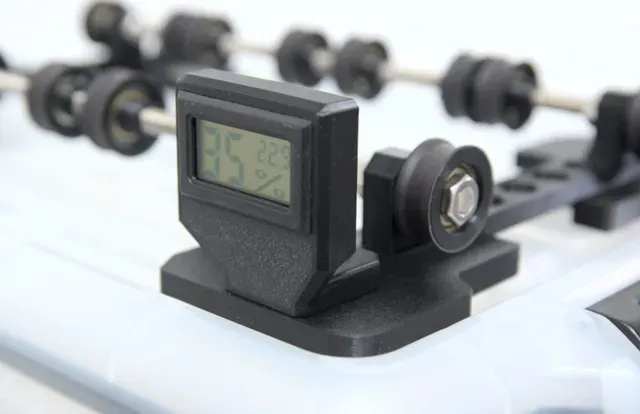
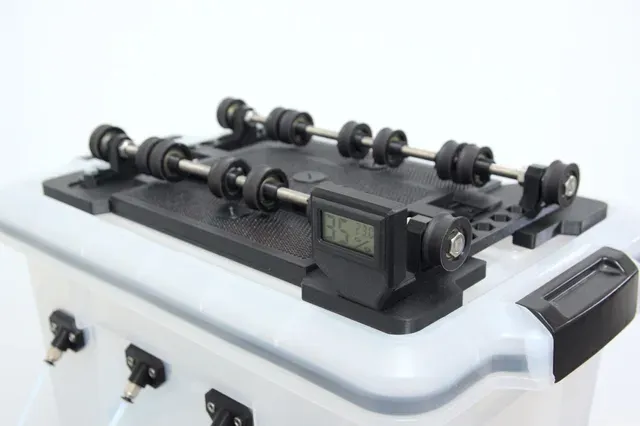
- Mechanically adjustable, bearing-based spool pulley assembly with hygrometer mount and silica storage container
- Of course it's stackable, airtight, looks good and is over-engineered ;-)
Placing and Stacking Options
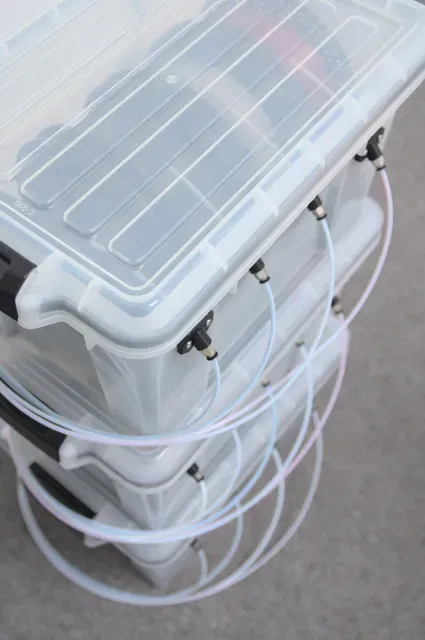
The main feature of this box is that it can be stacked tightly and fit into a 50 cm wide cabinet (outer dimensions). Besides of vertical stacking (picture 1) it can also be stacked one behind another. And as the filament outlets are angled they perfectly support this type of alignment (picture 2 and 3).
In my setup the boxes are placed above the printer (picture 4 and 5) with the PTFE tubes being guided though an outlet in the shelf board which allows me to directly access the filament of all three boxes for printing.
If you want to place the box aside of your printer, you can also mount the filament outlets accordingly (i.e. rotated by 180° and a bit further to the bottom) with the PTFE tubes then guided upwards. I did not build such a box yet, but I do not expect any issues with the pulley gantry. If you have built such a box, maybe post a make and give the dimensions of where you placed the outlets.
Multi-model project and where are the files?
I decided to publish two components of this drybox design as a separate model. Just click on the links to get to the files and the detailed description:
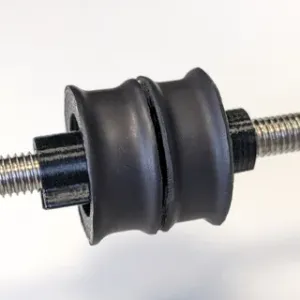
- Pulley and M8 Threaded Clips for Filament Rollers
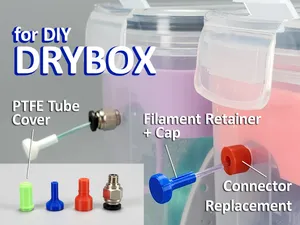
- PTFE Tube Cap with Filament Label
The reason for this is that the two are pretty universal and could be of use for building other dryboxes and I think it will be easier to find if it's released separately.
Also you most probably want to print additional Silica containers that go into the center of the filament spool. This will allow you to keep the air in the box dry for a longer time, easily replace some Silica gel when changing a filament spool, and also it will add weight to the filament spool which makes it roll even more robust on the pulleys (especially if the spool is almost empty). The ones which I used for in this project are Filament Spool Desiccant Canister .
The Parts , Howto Print and What You Should Know
Let's go through the parts list, let's look at some specifics and how they should be printed. For my boxes I printed everything in Prusament PETG with a layer height of 0.2 mm and I will also provide gcode files for printing on a MK3s+.
Remark: The STLs should already have the correct orientation for placing them on the printbed.
- Baseplate : These fit into the corner of the drybox and allow mounting of the brackets for the threaded rods. The base plates compensate for the box's curved bottom and it becomes a rattle and wobble free seat without the need for anything being glued. Type 2 is just the mirrored version of Type 1. You will need two of each type. Print Orientation : Place the top side on the printbed Supports : Manually add some support along the recess for the brackets. If you just bridge these gaps, the mounts will not sit flat and the hygrometer mount will not fit perfectly either. Perimeters : 4 Infill : 30% Required Quantity: 4 (2 of each type)
- Brackets : The hole for the rod in the bracket should already have enough spacing for the threaded rod. If your print doesn't, take an 8mm drill bit to clean it by hand. Make sure the bars go really smooth, otherwise the assembly will be a pain. Print Orientation : Place it upright Supports : None Perimeters : 4 Infill : 30% Required Quantity: 2
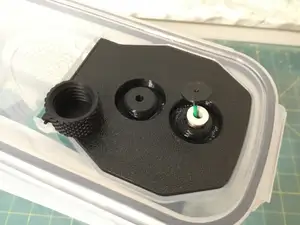
- Filament Outlet : The angled filament outlets are (almost) airtight. It also has room for an optional small sealing O-ring to further increase air-tightness Print Orientation: Place the plates it with the flat surface on the printbed Supports: None Perimeters: 6 Infill: 30% Required Quantity: 5 (one will be used as a drilling guide)
- Hygrometer Mount : This part can be mounted on the right bracket (as it is not symmetrical; if you want it on the left side, just mirror it in the slicer). To have it inside the box definitely isn't the best option in terms of readability but I opted for this as it works for me and I wanted to avoid cutting to many holes in the box. If this is a concern for you, you can find several mounting options for this hygrometer that fit right into the box's wall. Print orientation : Place it with the front-facing side on the printbed Supports : None Perimeters : 3 Infill : 15 % Required Quantity: 1
- Silica-Container : It requires quite a bit of filament to print and also requires some space on the print bed (it fits on an MK3s but takes up almost the entire bed). Also, it doesn't hold a lot of silica gel, which is a bit of a price to pay for the box's small footprint. But it works well and adds a professional touch to the box. If you don't want to print it (or it does not fit on your printbed), you can also choose to only use the filament containers that fit inside the spools. Print orientation : Place the container upright on the printbed Supports : None Perimeters : 4 Infill : 20 % Required Quantity: 1 Note : To print it on a MK3S+ You need to remove the skirt in the slicer as there is no space for it left on the printbed. And if you do not mind the extra time, use ironing for the flat surfaces.
- Silica-Container Sidebars Print orientation: Place them updside-down on the printbed Supports: None Perimeters: 3 Infill: 15% Required Quantity: 2
- Silica-Container Side-Cover Print orientation: Place them updside-down on the printbed Supports: None Perimeters: 4 Infill: 15% Required Quantity: 2
- Silica Container Center-Cover Print orientation: Place them updside-down on the printbed Supports: None Perimeters: 4 Infill: 15% Required Quantity: 1
- Silica Container Refill Cap Print orientation: Place them updside-down on the printbed Supports: None Perimeters: 4 Infill: 30% Required Quantity: 2
- Silica Container Refill Funnel Print orientation: Place it updside-down on the printbed Supports: None Perimeters: 4 Infill: 30% Required Quantity: 1
- Pulleys and M8 Clips : Check the Printables Project Page
- Filament Tube Caps and Labels Check the Printables Project Page
Required Parts
Remark: Some parts come packaged in larger quantities than you need for a single drybox, notably the Amazon Basic 21L container (which is the most expensive part) comes as a set of three. I would recommend planning at least two dryboxes. After you've built and used your first box, you'll most likely end up building a few more anyway. At least that is my experience :-)
The following parts are required for one Drybox and 4 filament spools.
Component
Quantity




Названия используются только для указания источника результата. Polyzon не аффилирован с перечисленными площадками.