
Бесплатно 
Fast & Furious Tokyo Drift Han's Garage (For Hot Wheels & 1/64 Scale Cars)
Thingiverse




DESCRIPTION
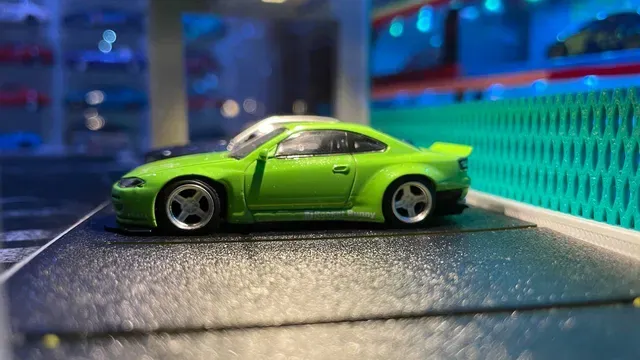
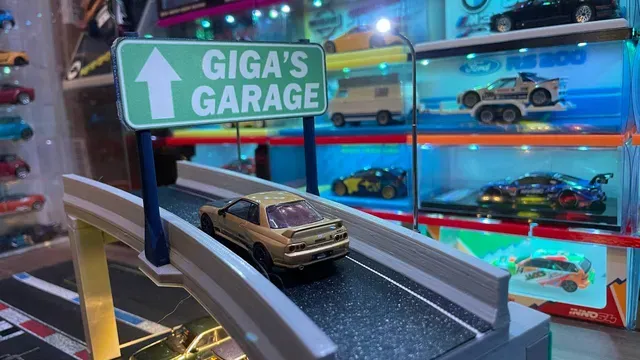
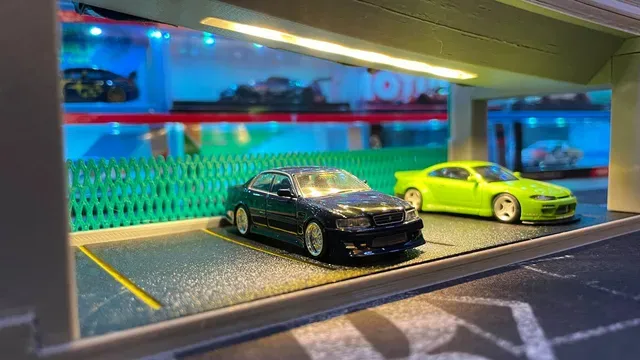
Fairly simple overpass design with a 4 car park slot under it. This design is somewhat similar to my old underpass design but it shrink down for easy storage but similar double layer idea. The whole diorama will fit in a double Funko Pop protector box for easy storage too!
All cars used in this video are proper 1/64 scale cars, will fit nicely with Hot Wheels cars too!
Checkout my showcase video:
The diorama is separated into multiple parts for easy printing. All files are packed into a zip files and arranged in folder as follow:
1) Base: - BaseV3 - Grey.STL - CarPlateV8 - Black + Yellow.STL
2) Pillars: - CrossPillar - Pt1 - Tall Pillars - Grey.STL - CrossPillar - Pt2 - Short Pillars - Grey.STL - ThickPillar - Short - Grey.STL - ThickPillar - Tall - Grey.STL - WallPillarV5 - Green + Silver + Grey.STL
3) Overpass: - Divider1 - Grey.STL - Divider2 - Grey.STL - RoadPiece - Curve - Black + White.STL - TopPlatform - Grey.STL
4) Sign: - CrossBar - Navy - x2 Print.STL - Pillar - Nazy - x2 Print.STL - Sign - Nazy.STL - Sign.JPG
PRINT SETTINGS
Nozzle size = 0.4 mm Layer height = 0.2 mm
Filament change layer for colours on "CarPlateV8 - Black + Yellow": 1) Start (Overall road colour, mine is in black) 2) Layer 5 (Stripe colour, mine is in yellow)
Filament change layer for colours on "WallPillarV5 - Green + Silver + Grey": 1) Start (Fencing colour, mine is in dark green) 2) Layer 8 (Fencing frame colour, mine is in silver) 3) Layer 21 (Pillar colours, mine is in grey)
Filament change layer for colours on "RoadPiece - Curve - Black + White": 1) Start (Overall road surface colour, mine is in black) 2) Layer 5 (Stripe colour, mine is white)
ASSEMBLY
The car is just placed on the diorama, there are no holes to tie the cars down by wire.
It is recommended to use glue or double sided tape for this build.
Check out my assembly video to give you a better idea on how the build supposed to go:
OTHERS
Feel free to send me any feedback on how to improve the design. Suggestion on display base designs is welcomed too.
I can be contacted through Instagram or Twitter too:
Facebook: https://www.facebook.com/groups/1115757609295068 Twitter: https://twitter.com/Giga_Penguin Instagram: https://www.instagram.com/GigaPenguin3DPrinting/






Названия используются только для указания источника результата. Polyzon не аффилирован с перечисленными площадками.