
Бесплатно 
Voron 0.1 compact air filter system (HEPA + active carbon)
Printables

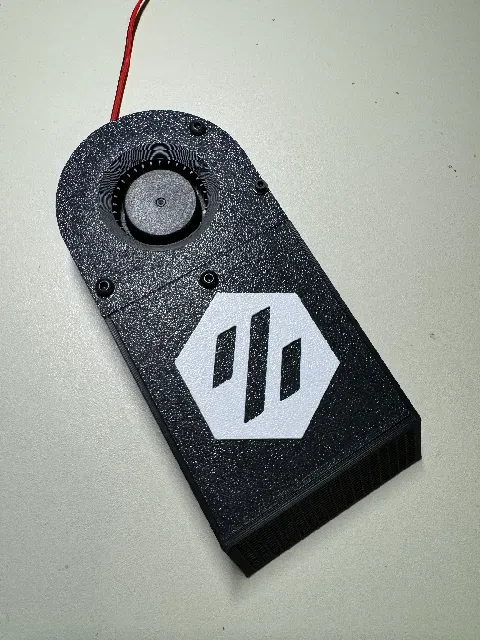
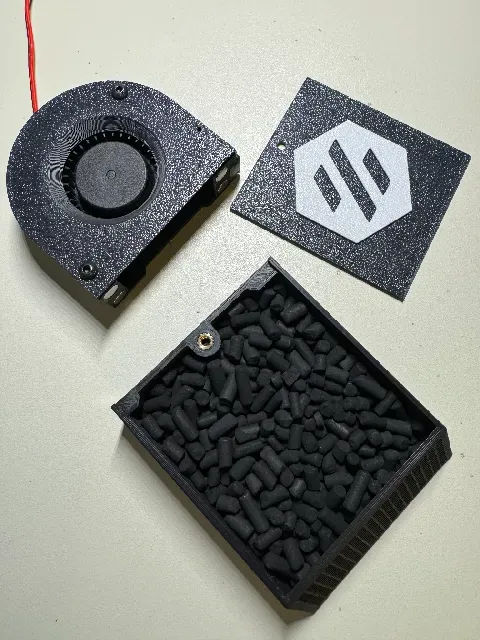
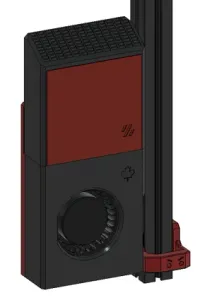
This is an active carbon filter for the Voron v0 (tested on a v0.2), designed from scratch but inspired by the Nevermore Micro (https://github.com/nevermore3d/Nevermore_Micro) and MFNano (https://github.com/MapleLeafMakers/MFNano) filters. It's larger than the MFNano, but smaller than the Nevermore, which allows it to make full use of the space along the back of the printer, to the left of the Z axis. All parts can be printed on the v0 itself.
Hardware required:
- 5015 blower fan - M3x6 screws (x5) - M3 nuts (x2) - M2x20 screw and nut - Heat set insert (M3, 4mm long and 5mm OD) - 6x3mm magnets (x8) - Active carbon pellets (source according to Nevermore's instructions) Assembly instructions:
- Print everything. The plenum will require supports inside the mounting groove. - Test fit all parts and make sure the plenum can slide onto the mount. - Insert (optionally glue) the magnets into the plenum and base, paying attention to polarity. - Insert an M2 nut in the back of the plenum. - Insert the heat-set insert into the cartridge base. - Cut off the front, sides, and most of the back of the fan. There should only be the blades and hub left, along part of the back behind the blades. - Pass the fan cable through the back of the plenum and glue the fan in place. Hot glue worked well for me, and it can be removed easily if you mess up. There's a small hole in the back of the plenum that marks the centre of the fan, which can help with alignment. - Screw the plenum lid onto the base using 2 M3 screws. The screws go directly into the plastic. - Glue the logo onto the lid. The small pegs help with alignment and can be glued from the back to keep the front clean. - Fill the cartridge and slide on the lid, screwing it in place. - Insert the screws into the mount and put on the nuts. Slide it onto the rail and secure it in place with the top of the mount approximately 53-55mm from the top of the rail. You may need to come back and adjust the position a little if you are unable to fit the plenum or cartridge in the next steps. - Slide the plenum onto the mount, rotating it as needed to clear the frame extrusions. - Screw the plenum onto the mount using an M2x20 screw. - Attach the cartridge onto the body. - Route the fan cable according to your preference and connect to the mainboard.



![[Rotating Mod] - V0 Upper-Rear Bowden Inlet (URBI) for Voron V0](https://cache.polyzon.org/api/img?url=https%3A%2F%2Fmedia.printables.com%2Fmedia%2Fprints%2F855267%2Fimages%2F6576356_0afa6c1e-4671-40b7-8454-ec5c2f452c0f_0bbbf862-abb5-439c-93a8-fb5b6aee3402%2Fscreenshot-2024-04-23-145039.png&w=300)
Названия используются только для указания источника результата. Polyzon не аффилирован с перечисленными площадками.