
Бесплатно 
Creality Ender 3 Y Axis Linear Rail Mod V2
Printables
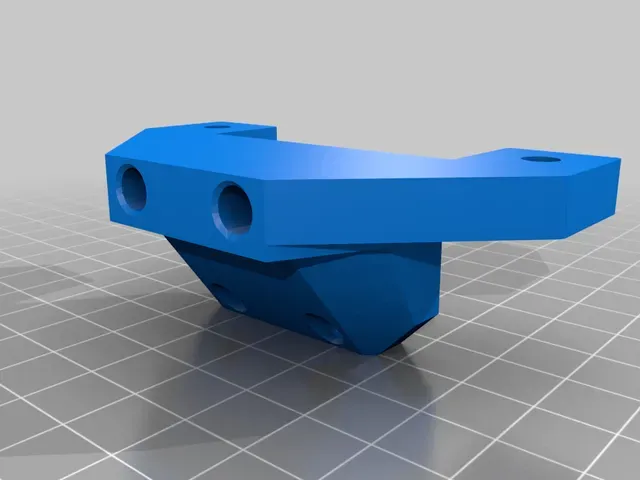
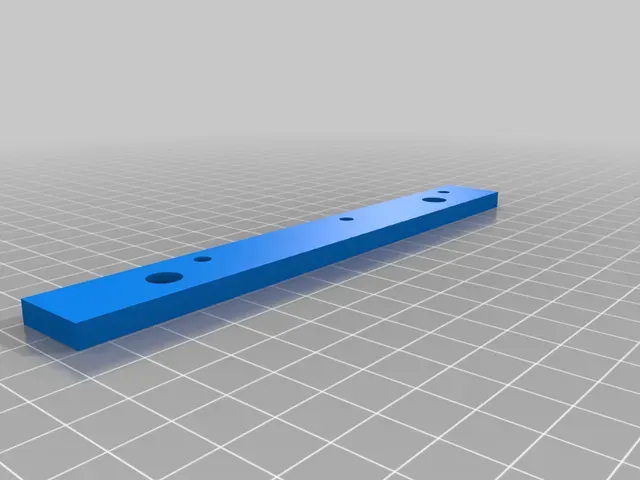

While attempting to install a set of tech drawers ( https://www.thingiverse.com/thing:3831119 ) into the front sections of my Ender 3, I discovered that the linear rails on the Y-axis were just a few millimeters too low to clear the top of the drawer casing. As I had already printed the drawers and drawer casings and they were a long print, I elected to instead design these mods to ship the linear rails slightly upward to clear the drawers.
These adapters will attach to either side of the rails and will create a series of screw holes 5 mm higher than the standard V-slot. Each side requires one adapter 1 and adapter 2, and they are designed such that the bolts on either end of the linear rail will be used. The adapters are designed to be used with M3 threaded inserts to retain the rails. They're much easier to model than nut spaces.
Since these adapters also push the rails outward by 5 mm from the Y extrusion, the actual carriage mounts from the original design have been modified to match. I also thinned the mounts at the top and bottom to recover some lost Z-height and ensure the mount cleared the drawers, since the stock mount hangs below the bottom of the carriage. Between thinning the top of the mount and compressing my bed springs a bit more, I believe I ultimately ended up losing only 1 mm or so of Z height.
You will need to source a modified endstop mount of some kind to account for the extra offset from the extrusion.
For this adapter set you will need:
-8 M4x8 bolts and T-nuts to attach the adapters to the Y extrusion
-4-12 M3x4 heated inserts and M3x8 bolts to attach the rails to the adapter
-All hardware from the original kit
Print Settings
Printer Brand:
Creality
Printer: Ender 3 Pro
Rafts:
No
Supports: No
Resolution:
.2 mm
Infill: 20-30%
Filament:
Atomic Filament PETG Dark Cherry Red Notes:
The adapters need to be strong enough to not be crushed or warped by the screws when inserted and tightened, but do not need strength along other axes. Therefore, grid or line infill is sufficient. Additional perimeters do more to improve strength and rigidity than higher infill percentages, though.
After inserting the threaded inserts, you may need to smooth the rear side of the adapters as melted plastic will likely flow out this side when you install the heated inserts. I found using the flush cutters plus a bit of sanding or a good Xacto knife will clean it up well.
When installing the adapters, the M4 bolts need to be tightened down first because the rails will cover them once installed. So position them as you would the rails, as the two parts together are each the length of one 300 mm rail. The rails technically only need to be secured at either end. When testing the smoothness of the travel, you can tighten or loosen the bolts in the middle if needed to reduce any resistance caused by potential warping in the adapters.
Note that the M5 screws for the mounting plate will need to be difficult to install; they were already a bit tricky on the original model but they are now completely covered by the rails. I found the easiest way to tighten them against the lock nuts is to pull the carriage all the way to the front or rear so the bolts overhang the edge but the carriages are still on the rail. Beware though as moving the carriages off the rail may result in lost bearings. The ideal solution is to probably flip the bolt and nut so the nut is installed in a captive mount and the bolt is screwed in from the top, but I didn't feel like prototyping this myself.
Category: 3D Printer Accessories




Названия используются только для указания источника результата. Polyzon не аффилирован с перечисленными площадками.