
Бесплатно 
Customizable Plate Bracket for Aluminium Extrusion Profiles (Misumi 2020, 2040, 4040, ...)
Printables


I am currently in the process of creating my own 3d printer based on 2020 beams
and there is a common issue when it comes to mounting linear rails: It is hard
to get them dead center, as the hammer nuts or the preferable pre mount nuts
have a little play, which easily adds up.
Especially when dealing with two parallel rails this can be an issue as a
misalignment could cause the x axis to shift depending on the Y axis position.
There are probably other ways out there to make the mounting process easier, but
I have a 3D printer, so I created this simple tool for the job and here it is.
This is just my lame little design. :D
Please note:
This is not a new way to mount a linear rail. It is just a helper to perfectly
align the linear rail before mounting.
Printing:
When printing top down there is no support needed and with 0.2mm layer height it
takes around 20 minutes to print. Depending on your printer speed and settings
of course. I used a brim, but probably not required for some small quick print
like this. However the look doesn’t matter and the top face is not even required,
so you can leave the brim on and keep it in all its ugliness.
Make sure your printer is calibrated properly, or the part will snap or be loose.
Depending on the length of the rail you probably want to print two of these. ->
see below.
Other Components:
This design by default is ment for MGN12H linear rails on a 2020 beam. However I
included a spreadsheet with all measurements, so you should be able to simply
adjust the model to any rail and beam dimension you want. I just made this one,
because I needed it and maybe it is useful for someone else out there. Well, it
is a tool.
How to use:
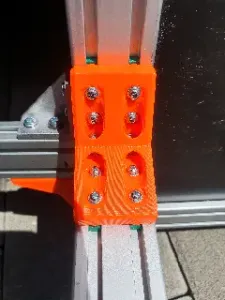
Very simple. Place the rail onto your beam and clip the model over it.
Just press is down, so the lower section encloses the 2020 beam on the sides.
When printed with a calibrated printer it just fits and allows no sideways
movement.
Place your nuts and screws into the rail without any tension. Best is to use at
least four screws, better is to use all of them. But that’s just my opinion.
Slide the rail over the beam inserting the nuts from the side. Once everything
is in place it is time for the helper.
When using a long beam clip one helper on each the end of the rail is better
than just having one in the middle. Once done the rail should be fixated dead
center. Now simply tighten all screws, remove the helpers and your rail is
mounted perfectly. I left a hole on top to save material and to be able to





Названия используются только для указания источника результата. Polyzon не аффилирован с перечисленными площадками.