
Бесплатно 
Heavy Duty V2 Shifter Mount: TH8S/TH8A Playseat
MakerWorld


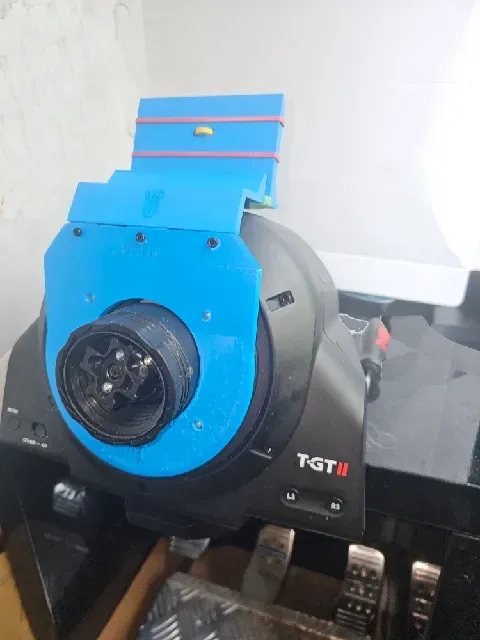
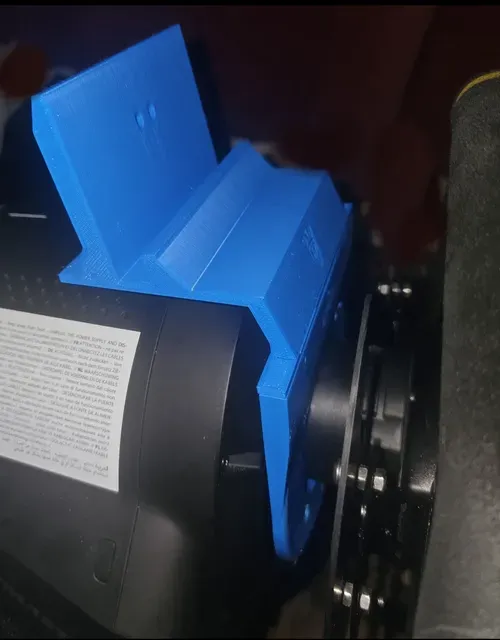


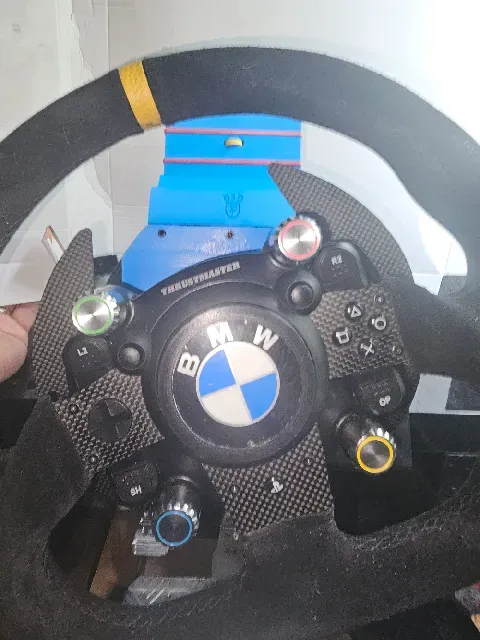
If You find this design useful, Please consider sharing a Make or leaving a comment. It's always good to see my efforts in use by others out there and it often inspires me to make improvements where I can. Without feedback I just draw a line under a design and move on to new projects.
-------------------------------------------------------------------------------------------------------------
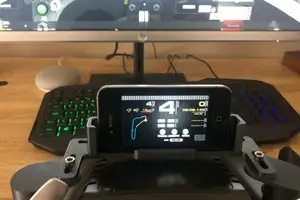
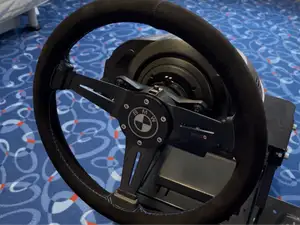
I use a cheap android tablet and a sim racing app that shows customised dashboards when playing GT7. Until now I had nowhere decent to mount the tablet. I designed this to have the tablet exactly where I wanted it, on top of the wheelbase. It is designed to allow use of any tablet or phone. My actual steering wheel is larger than the stock TGT wheel so it blocks a little of the screen at the bottom. That effect will be far less for stock users.
It was designed to fit the TGT/TGT2 and is perfect for that purpose. However, It ‘may’ also fit the T300 and similar variants. I don't have my old T300 to do any measurements though so I leave that for others to confirm. I see no reason why it shouldn't fit the T300 series at least as the front of the base unit is very similar..
The pictures show a mix of 2 versions I had designed and printed to get to this stage. I wasn't fully happy with the Beta version as it had corners that my modified wheel and paddles made them too easy to catch with my fingers. My next version (version 1a) had the corners removed and a few minor tweaks but retained the fully functional upper half of the set as it was. The final release version has been tweaked again with even more chamfers and corners removed along with considerably more finger clearance.
This new version also did away with the Spacer I used on the Beta version (though I have left the spacer in the set as it can still serve another purpose if desired).
My cheap android tablet is 10mm thick at the base. I made the trough 13mm wide to allow for anything up to 13mm depth to be used. The now unused spacer can be repurposed if desired for removing excess space when fitted between the mount and the tablet. It isn't actually needed but it does push the base of the tablet closer to the rear of the mount when used for that purpose (print more spacers if you feel the need to fill the space), but as stated, it isn't essential in any way).
I designed this primarily for myself, but after using it decided to do a few improvements and released it for others who may want it. I made every effort to not need any extra hardware.
If printed in pla, the only thing needed is a tube of superglue. Alternatively you could use three M3 screws/bolts in place of the glue.
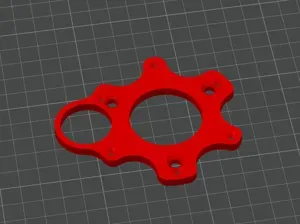
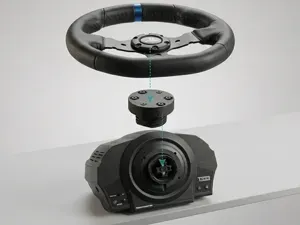
The design itself is simple enough and doesn't involve any modifications to the wheelbase. It uses the four pre existing screws that originally hold the round beauty ring on the front of the unit.
At some point I may come back and add a couple of upper part variations to add options for offset for those wanting a phone off to the side rather than fully on top, I also had an idea for a better retention system (The current method works perfectly already, but the challenge of giving it a more ‘pro’ look appeals to my over engineering style).
Because it already works and is in use daily now, these design changes are way down low on my priority list so may never happen. Especially given the fact that after 3 days of it being on my files page of printables, it has a grand total of Zero attention from anyone out there, no downloads, no Likes. Zip, Zero, Nada, Nowt. At this moment it feels like it will only have one user, Me, and it already works as it is so I would likely be just wasting my time revising it.
Instructions.
Once printed, Test fit the 2 main parts but don't glue or screw them together at this point. If you plan on screwing the 2 parts together? Then while they are assembled together, run a 2.5mm drill bit through the 3 holes at the top of the printed faceplate. Then using 3 M3 screw/bolts, you can run these through the holes to affix the two parts without needing glue. Don't fully tighten them yet, just run them through to create a thread. Once at this stage take the 2 parts apart again.
Remove your wheel from your base unit. Then using a philips head screw driver, remove the four screws holding the circular plate to the front of the base unit. For the current release version I haven't added the holes needed to affix the printed face plate to the Base unit, this was intentionally to allow the bracket to be used on a wider range of Thrustmaster wheel bases.
For making the holes in the main plate, align the circular ring you removed from the wheelbase with the printed faceplate. Drill 3mm holes through the printed bracket using the original wheelbase circular ring for alignment. In order to use the top pair of the wheels original screws you will also have to slightly countersink the holes as the screws Thrustmaster use are pretty short and the printed bracket is thicker at the top than the bottom. You can likely get away with just using the 2 lower screws if you don't want to Mess around with those top two. Fit the printed faceplate to the wheelbase and put your original circular plate somewhere safe as it is not needed with the screen mount fitted.
If you don't have drill bits and a drill, you could just mark the holes and heat up an appropriate piece of metal such as a screw held by pliers and melt the holes through the print instead.
This next part is fully optional and better done now than later if you opt for it. I used a number of elastic bands for where the tablet will sit along with the top securing clip. Stretch a few bands over the print so that they cover the bottom of the channel where the tablet sits, the other side of the bands will be sandwiched between the mount and the wheelbase once fitted. The bands will then pull on the clip and hold the tablet or phone firmly in place. I also ran a couple of elastic bands around the rear support of the bracket behind the tablet so that the tablet itself rests on rubber bands and not the printed part but that's just overkill on my part and isn't essential.
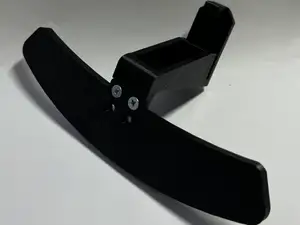
There are 2 holes in the back of the tablet mount. You only need use these if you intend using the tablet securing clip. If you do intend using that option? run an elastic band through from the rear and back out through the other hole (use two if needed. The top clip (ugly as it is, but I went for function and strength over aesthetics there) is designed to just sit on top of the tablet (with room for more elastic bands to be added to cushion the tablet). The back of the clip has a protrusion that the elastic band/s you fitted to the back of the tablets rear support can be hooked over to keep the tablet firmly in place.
You can now fit the 2 parts together.
PRINTING
I made the design itself an easy print. The main faceplate needs printing flat with supports as there is a set of channels in the top of the faceplate. If using the original screws (and because you will be drilling holes in the print), I would advise printing this part fairly dense or with more outer perimeters. If you are using new longer screws then this density requirement isn't as important.
The rear/upper portion of the mount needs printing standing on it's side with supports due to the fixing lugs and to a lesser extent the 2 small holes in the rear of the mount.
The securing clip again needs supports due to the rear protrusion.
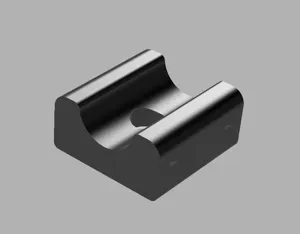
The only part not needing support is the old Beta version Spacer that is no longer required but has been retained for reasons given elsewhere in the above text.
All the parts should already be in the correct orientation for printing.



Названия используются только для указания источника результата. Polyzon не аффилирован с перечисленными площадками.