
Бесплатно 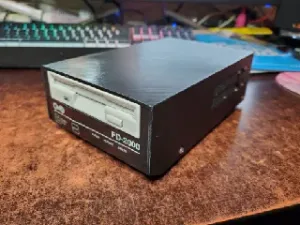
CMD FD-2000/FD-4000 enclosure
Printables

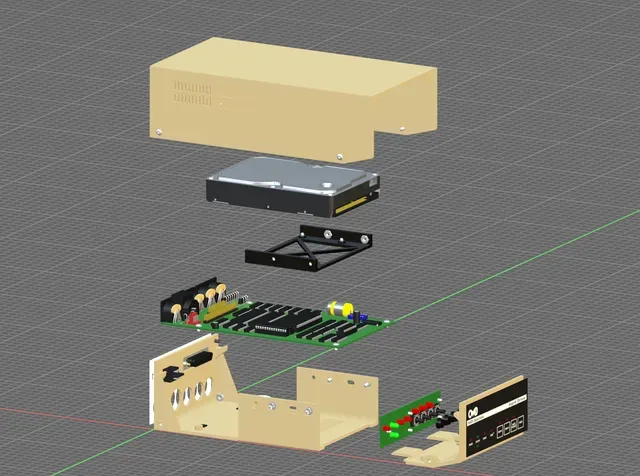
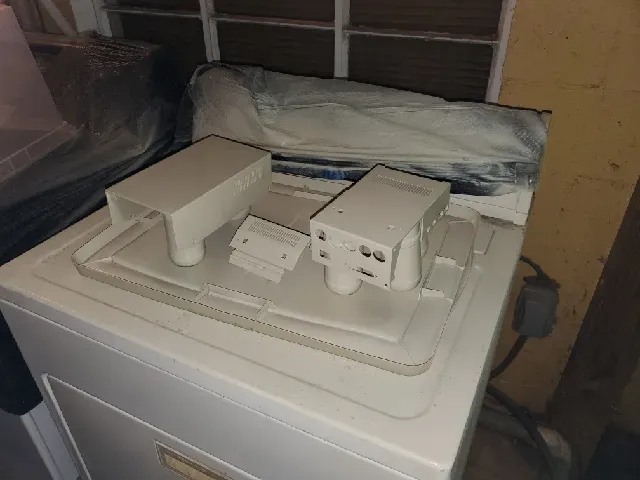
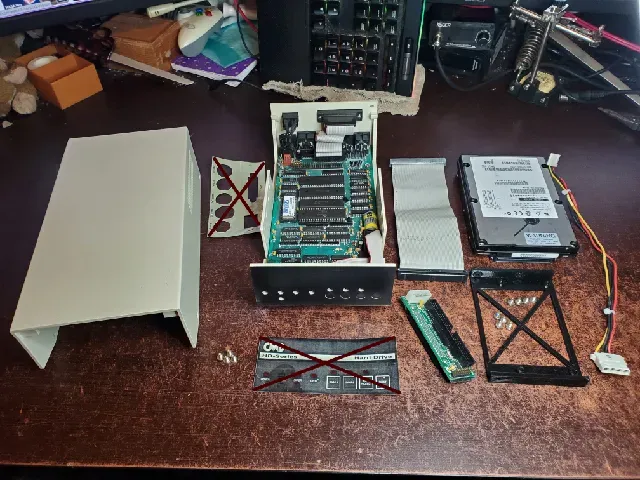

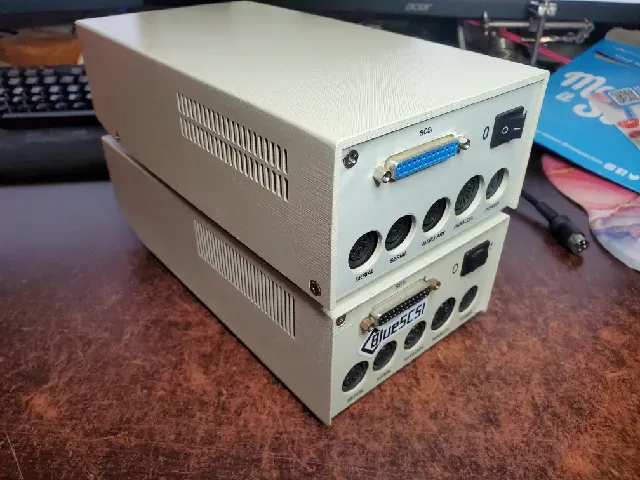

While I was working on the previous RAMLink model, I went digging through my junk box again, and like a treasure hunter who just found “X marks the spot”, I found an old CMD HD SCSI controller.
At some point, I must have assumed it was no good anymore (hence why it ended up in the junk box), but I figured I'd just have to see. I cleaned it up, made a couple minor repairs, popped a new v2.80 ROM from Retro Innovations onto it, hooked up an appropriate SCSI drive, and voila, a working setup.
Like the RAMLink, this old board "was without apparel" 😛 so I set about correcting that. This project is the result; contained herein is a complete printable case/enclosure.
This project consists of:
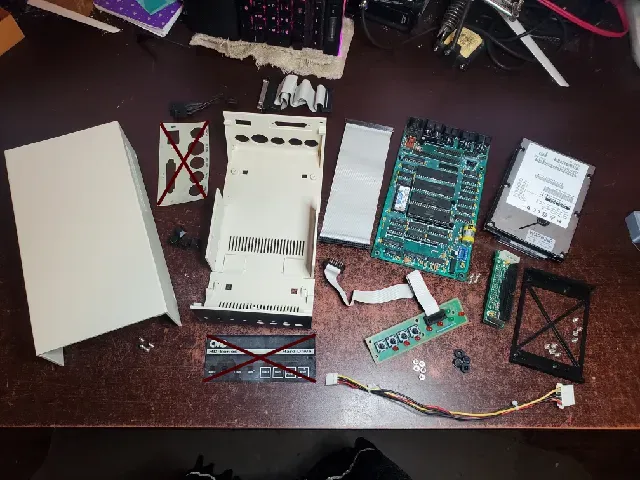
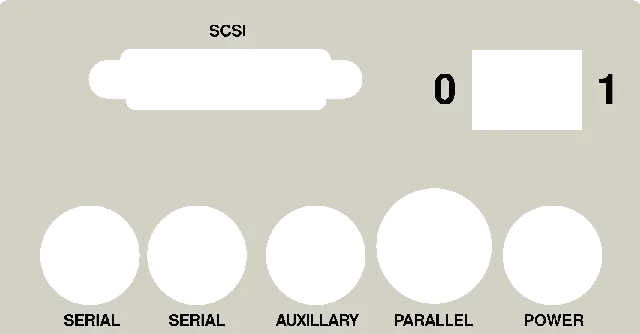
- case bottom, rear section - case bottom, faceplate section (two variants) - the case top - four snap-in TPU feet - four “button caps” to extend the LED board's buttons almost-flush to the front of the case - a caddy for 3½" HDD and two caddy variants for BlueSCSI (50-pin “desktop” version) - high-resolution printable stickers for the front and back You will need a handful of screws and nuts also. Normally I would use metric, but since this involves a standard 3½" HDD mechanism, I've designed everything for common #6-32 ¼" screws. For the sake of appearance, I recommend using pan-/button-head screws, since that's what CMD used. If you want to thumb your nose at CMD as I did 😉, you can also install a #6-32 countersink screw in the upper-left corner of the back of the enclosure. Yeah, like people wouldn't discover and remove that screw, guys. 😛
There's an exception here: if you're using a BlueSCSI, you'll need three M3 x 6 to 10 mm screws and nuts to secure it to its caddy (the caddy and screws that you may have received with yours will not work here).
The bottom prints in two pieces, owing to the angles in the front-most part. That front part prints front-face-down, which is actually beneficial as that creates as flat of a surface as it gets, which we want since the front sticker of course goes there. I recommend using two-part epoxy to join the two halves together, as superglue will dry way too fast to allow you to properly align them.
In order to properly-align the two halves, fasten the LED board to the front part (just because it'll be easier to do so now), install the nuts into their traps in the bottom and top pieces, attach the feet, then apply a good amount of epoxy to the joining surfaces, put the two halves together, and immediately install the CMD controller board and the case top. Flex the assembly gently a bit in various directions, pressing and prodding here and there until you're satisfied with the parts' alignment, then set the assembly aside until the epoxy has cured. Make sure that you check that the feet sit flat and level on the table before you leave it aside!
You will almost certainly need to use your soldering iron to heat-set the nuts that go into the case bottom rear part, especially if you paint the case before adding them, as the nut traps are fairly tight. For the others, the nuts should just press-in without much effort. I recommend adding a drop of superglue as you put those in, as an anti-frustration measure (especially for the two that go into the front/faceplate piece).
Note that the top is over 20 cm long, so some users will have to cut the that model in half and print/glue the pieces (I kept it one piece because I have a printer big enough to print it whole).
In addition to the caddy for a standard 3½" HDD, there are two caddies for the BlueSCSI v2. One of them keeps the SD card inside, and the other would be used along with an alternate faceplate to make the SD card accessible from outside.
These caddies fit fine inside an original metal CMD HD case also, but I cannot be 100% sure that the BlueSCSI-accessible-SD version will line up properly with the white stripe on the front sticker on those like it does in the printed model.
Since the original metal case has a mostly-black sticker that almost completely covers the case front, it might be a good idea to start printing the faceplate piece in black, then do a filament/color swap to beige after the first few layers. This will look better than an all-beige case, at least until you add the front sticker.
Furthermore, an oddity I ran into with my first print was that the case top's sides seemed to “flare-out” a bit, even though they're perfectly flat and square in the model and in the slicer g-code preview. I don't turn the fan up very high in my prints, so I attribute this to the plastic shrinking more in the solid top surface than it does on the sides. If your prints tend to do this also, you might consider stretching a few strips of tape from side to side just after the print has finished, while the bed is still hot. Make the tape just taut enough to pull the sides together just a few millimeters, and leave things that way until the bed has cooled. That should help cancel out some of the flaring-out effect.
Finally, if you're using a standard HDD mechanism, print this in PETG, ABS, or something else heat-tolerant. A hard drive can run a bit on the warm side, which may be just enough to cause deformation of the case top if it's made of PLA. That plastic should be okay if you're using a BlueSCSI or similar HDD replacement.
No supports needed, and everything is printable with the usual 0.2 mm layer height and 0.4 to 0.5 mm line width.
Pictured here are Atomic khaki and Atomic deep black PETG.
If you find cause to look into the the Blender project file, note that it depends on materials and objects found in my 3D printing toolkit/library, which you can find here: https://www.printables.com/model/16640-my-blender-3d-printing-partsmaterials-library
Credits:
I reconstructed the front and back stickers based on original, unused decals scanned by Mike Naberezny.
Source: https://www.flickr.com/photos/mnaberez/albums/72157719616959730/
The stickers in the main photos above were professionally-printed by makestickers.com, using my reconstructed images. Their product isn't as good as the OEM stickers, but they are cheap, and theirs beat the living crap out of my own attempts 😛 (mine can be seen crossed-out in a couple of images).
If you'd like them to make the appropriate stickers for you, here are the relevant links:
Front: https://www.makestickers.com/design/2405220823L7-pgch6yd9cjgjndil1e7j4whu
Back: https://www.makestickers.com/design/24051122CYB2-7r2zd2nahky779fyxtfhvu6m
Changelog:
2025-05-24: updated the sticker image. The only change is that the LED spots are now opaque in the image, but when printed with makestickers.com's process, you can have them omit the white backing layer in those areas, so they'll come out translucent.
2024-05-15: increased the front overhang distance on the case top, to more closely mimic the original case. In theory it's about 2 mm now, but in practice it'll be closer to 1.5 mm.
2024-05-10/2: huh. BlueSCSI uses much smaller screws than I thought – they aren't #6-32 like one might expect (since it's meant to replace a HDD), but instead closer to 3 or so mm. Corrected the two caddies to just use M3 screws/nuts. Also added some printable washers for those screws. BlueSCSI has very little room around the screw heads, these are to protect some nearby traces if the screws heads are scratchy.
2024-05-10: corrected the geometries of the stickers once and for all 😛 and separated them into their own objects distinct from the case parts. This revealed a minor LED board horizontal positioning error in the faceplates, which I've corrected. There's no need to re-print the faceplate, just trim the right edge of the sticker, it was only off by half a millimeter. Re-centered the BlueSCSI SD card slot and adjusted its caddy accordingly.
2024-05-09: Improved the fit and printability of the button caps.
2024-05-08: reduced the depth of the fillet where the HDD brackets meet the bottom in the case bottom rear half, there was a minor interference with the mainboard.
2024-05-05/2: Made the bottom and faceplate pieces use proper nut traps for where the case top screws go in, instead of having threads cut into the plastic. This should eliminate the over-tightening risk I mentioned previously. Also fixed some sort of weird doubling-up of the case bottom in the project file. Not sure it had any impact on the exported model but I had to re-export that anyway so no matter… and then I had to re-upload the bottom and blend because I missed an important mesh detail. 😛 A bit later: used a nut trap for the case top's “security screw”.
2024-05-05: Made a handful of small refinements to positioning, added some alignment bits to the case bottom/back, added a caddy for the BlueSCSI, and a second version of that caddy along with a suitable faceplate to make its SD card accessible.





Названия используются только для указания источника результата. Polyzon не аффилирован с перечисленными площадками.