
Бесплатно 
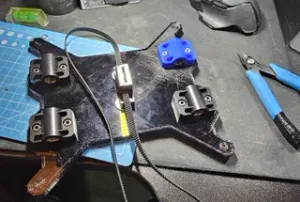
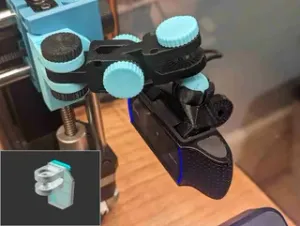
Cable Chain ( SPINE ) for SOVOL SV06 3d printer extruder cable
Printables


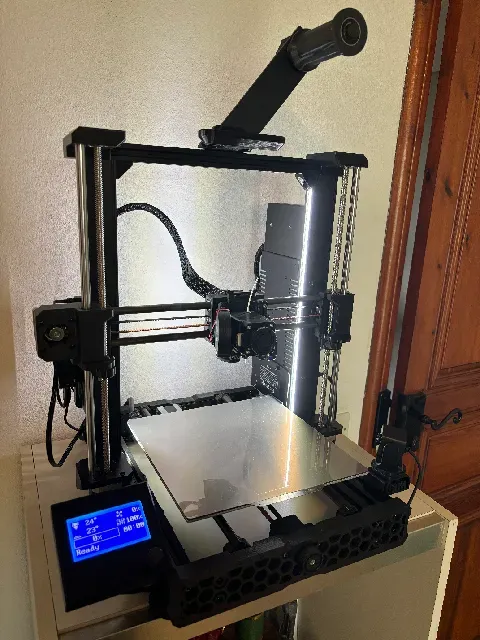
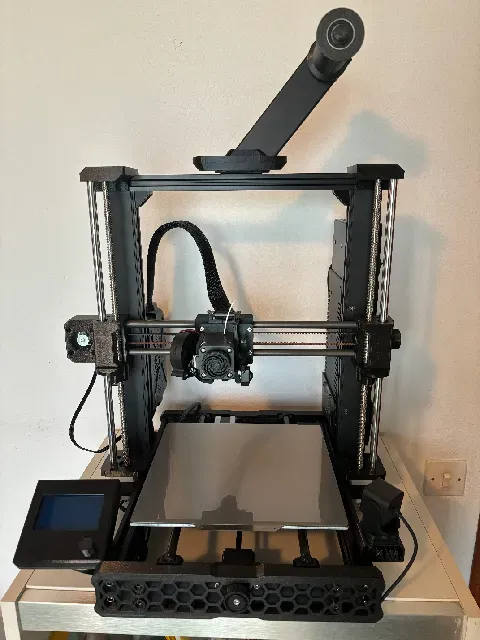


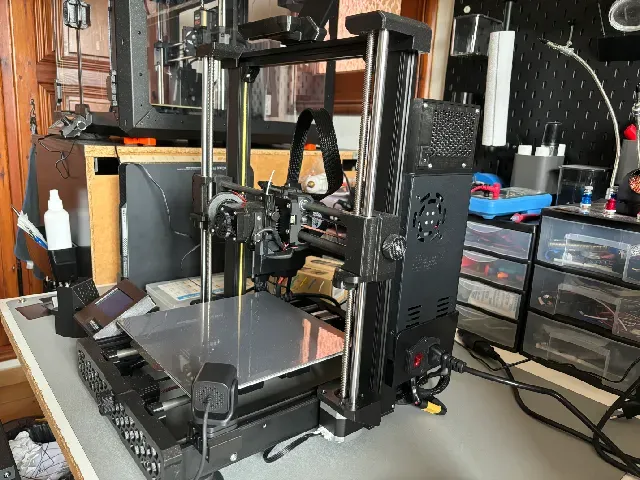

Let me introduce you the Ultimate Sovol SV06 : combinaison of already existing mods that I have modified (or not) and others that I have created especially.
This was possible only because of the open source spirit of the community (I will link later all the mod I used and I already thank every creators for sharing their models !!). And special thank to Sovol to use and respect the open source approch !! I would never done this redesign without original step files, etc….
The goals of this redesign was :
Upgrade stability : - 10 mm igus rods on both X et Y axis - 10 mm aluminium rods on Z axis
"Remove" maintenance of the printer : - Igus bearings (the real good ones, not the green ones ; more about it later !!) - Autolubricant bearings for Z axis
Add versatily (I don't know if it's the good word in English) with Klipper and Biqu microprobe to be able to use every bed including G10 Garolite, glasses, mirrors, etc...
Reduce footprint of the printer with the screen on the left side instead of the right side.
Upgrade airflow with “the nautilus fan” modified to fit my new carriage.
Add good integrations for the raspberry, camera and leds.
Upgrade the style of the printer (this is personnal but I think the SV06 looks incredibly nicer now !!)
Every step files for crucial parts are avalaibles because you have to be able to adjust tolerance according to your printer…
I will not explain every heats inserts, screws, nuts I used, it will be too long but it's totally standard M3/M4/M5 with classical screw length (6/8/10/12/16/20/25/30).
I put a link of a super repository to know multiple things on the SV06, I used it a lot when needed : https://github.com/bassamanator/everything-sovol-sv06
X-AXIS :
I used 2x 10 mm Igus rods (355 mm length) : https://www.igus.fr/product?artNr=AWMP-10
and 3 Igus RJUM-11-10 : https://www.igus.fr/product?artNr=RJUM-11-10
Advice : Don't use the standard green ones, Igus says about it that they require a perfect compression to work perfectly wich is really hard to obtain with our 3D design carriage. They also say that they aren't planned to work on aluminium rods, only on their specials rods.
I have redesigned the tensioner too because I wasn't satisfied with the original design tolerance.
I have printed the parts with PETG 4 walls / 5 top / 5 bottom / 40% gyroid.
Y-AXIS :
I used 2x 10 mm Igus rods (340 mm length) : https://www.igus.fr/product?artNr=AWMP-10
and 3 Igus RJUM-11-10 : https://www.igus.fr/product?artNr=RJUM-11-10
I have redesigned the tensioner like on x axis, the tensioner holder and the belt fixation under the bed to have the belt perfectly aligned.
I have printed the parts with PETG 4 walls / 5 top / 5 bottom / 40% gyroid.
Recommanded : I installed 4 Voron feets for better stability : https://fr.aliexpress.com/item/1005005600356489.html?spm=a2g0o.order_list.order_list_main.126.144a5e5bxMBmss&gatewayAdapt=glo2fra Installed with shorts M5 screw directly in 2020 nuts.
Z-AXIS (and top bar) :
I used 2x 10 mm chromium rods (400 mm length) : https://fr.aliexpress.com/item/32332798910.html?spm=a2g0o.order_list.order_list_main.161.144a5e5bxMBmss&gatewayAdapt=glo2fra
and 2 LM10LUU 10x19x55 autolubricant bearings : https://fr.aliexpress.com/item/1005001585671763.html?spm=a2g0o.order_list.order_list_main.166.144a5e5bxMBmss&gatewayAdapt=glo2fra
I have used the super work of flatpackrs for the top guide and motor brackets (more information) : https://www.printables.com/fr/model/433884-sovol-sv06-x-twist-fix-top-bar-upgrade I have installed the top bar with his explanations. It's a really cool upgrade for many reasons (esthetic and the ability to fix multiple things on the 2020 extrusion).
I remixed it to fit 10 mm rods.
Optionnal :
To perform a better Z-axis movements, I have remixed the Z-Wings of DIYLAB to fit the 10 mm rods (more informations for the installation) : https://www.printables.com/fr/model/573704-sovol-sv06-z-wings/files
LIKE DIYLAB EXPLAINS : if you want to install Z-wings and upgrade the Z axis consistancy, you also need to replace stock Z led screws/motors of the SV06 before with an all in 1 solution lead screw/motor like on the Prusa. I install these models : https://www.amazon.fr/gp/product/B07YQQGQ4C/ref=ppx_yo_dt_b_search_asin_title?ie=UTF8&psc=1 You will have to revert the 2 central wires of the SV06 stock motor cables to get the new motors working correctly.
I have printed the parts with PETG 4 walls / 5 top / 5 bottom / 40% gyroid.
EXTRUDER MOUNT :
I used 3 Igus RJUM-11-10 : https://www.igus.fr/product?artNr=RJUM-11-10
The carriage is in 1 piece for rigidity + 2 belts holder for each side. I have printed the parts with ABS 4 walls / 5 top / 5 bottom / 40% gyroid for more rigidity. No support needed.
I have modified the nautilus fan to fit my carriage and have integrated “strategic” supports to print it "easily".
Original nautilus can be find here : https://www.printables.com/fr/model/542760-the-nautilus-sovol-sv06-fan-duct-5015-blower-fan-v
It's still hard to print so you have to slow down your printer and have a perfect bed adhesion. Brim and standard supports are needed. I don't have step file for this design.




Названия используются только для указания источника результата. Polyzon не аффилирован с перечисленными площадками.