
Бесплатно 
J-Max_Bowden Belt Extruder (feeder) V1.0
Printables


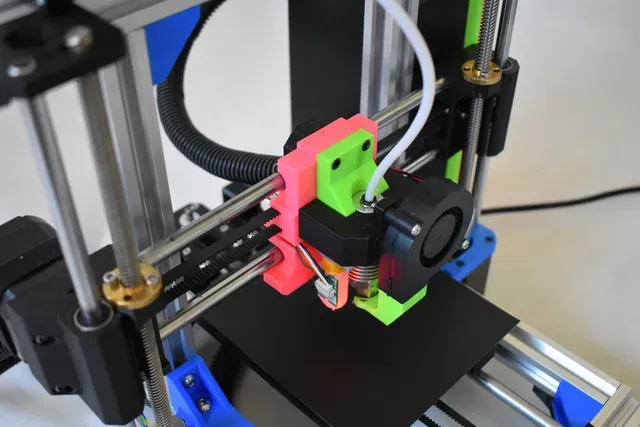


NEW BOWDEN VERSION (PICS BELOW)
Changelog
4/09/19 Added Pictures
4/01/19 Added Electronics Case
3/19/2019 Organized file section / added print guide
3/17/2019 Added Bowden .3mf file (courtesy of PteroDancer)
01/28/2019 Added wiring diagram in files section
01/24/2019 Updated BOM
01/23/2019 Uploaded Bowden version including new toolhead and extruder
01/23/2019 Uploaded new Z rod mounts for better rigidity
01/16/2019 Improved cooling fan design (more directed airflow)
01/16/2019 Improved Extruder_Backplate (better wire management / BLTouch fits better)
01/16/2019 Improved Extruder_Rear (PTFE tubing easier to insert / better wire management / E3D hotend fits better)
01/16/2019 Improved X_Idler (Added screws to adjust belt / rod tension)
01/16/2019 Improved Z_Motor_Mounts (Increased support for Z extrusions)
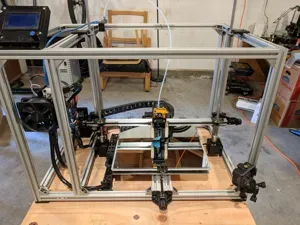
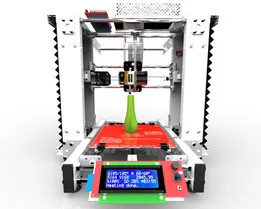
The Bonsai 3D Printer is a scaled-down version of the popular "Prusa" syle 3D printer, hence the name ;). Much of the inspiration for this project came from the design of the Prusa Mk2s. The frame of the Bonsai is made entirely of 2020 aluminum extrusion and 3D printed brackets. All parts were designed by me, except for the LCD case, which was designed by wersy https://www.thingiverse.com/thing:87250 (aweseom design, very cool!)
The machine itself is roughly 11in x 11in x 12in, excluding the LCD and plastic spool. The build volume is 100mm (x) x 140mm (y) x 100mm (z). As to the parts needed to build this, they are all standard printer components : Nema 17's, 8mm smooth rods, lead screws, Ramps 1.4 + Mega 2560, etc. There is a BOM in the files section for more details (Excel file). You can also find the Marlin firmware and a tailored Cura profile for this printer in the files section.
Features
-Magnetic Bed
Now don't get too excited, it's no fancy magnetic, flexible build plate. It's basically a piece of glass with craft sheet magnets stuck on the back (see pictures). But I found it is much easier to remove prints and apply painters' tape with the bed detached from the printer. There are also 4 holes on the bed carriage in case anyone wanted to incorporate a fixed bed.
-Easy-Swap Spool
Convenient spool swapping in a flash. Based on many designs floating around Thingiverse.
-Cool - Looking Tool Head
Besides looking totally cool ( at least I think so), the extruder assembly is very functional. It houses an E3D Lite6 hotend, and is capable of printing flexible filaments. A 50x50x15 blower fan is used for active part cooling. The assembly also houses a BLTouch module for auto bed leveling. All wires are neatly hidden and routed to the back of the tool head
NEW Bowden Extruder and Tool head (01/23/19)
In response to several requests, I have designed a new Bowden setup for the Bonsai. The tool head is MUCH simpler to assemble and is able to mount both the BLTouch and radial cooling fan that were used in the original tool head. The new tool head is now mainly secured to the bearings with a clamp, making the assembly far more rigid and easier to disassemble. In addition, the fan duct has been redesigned for better cooling. The actual extruder is mounted to the top extrusion of the printer.
Print Guide
Download the Folder "Bonsai_Parts." Inside, there are 2 folders.
Step (1): Print all parts in the folder "Universal_Parts_STLs"
Step(2): Choose either the Direct Drive or Bowden extruder within the folder "Extruder_Type" and print respective parts.
Miscellaneous
There are now two versions of the extruder idler, one which uses a 633 bearing and the other which uses a 625 bearing. These files can be found in both extruder type folders.
PteroDancer has kindly put together a .3mf assembly file that is now available in the files section ("Bonsai.3mf"). This can be opened with most CAD / 3D viewer applications and is very useful if you want to explore the assembly.
Overall, this was an awesome and fun project, hope you enjoy the design!
Quick Tip:
Add this code to the "Start G-Code" dialog box in Cura in order for the printer to print a purge line similar to the Prusa printers. This cleans the nozzle of any ooze before starting the print.
G28 ;Home
G0 X0 Y0 F2400 ; Go to front
G0 Z0.2 ; Drop to bed
G92 E0 ; zero the extruded length




Названия используются только для указания источника результата. Polyzon не аффилирован с перечисленными площадками.
Комментарии 0
Загружаем комментарии…