
Бесплатно 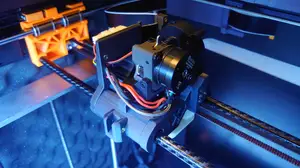
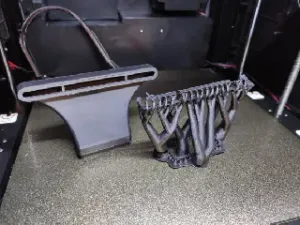
Icarus 2 - QIDI X-Max / X-Plus / I-Mate / X-Maker Carriage (Orbiter, Sherpa Mini, LGX Lite)
Printables
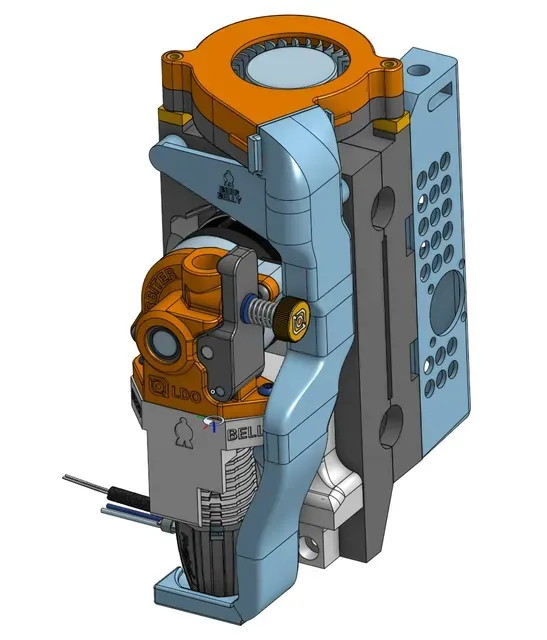
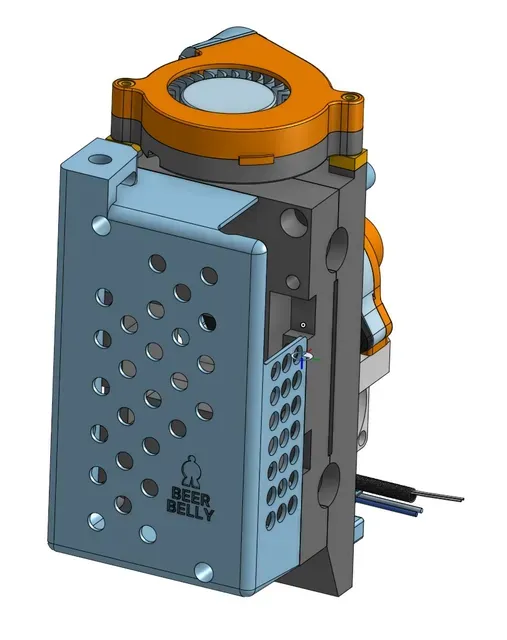


*** WARNING - This model is complicated and requires soldering, lots of melt-in threaded inserts, and much more. It risks bricking your printer if you make a mistake. It is also a Beta release, and as a result, is under-developed and maintenance intensive in service. DO NOT print and use this model unless you are ready to curse regularly at your printer.
Changelog:
- v0.5 (Alpha) - Initial release - v0.6 (Beta) - Improved carriage design to reduce bind; amended rear cover design to improve primtability. - v0.7 (Beta) - Revised printer.cfg (printer.txt) file with much improved PID values to reduce hotend overshooting. Credits/Thanks -
- To @humebeam, for the inspiration from Icarus. The extruder/hotend carrier dimensions draw directly from the Icarus design, so thank you! - To the QIDI TECH - 3D Printer Owners group on Facebook, and especially to S.Pollard, M.Chandler, E.Zweigle, A.Fera, and others who helped me get this working. Thank you all! As of May 2025, I have over 1800 hours of printing on this print head and it works very well for most filaments. Part cooling for fast printing with garden-grade filaments could be improved, but it is faultless when printing nylon blends and other slow-print filaments that are less sensitive to part cooling.
Please help develop this model further . The STEP files are included for this purpose. I have spent way too much time getting it to this point, and I don't have the time to perfect it. It works, but it has issues and i'd dearly love the community of X-Max 3 owners to help make it better - for the benefit of all of us.
REQUIRED - You will need:
- An Orbiter v2.0 extruder - A Trianglelab Rapido K500 hotend with the HF nozzle - A suitable standard-form 5015 24V blower fan with a JST-XHP-2.54 connector - If yours is a BL Touch printer, you will need a X-Max 3 inductive proximity probe and the magnetic setup sticker (instructions on how to do the swap can be found elsewhere) - A whole stack of m3 threaded melt-in inserts (preferably the longer kind from CNCKitchen), and some way to install them - A soldering iron and solder, together with appropriately sized heat shrink and the skill/tools to install it - A large volume of M3 cap head bolts, ranging from 8mm long to 16mm long (and possibly a few 20mm long ones as well) - At least nine (9) 6mm x 2mm rare earth magnets (do yourself a favour and buy a HEAP of these - they are cheap, so why not?) - Suitable temperature resistant filament (see below) - A small amount of bowden tube to run between the extruder and hotend - A nice, strong elastic band - Some good quality, two-part epoxy-based glue (eg. Araldite) - Appropriate tools and skill to remove the connectors from the print head control board STRONGLY RECOMMENDED - I strongly recommend you also purchase:
- A new v1.2 print head control board. These were available for $40 or so from the Qidi website when I purchased mine. Earlier version boards may work, but won't mount easily in the case without modification. - A bunch of small zip ties - you're gonna regret it if you don't have any KNOWN ISSUES
Don't bust my chops about these. I probably don't have time to fix them. Instead, please consider downloading the STEP files and fixing them yourself. Then you can re-upload them and make all our lives better as a result!
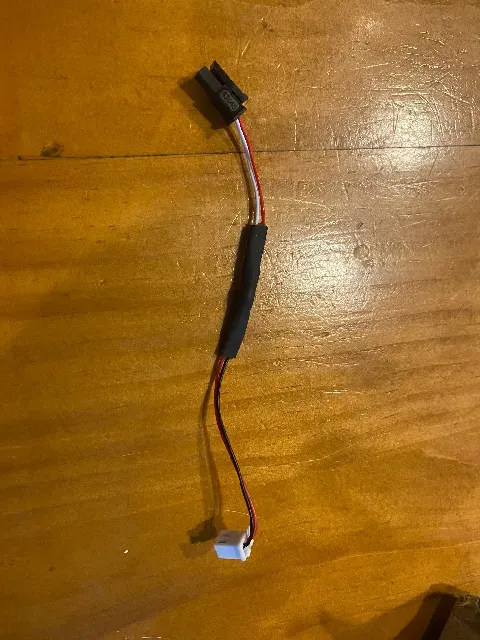
- Belt retention . This version relies on printed retaining posts to hold the belts in place. They are not great, tend to slip, and are hard to tension and secure. I have reverted to using aluminium pieces I milled up myself which work much better. A better solution may be to redesign the carriage rear to accept the original retaining plates from the OEM print head, but these use smaller m2.5 hardware and I don't have any of that… so over to you, folks! - The rear cover has deliberately shallow screw holes for mounting the print head control board. These work for the short OEM mounting screw, but not the longer one. If you buy a new v.1.2 control board, you will also receive new hardware, including another short screw. However, if you don't, you will need to cut down the long screw to fit. - Carriage binding on x-axis . Improved in the v0.6 Beta release, but always an issue… This has been the toughest issue to overcome, and is still a work in progress. Depending on your machine and it's tolerances/accuracy, and depending on the filament you use to print your carriage pieces, you may experience carriage binding. This could happen cold, or it could happen as the chamber/print head warms up and the material expands. It can be so severe that it siezes your x axis mid-print and this is REALLY BAD!!!! It will wreck your printer if you don't catch it. If you print your carriage from a material like nylon, it may take days or weeks for the issue to materialise as the print walks or grows over time. I have done my best in the design to allow for this, and for me at least, the issue is now manageable with a carriage printed out of ASA. But your mileage may vary. This is the worst issue the print head has had in development. - Solder joints on the thermocouple . DO NOT cut the copper wires on the K500, and DO NOT cut the connector off your OEM thermocouple. Soldering these dissimilar, solid wires together is a bad idea. Instead, make an adapter harness to convert the K500 connector to the JST-type connector of the X-max 3 control board. To do this, use the blue extension harness that comes with your K-500 print head. This harness uses normal, multi-strand wire that is easy to solder. You can either just crimp a JST-type connector to it, or alternatively, use another JST multi-strand wire harness and solder the two together. Carefully heat shrink the joints to ensure a solid, durable connection. If the joint fails, the printer will immediately shut down (likely mid-print) and will not work again until you correct the issue. - Installing the magnets - the holes can be tight, depending on the filament you use. I needed to force the magnets into place and clamp them in so the glue could set. Use paper towel or similar as a sacrificial cover to ensure your clamps don't stick to the magnets and pull them out when released. - DON'T USE A UHF NOZZLE . It will smash into your bed. HF (volcano) nozzles only. - Print head cable fouling the rear of the printer frame/roof . Consider removing the print head hinge/retainer link on the print head cable chain reinforcer, and securely cable tie the naked cable to the print head retainer hole on the rear cover of the print head. This will lower the print head cable, and stop it from catching on the top and rear of the printer chassis. If you don't do this, be sure to check print head cable clearance at all 4 corners of the printer's x-y travel, and make appropriate modifications/allowances for any interference.





Названия используются только для указания источника результата. Polyzon не аффилирован с перечисленными площадками.