
Бесплатно 
26650 Battery Holders for Welded Batteries
Thingiverse


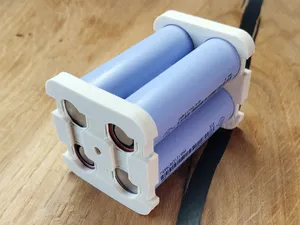
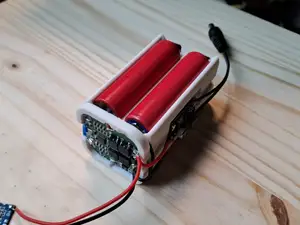
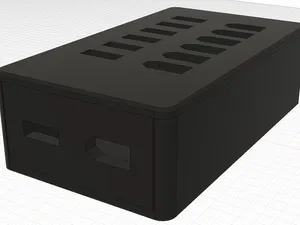
The 4 cell 26650 battery pack is meant to supply around 12 volts or be used in place of a vehicle battery. The battery trays can be used individually or to wire together as many batteries as you want. I use the battery pack to rapid charge my phone, charge a dead car battery enough to start it or anything that can use 10 - 14vdc. It uses a JST-XH balance connector for balance charging the pack on a RC hobby charger. I used the <a href = "https://jag35.com/products/new-k2-26650-lfp26650ev-3200mah-10-24wh-lifepo4-batteries" target = "_self">LFP26650EV</a> LiFePO4 batteries from K2 energy. Everything is designed to be fairly easy to print.
There is also a rapid USB charger meant for this battery pack. - https://www.thingiverse.com/thing:5221640
<hr>
<p><font color="black" face="sans-serif" size="+2">Construction Notes</font></p>
<b>1st.</b> - Print all the necessary pieces. 2 battery trays, a battery pack body and a battery pack cap.
<b>2nd.</b> - Solder together the <a href = "https://www.amazon.com/uxcell-Negative-Conversion-Nickeling-16-5mmx16mm/dp/B07HRTMY5T/" target = "_self">battery contacts</a> as shown. I have the center-to-center spacing at 27mm but it can be off by 1 or 2mm. Press down the small locking tabs with pliers before installing the contacts or they will be difficult to install.
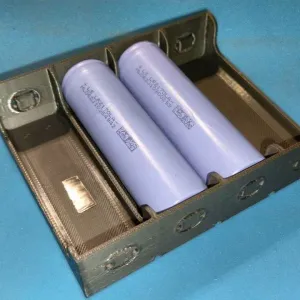
<b>3rd.</b> - Glue together two battery trays to make a complete sled for the batteries. Be careful not to get glue in the slots where the battery contact slides through the two halves or it won't go in. One end should have two holes through it and one end should be solid. The two holes are for a balance wire to be soldered on in the next step. Superglue in the battery contacts as shown in the pictures. I did not need to superglue the contact that slides between the two halves.
<b>4th.</b> - Attach the <a href = "https://www.amazon.com/Apex-RC-Products-JST-XH-Balance/dp/B074TVP8C7/" target = "_self">balance connector</a> wires that go to cells 1-2, 2-3 and 3-4. Do not connect the main positives and negatives for the pack or balance connector. I included <a href = "http://www.tjinguytech.com/charging-how-tos/balance-connectors" target = "_self">this page</a> as a reference to how balance connectors are wired.
<b>5th.</b> - Put the batteries in the sled and slide the assembly into the pack body. Attach the main <a href = "https://www.amazon.com/BNTECHGO-Silicone-Flexible-Strands-Stranded/dp/B01ABOPMEI/" target = "_self">wires</a> for positive and negative. After those are soldered attach the balance connector wires for the main positive and negative. I add a zip tie on the inside around the balance wires and main wires. This serves as a strain relief so the wires don't pull on the solder joints.
<b>6th.</b> - Install the main connector of your preference. I use a <a href = "https://www.amazon.com/FLY-RC-T-Plug-Connectors-Battery/dp/B07BHCFXJZ/" target = "_self">dean's connector</a> but any connector can be used. Lastly, screw the cap on. The holes should fit #4 or M2.6 fasteners. The <a href = "https://www.mcmaster.com/90627A114/" target = "_self">screws</a> in the picture I ordered from McMaster.
<hr>





Названия используются только для указания источника результата. Polyzon не аффилирован с перечисленными площадками.
Комментарии