
Бесплатно 
Micro:bit robotic drawing arm - Stardraw Megalink
Printables


# StardrawMegalink - Robotic drawing arm
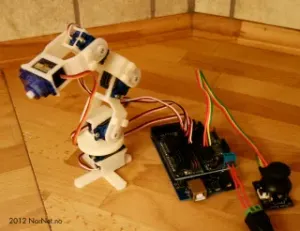
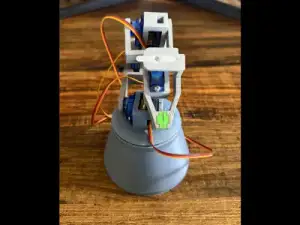
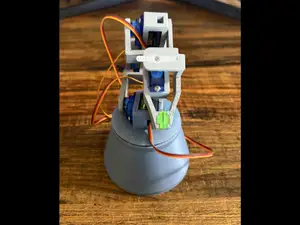
<div> <img src="https://raw.githubusercontent.com/pslib-cz/2022-p2a-mme-pppp-Kraus-Ivan/main/images/IMG_2264.JPG" > <img src="https://raw.githubusercontent.com/pslib-cz/2022-p2a-mme-pppp-Kraus-Ivan/main/images/IMG_2266.JPG" width="400" height="300"> <img src="https://raw.githubusercontent.com/pslib-cz/2022-p2a-mme-pppp-Kraus-Ivan/main/images/IMG_2262.JPG" width="300" height="350"> </div>
## Introduction The project aims to create an experimental prototype of a drawing arm with a base. It is designed to test inverse kinematics. The software part is provided by a Micro:bit microcomputer with a library actually written for the digital servos controlling the arms.
## Equipment needed and price - 3D printer with filament (recommended PLA) of about 400 grams with a print area of at least 18×18 cm **(price about 2 USD)** - Nuts to load (12 nuts M14) - 8 magnets (4 smaller: diameter 6 mm, thickness 1.3 mm, 4 larger: diameter 6 mm, thickness 2.6 mm) **(price approx. 2 USD)** - Soldering iron - Instant glue - 5× [thread inserts](https://eshop.sharplayers.cz/p/zavitove-vlozky-m3) **(price approx. 1 USD)** - 2× [SG90 servo](https://www.aliexpress.com/item/4000903254039.html) **(price approx. 1.25 USD)** - 2× Plastic handle for attaching the arm to the servo (included with the servo) - Drobné lineární [mikroservo](https://www.aliexpress.com/item/1005004339409489.html) **(cena cca 8.5 USD)** - [Micro:bit](https://www.amazon.com/GeeekPi-Micro-Original-Batteries-Programming/dp/B0BB6T186P/ref=sr_1_1_sspa)**(price approx. 34.5 USD)** - [Expansion board for microbit ](https://www.aliexpress.com/item/32919813638.html) **(cena cca 11 USD)** - Micro USB cable **(price approx. 1 USD)** - [Micro USB adapter](https://www.aliexpress.com/item/1005002500157420.html) **(price approx. 2.1 USD)** - Power cable extension tool and extension cable for microserv0o
***Total price: around 64.5 USD with micro:bit***
<img src="https://raw.githubusercontent.com/pslib-cz/2022-p2a-mme-pppp-Kraus-Ivan/main/images/20230615_111352.jpg" width="400" height="350"> Similar screws and bolt must be obtained for assembly. Dimensions are given in width/length ratio (milimeters). The silver screw (second from the left) is supplied in the package with the servos.
## Assembly and printing
### Printing Print the components below on a **3D printer**. The recommended material for printing all components is **PLA**.
#### Arms Links to download the arms in .STL format: [1st arm](./MODELS/models/STARDRAWMEGALINK_arm-1.STL), [2nd arm](./MODELS/models/STARDRAWMEGALINK_arm-2.STL). If you need to customize the arms, they are also available in .SLDPRT format: [1st arm](./MODELS/solidworks_models/STARDRAWMEGALINK_arm-1.SLDPRT), [2nd arm](./MODELS/solidworks_models/STARDRAWMEGALINK_arm-2.SLDPRT).
#### Pen holder Link to download the pen holder in .STL format: [Pen holder](./MODELS/models/STARDRAWMEGALINK_pen-grabber.stl). If you need to customize the holder, the holder is also available in .SLDPRT format: [Pen holder](./MODELS/solidworks_models/STARDRAWMEGALINK_pen-grabber.SLDPRT).
#### Base with lid and cube for holding USB Download links for base with lid and cube in .STL format: [Base](./MODELS/models/STARDRAWMEGALINK_base.STL), [Lid](./MODELS/models/STARDRAWMEGALINK_base--cover.STL), [Cube](./MODELS/models/STARDRAWMEGALINK_usb--block.STL). If you need to customize the arms, components in .SLDPRT format are also available: [Base](./MODELS/solidworks_models/STARDRAWMEGALINK_base.SLDPRT), [Lid](./MODELS/solidworks_models/STARDRAWMEGALINK_base--cover.SLDPRT), [Cube](./MODELS/models/STARDRAWMEGALINK_usb--block.SLDPRT). **Beware!** it is necessary to set the breakpoint in your program controlling printing on the 3D printer to the position just before pressing the magnet insertion point and pressing the nut insertion point during printing.
<div> <img src="https://raw.githubusercontent.com/pslib-cz/2022-p2a-mme-pppp-Kraus-Ivan/main/images/20230614_074527.jpg" width="300" height="350"> <img src="https://raw.githubusercontent.com/pslib-cz/2022-p2a-mme-pppp-Kraus-Ivan/main/images/20230614_113205.jpg" width="300" height="350"> </div>
### Assembly Once you have all the components printed, magnets and nuts embedded in the base, and all the parts secured, you can proceed to assembly.
#### 1. Soldering the threaded inserts Heat the soldering iron to about 220 °C. Take the base and pen holder. Insert the threaded inserts into the holes in the base. One by one, place the tip of the soldering iron on each insert, waiting until the filament begins to melt slightly and the insert begins to embed. At this point, remove the soldering iron and push the insert into an aligned position using a blunt object (such as the end of a marker). Follow the same process for inserting the liner into the pen holder. **After embedding, wait at least 5 minutes to allow for setting**
<div> <img src="https://raw.githubusercontent.com/pslib-cz/2022-p2a-mme-pppp-Kraus-Ivan/main/images/20230616_092746.jpg" width="300" height="350"> <img src="https://raw.githubusercontent.com/pslib-cz/2022-p2a-mme-pppp-Kraus-Ivan/main/images/20230616_092806.jpg" width="350" height="350"> </div>
#### 2. Inserting the micro USB adapter Insert the micro USB adapter into the hole on the inside of the base. Then take the printed cube, apply hot glue to the sides and slide the cube behind the micro USB adapter to fix the micro USB adapter in the hole.
<div> <img src="https://raw.githubusercontent.com/pslib-cz/2022-p2a-mme-pppp-Kraus-Ivan/main/images/20230620_100146.jpg" width="300" height="350"> <img src="https://raw.githubusercontent.com/pslib-cz/2022-p2a-mme-pppp-Kraus-Ivan/main/images/20230620_094711.jpg" width="300" height="350"> <img src="https://raw.githubusercontent.com/pslib-cz/2022-p2a-mme-pppp-Kraus-Ivan/main/images/20230620_094705.jpg" width="300" height="350"> </div>
#### 3. Screwing in the micro:bit expansion board Take the appropriate screws and screw the micro:bit expansion board to the base with them into the recessed inserts.
<img src="https://raw.githubusercontent.com/pslib-cz/2022-p2a-mme-pppp-Kraus-Ivan/main/images/20230616_093503.jpg" width="300" height="350">
#### 4. Screw the servos into the base and arm Take your servo motors and use the screws provided to screw one into the hole in the base. Screw the other servo motor into the hole in the arm 1.
<img src="https://raw.githubusercontent.com/pslib-cz/2022-p2a-mme-pppp-Kraus-Ivan/main/images/20230615_113624.jpg" width="300" height="350">
#### 5. Screwing in the linear motor Take the linear motor and use the screws to screw it to the pen holder from the back side. Make sure that it is screwed in the direction shown in the picture.
<img src="https://raw.githubusercontent.com/pslib-cz/2022-p2a-mme-pppp-Kraus-Ivan/main/images/20230615_113752.jpg" width="300" height="350">
#### 6. Screwing on the servo handles Screw the servo handles into the arm sockets using the screws provided.
<div> <img src="https://raw.githubusercontent.com/pslib-cz/2022-p2a-mme-pppp-Kraus-Ivan/main/images/20230615_112823.jpg" width="300" height="350">
<img src="https://raw.githubusercontent.com/pslib-cz/2022-p2a-mme-pppp-Kraus-Ivan/main/images/20230615_113159.jpg" width="300" height="350"> </div>
#### 7. Screw the arms together and to the base and add the pen holder Screw the second arm to the servo on the first arm first using the included servo screw. Then screw the first arm to the servo in the base. Also, add the pen holder to the second arm and drip hot glue between the tip of the linear servo and the second arm. <img src="https://raw.githubusercontent.com/pslib-cz/2022-p2a-mme-pppp-Kraus-Ivan/main/images/IMG_2264.JPG" width="450" height="350">
***Voila you have folded the robotic arm***
## Software The software part is provided by the microsoft makecode environment for micro:bit https://makecode.microbit.org/.
An external [pxt-smooth-servo](https://github.com/Kraus-Ivan/pxt-smooth-servo) library written in *Typescript* was created for this project. The library provides servo and microservo control. The library has its own documentation in the [main.ts](https://github.com/Kraus-Ivan/pxt-smooth-servo/blob/master/main.ts) code file. The way to add this extension to the project's macrocode is described in [readme.md](https://github.com/Kraus-Ivan/pxt-smooth-servo/blob/master/README.md). ### Implementation of this class:
```typescript basic.forever(function () { basic.pause(50); smoothServo.SmoothServo.update(); });
let servo1 = smoothServo.SmoothServo.createServo(AnalogPin.P0); let servo2 = smoothServo.SmoothServo.createServo(AnalogPin.P1);
input.onButtonPressed(Button.A,() => { servo1.moveTo(2000); console.log(servo1.buffer()); console.log(servo1.toString()); }); ```




Названия используются только для указания источника результата. Polyzon не аффилирован с перечисленными площадками.
Комментарии