
Бесплатно 
£80 Wide angle + Night Vision Security camera
Thingiverse


Big 'ole disclaimer: If you do not have experience working with electricity before, be aware that in this project I'll be repurposing a laptop charger, just make sure you're comfortable with that, or find another way to power the project.
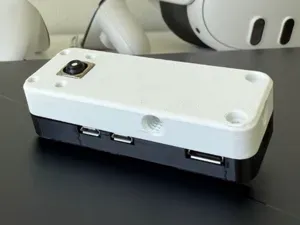
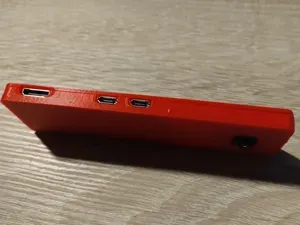
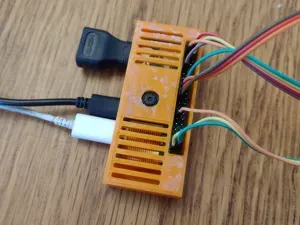
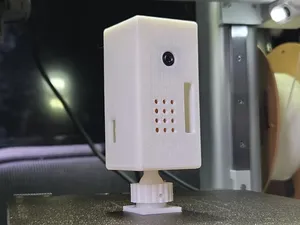
This is a facelift of the third iteration of my Pi Zero cameras, if you made the third iteration, then the internals are a direct drop in replacement. This version also features a CTS gland at the rear for better water sealing.
I'd recommend printing on lower quality settings and then just filing/sanding until they fit.
The aim of this project was to create a robust, cost-effective security camera based on the Raspberry Pi Zero 2W. At current prices, I was able to make this for £80 - minus printing costs
-HARDWARE-
Parts used: 2 x Pi Zero 2W: (£17/£15) https://thepihut.com/products/raspberry-pi-zero-2 https://thepihut.com/products/raspberry-pi-zero-w
2 x Micro SD card (16GB will be fine) (£5) https://www.ebay.co.uk/itm/264783161833
1 x ZeroCam Fisheye: (£15) https://thepihut.com/products/zerocam-fisheye-camera-for-raspberry-pi-zero
1 x eBay special IR sensor: (£14) https://www.ebay.co.uk/itm/354891749089
1 x Pack of assorted 2.5 standoffs + screws (8 x 15mm, 4 x 10mm, 2 x nuts, 4 x m2.5 screws)
2 x Heatsinks: (£1) https://thepihut.com/products/heatsink-for-raspberry-pi-zero-2
2 x USB 6v-40v 5A 5V power supply: https://kunkune.co.uk/shop/power-converter-modules/dual-usb-dc-dc-6v-40v-to-5v-3a-double-usb-charge-step-down-converter-module/
1 x Laptop Charger / power supply / something which can push 5V 3A per Pi I used an old Lenovo Laptop charger, so this cost me nothing, but used 60w laptop chargers or something of the like will be fine.
2 x Micro USB cables (some short angled ones preferrably, if you don't have them, they're dirt cheap)
Now that you have the hardware sorted, it's time to assemble it all.
Print out the inner enclosures (innerpienclosure & innerpienclosure upper) once those have printed out, start printing off the lid and main case.
Whilst those are printing, sand down the inner frames so you haven't got any stringing or zits.
Once that's done, make sure the screw holes are unimpeded by any support material if you have used supports (I didn't need to)
Add the heatsinks to the Pi's, and plug in the CSI cable from the wide angle lens into the bottom Pi.
Screw in the screws into the bottom of the frame that has the square-circle cut-out, then put the wide angle lens in through the hole, and add a little super glue just to keep it in place, but it should be a tight-ish fit.
Once that's done, screw the 15mm standoffs onto each corner, and place the next Pi on top, repeat the same process.
Then unscrew the lens from the night vision sensor, and push the assembly through the hole in the frame, then screw the lens back in. Be extra careful to not damage the exposed sensor during this process, and if you find yourself straining to fit it in the hole, stop, and sand it down.
The acrylic frame that I have behind the sensor is unnecessary, and I'm only using it because I had it laying around, it will hold without it.
Once the camera is securely in place in the frame, push it onto the standoffs, and secure it with nuts.
Next, plug the CSI cable into the second Pi.
Once that's done, you're pretty much done from a hardware perspective.
-SOFTWARE-
I'm going to be using a computer that has a docker instance of MotionEye on it, it's got a cheap 2tb HDD attached to it, so it should be able to record a few days footage at a time at full resolution.
On the Pi itself, I'm going to be using a great tool called Cam2Web (https://github.com/cvsandbox/cam2web), as it is super easy to configure, and then just a standard install of Raspbian (latest will work).
So flash your SD cards with raspbian, during the imaging process, if you're using the official tool, start SSH, and add your wireless network. If you're not using the Raspi imager, then have a mini-hdmi and some dongles to hand.
When you've powered the Pi up, and done the usual setup, open a terminal and do: git clone https://github.com/cvsandbox/cam2web sudo raspi-config
When in this menu, enable the legacy camera stack under "Interfaces", also enable I2C as I've had some compatibility issues when this was disabled. Reboot your Pi after.
At this stage, with the camera plugged in, hopefully you can see some sign of life from one of the LEDs, if not, check your cables, they can be tricky, make sure they're the right orientation. If you cannot see any life, you might have a defective unit.
In a terminal run the command vcgencmd get_camera
Your output should indicate that you have a detected and supported camera
Once you've verified your camera is working, go ahead and compile Cam2Web, I learned that I am a complete idiot, as I compiled it on my main linux machine and just completely forgot that they're different CPU architectures -dumbass alert- I would recommend compiling it on a more powerful ARM chip, as I had some issues with gcc on the Pi Zero, so, I used my Pi 3a+ to do it instead.
If you're having issues compiling this, I may upload compiled binaries at some point, as this project is no longer maintained by the looks of things.
Once compiled, run: chmod +x cam2web ./cam2web
You should see that it is now streaming on port 8000, verify this by checking in a browser. You can find your Pi's IP by typing "ifconfig" in terminal.
You can also see all of cam2web's options by doing ./cam2web -?





Названия используются только для указания источника результата. Polyzon не аффилирован с перечисленными площадками.