
Бесплатно 
Voron Stealthburner for Artillery Sidewinder X2
Thingiverse


Carriage design for SW X2 3d printer. Allows you to mount the Voron Stealthburner toolhead and a CR-Touch (or BLTouch) probe. Replaces the stock toolhead and improves weight and accuracy. Runs on MGN9 linear rail (top) and a V-wheel (bottom). Video overview: https://youtu.be/jpeJ4v6u7H0
Inspired by this thing https://www.thingiverse.com/thing:6098638, but it is for MGN9 and is composed by only two parts (easy to print).
Print it with strong filament like ASA CF or PA12 CF
All latest Voron Stealthburner parts are on Voron's GitHub: https://github.com/VoronDesign/Voron-Stealthburner
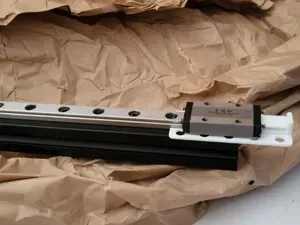
Installation instructions: 1. Install 9 x M3 plastic inserts - 6 on the carriage + 3 on the MGN9H mount. 2. Screw the MGN9H mount to the carriage with 3 x 25 mm M3 bolts. 3. Install the V-wheel with 1 x 40mm M5 bolt, 2x M5 locking nuts and spacers - no excentric needed. 4. Install a 400mm MGN9 linear rail with MGN9H size block on top of the gantry - you'll need 6-7 8mm M3 bolts. 5. Install the belt and fix it from 1 side with cable ties. 6. Position the V-wheel, then slide the MGN9H block from the side - below the printed MGN9H mount. Screw the MGN9H mont to the MGN9H block with 2 or 4 x 12 mm M3 bolts. 7. Tighten the belt from the other side and secure it with cable ties. 8. Install the CR-Touch probe. You can use M3 screws or 2x cable ties. Please note that you'll have to modify the connector from 5 wires (CR-Touch) to 4 wires (PCB connector). Info is available on internet. 9. Print and install the voron stealthburner/clockwork components - you can follow Voron's documentation. 10. Install the connections PCB on the PCB mount, install the ribbon cable, screw the PCB mount to the carriage with 2 x 30mm M3 bolts.
Enjoy incredibly stable and lighter toolhead. :)




Названия используются только для указания источника результата. Polyzon не аффилирован с перечисленными площадками.