
Бесплатно 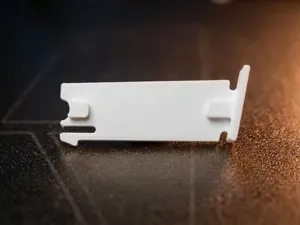
VW T3 / T25 Vanagon Heater Box Flap Retaining Clip
MakerWorld


Summary Replacement latches/clips for classic Seitz / Dometic roller blinds (flyscreen and blackout/thermal blind connectors) commonly found in VW T3, Westfalia, and vintage campers or RVs.
Over time, the original plastic tabs break off, making it impossible to lock or join the blinds together. Instead of buying expensive replacement blind assemblies, this 3D-printable model restores full functionality using your existing housing and spring.
Print Settings Printer Brand: Prusa / Any FDM Rafts: No Supports: Yes (minimal / auto-generated for overhangs) Brim: Recommended for small contact surface Layer Height: 0.15 mm – 0.20 mm Infill: 30% – 100% (for maximum durability) Recommended Material: PETG, ASA, or ABS (⚠️ Do NOT use PLA – summer temperatures inside a parked campervan will warp PLA parts!)
Required Tools & Parts 3D printed replacement sliders + printed end-cap/plug 2.5 mm drill bit & cordless drill Original internal coil spring (reused from the broken mechanism) Superglue / CA glue (optional, to secure the end-cap)
Disassembly & Assembly Instructions Step 1: Removal Locate the metal blind rivet holding the plastic latch housing to the blind rail. Using a 2.5 mm drill bit, carefully drill into the center of the rivet to remove the flared outer head. Slide the outer plastic housing off the remaining inner metal sleeve. Step 2: Replacement Open the plastic housing, discard the broken plastic clips, and keep the internal tension spring. Insert your new 3D printed replacement latches along with the original spring into the housing channels. Step 3: Reassembly Push the assembled plastic housing back onto the metal sleeve extending from the window blind. Press your 3D printed end-cap/plug onto the tip of the metal sleeve to lock everything in place (apply a tiny drop of superglue inside the cap if necessary).
Названия используются только для указания источника результата. Polyzon не аффилирован с перечисленными площадками.