
Бесплатно 
Universal Valve Cap for Cars, Motorcycles & Bikes
MakerWorld
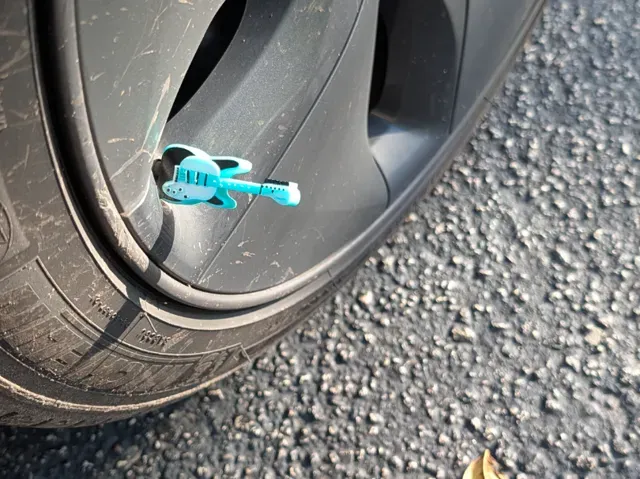
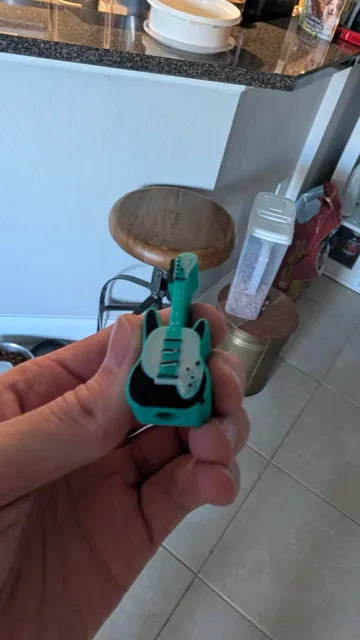
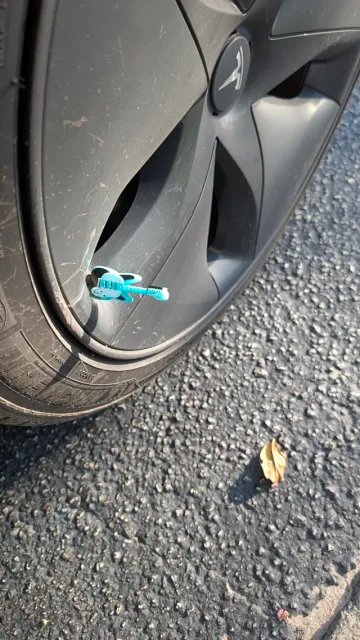
🎸 Guitar Tire Valve Cap for Car & Bike: it really screws on!
Rock out at every red light. This is a detailed Strat-style electric guitar that screws onto a standard tire valve. It has pickups, a whammy bar, knobs, frets, strings, fret dots and butterbean tuners.
Fits: standard Schrader valves, the kind on cars, trucks, motorcycles and most kids' and mountain bikes. It won't fit Presta (skinny road-bike) valves.
Size: about 23 × 54 mm. The thread is 10 mm deep and the standard 0.305"-32 valve size (5V1).
🔩 Which thread size?
Each version comes in two thread sizes:
- Regular (recommended): spins on smoothly by hand and holds snug. Start here. - Tight fit: a tighter thread for printers that print holes a little large. It can be a very tight fit to screw on, so only use it if the Regular version feels loose on your valve. 🖨️ Option 1: Solid color, one piece (recommended for single-color printing)
Print it standing up, with the threaded opening down on the bed . That gives the cleanest, strongest thread.
- Supports: none needed. Everything is designed to print without them, including the tuner keys and the pointed top of the thread hole. - Brim: 3–5 mm. The footprint is small for how tall it is. - Layer height: 0.12 mm or finer for crisp strings and frets. - Cooling: turn on a minimum layer time of 8–10 s, or print two at once, so the small headstock layers can cool. - Material: PETG recommended. PLA is fine for display. 🖨️ Option 2: Multi-color, two parts (much faster with AMS)
This version is a guitar body plus a small thread insert (Regular or Tight fit).
Printing in color standing up means a filament change on nearly every layer, which took over 14 hours in my slicer. Lying flat, all the colors are in the top few millimeters, and it took about 45 minutes .
Guitar body: print it flat on its back, face up . The file is already oriented that way. No supports needed. Use Bambu Studio's Color Painting tool to paint the face. My favorite scheme:
- Body: green - Fretboard and headstock: black - Pickguard and nut: white - Pickups and knobs: black - Strings, frets, bridge and tuners: blue - Fret dots: white Thread insert: print it standing up, threaded opening down , in any single color. It's tiny and prints in a few minutes.
Assembly:
- Screw the insert onto a valve first to check the fit. - Put a few drops of CA glue or 5-minute epoxy on the outside faces of the insert. Keep glue out of the thread! - Press it into the hex socket in the bottom of the guitar, chamfered end first. The hex keeps it from spinning. - Let it cure, then screw it on and rock on. 🤘 ⚠️ Notes
- These are big for valve caps. Check that the guitar clears your rim, brakes and spokes when screwed on. - They're made for fun and show. Check them now and then, and take them off if they get loose or cracked. - Hand-tighten only.
0.2mm layer, 2 walls, 15% infill

Названия используются только для указания источника результата. Polyzon не аффилирован с перечисленными площадками.
Комментарии