
Бесплатно 
Bubble Taper Candle Holder Mold, 3D Printable
Thingiverse


A cap for the Hyundai ix35 headlights with the corresponding silicone gasket.
Print the cap in ASA, ABS, or another material capable of withstanding higher temperatures.
The "Gasket [Silicone]" files are not for printing, they are just a preview how the silicone gasket should look like. You can try printing it in a very soft TPU, but I sincerely doubt it would properly work. The better approach is to print a mold and cast it in some household silicone that has a hardness shore around 20A, and that is far softer than any printable filament.
Casting the Gasket
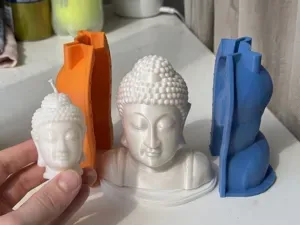
- Print the two parts of the mold. - Spread a thin layer of some dishwashing liquid on the inside, to ensure that the silicone can be easily released from the mold when cured. - Connect the two halves of the mold and tighten them with clamps. - Inject slowly some plain household silicone from the bigger hole, until it starts oozing from the opposing hole. Then squeeze some more to allow that all cervices inside the mold are properly filled and there are no bubbles left inside. - Let it cure for 24 hours. - Open the mold and take out the silicone part. - Carefully trim the excess silicone and that's it! Guidelines for Making Molds
If you need to make your own soft part in silicone, this is how you make the mold:
- Create a 3D model of your part. Minimize crevices as much as possible, as these are where bubbles are most likely to form. - Make a rectangular cuboid large enough to enclose the entire part, leaving sufficient material around it to ensure rigidity. Depending on the shape of your part, this extra material may vary from several millimeters to centimeters—use your engineering judgment. - Position your 3D shape in the center of the cuboid and subtract it, so only a cavity in the shape of your part remains within the cuboid. - Split the cuboid along its largest plane. That is now the core of your mold. - Place at least two cylinders on the opposite sides of the mold core, aligned with the cutting plane. These will act as the main entry and exit points for the injected silicone. You may model a cone on the entrance hole, like a funnel. The positioning of these holes is crucial for ensuring the silicone fills all crevices. Again - apply engineering thinking, and be prepared for some trial and error. - Model a few conically shaped alignment teeth and corresponding slots on both halves of the mold, so the two halves are positioned correctly when assembled. - Print the mold in PLA, as it is fairly rigid and good for printing detailed objects.






Названия используются только для указания источника результата. Polyzon не аффилирован с перечисленными площадками.
Комментарии 0
Загружаем комментарии…