
Бесплатно 
QIDI Printers (Q1 Pro, Plus4, X-Max3, X-Plus3, Q2, Max4) Spool Holder with Bearings
Printables
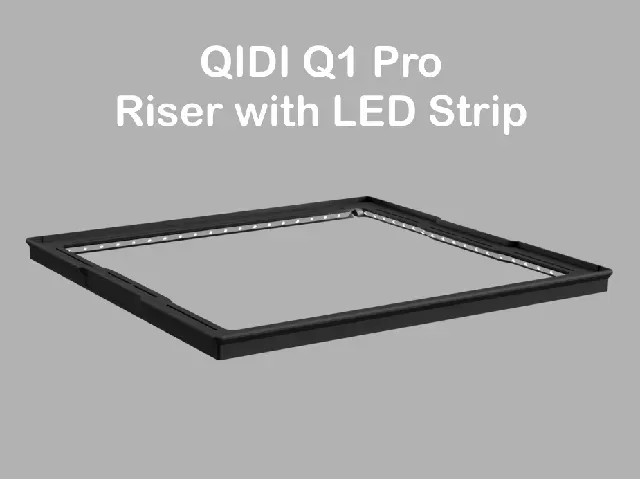
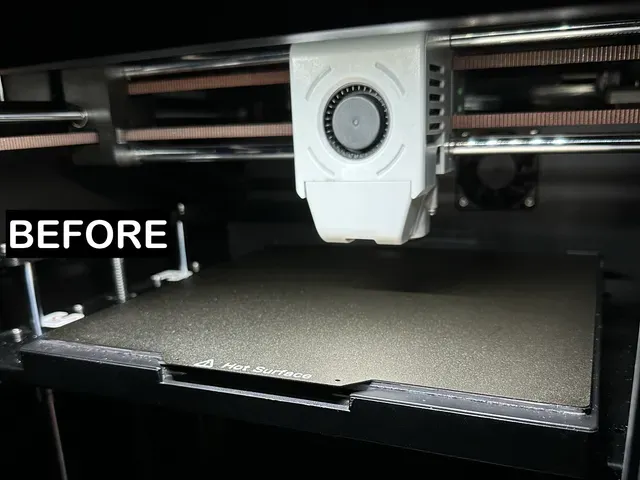
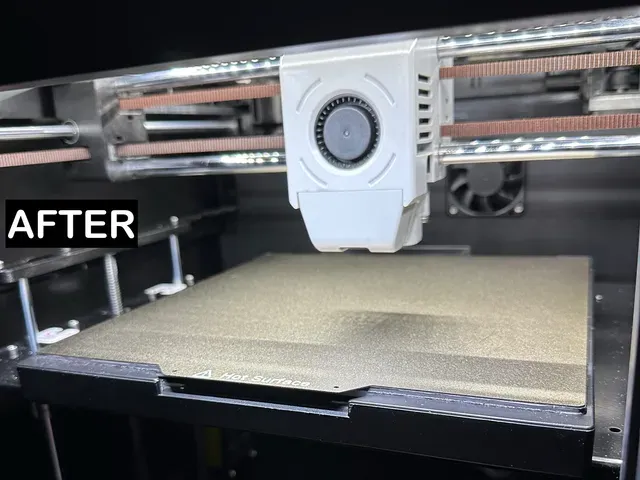
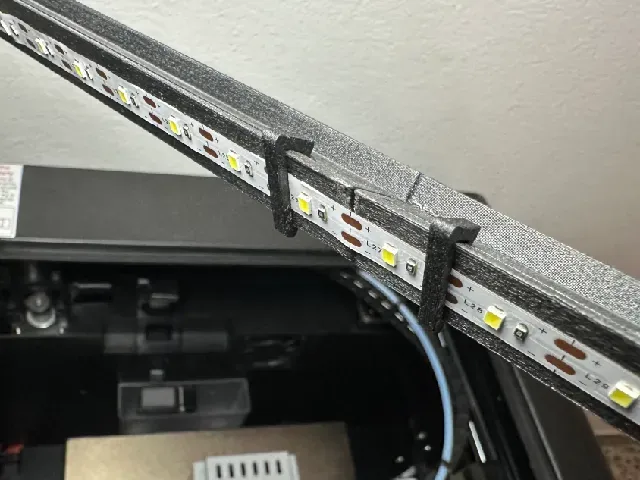
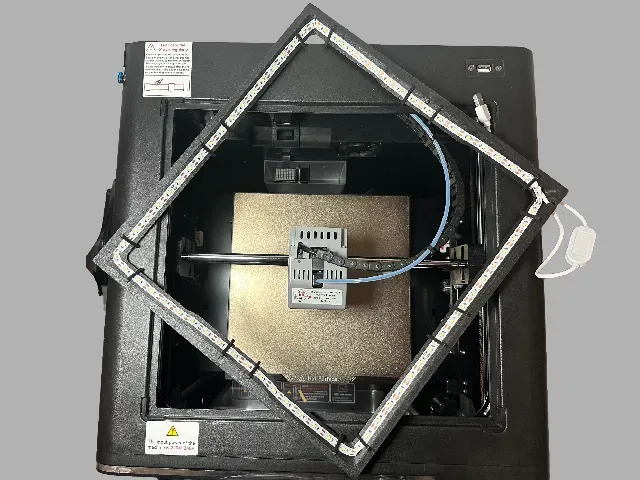
The internal lighting of the Qidi Q1 is not the best, especially when recording timelapses. The back of the print head often remains in the dark, which reduces visibility and overall video quality.
I looked around at other lighting mods, but most were either invasive or impractical (for example, requiring access to the rear of the printer to rewire the stock LED). I wanted something simpler…
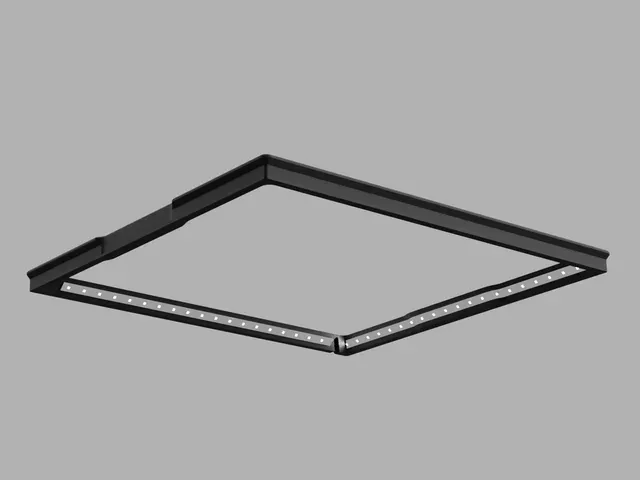
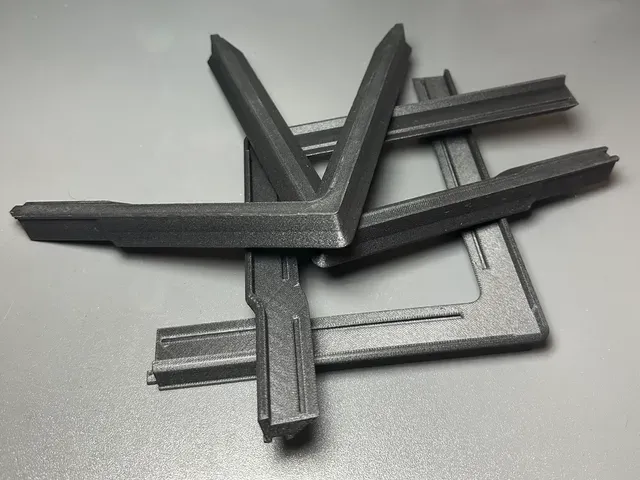
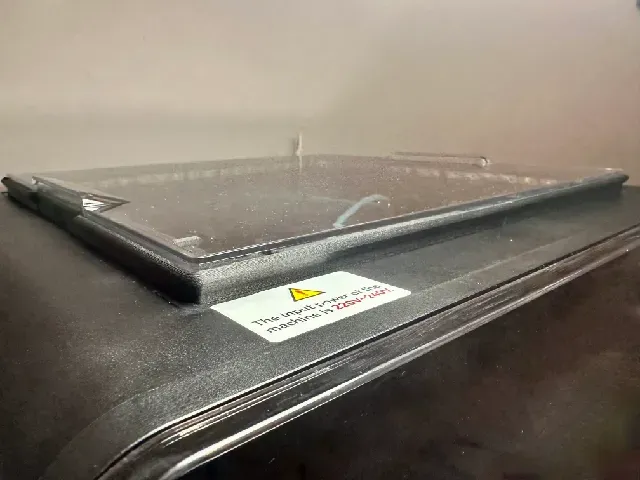
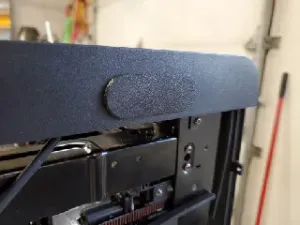
That’s how this idea came about: a small riser designed to lift the top cover while hosting an LED strip. This way you get proper illumination inside the chamber, while also adding a few centimeters of clearance so the PTFE tube doesn’t scratch against the lid.
This solution is completely non-invasive and reversible, just as I wanted. The LED strip can be powered either from the USB port on top of the printer or from an external power supply.
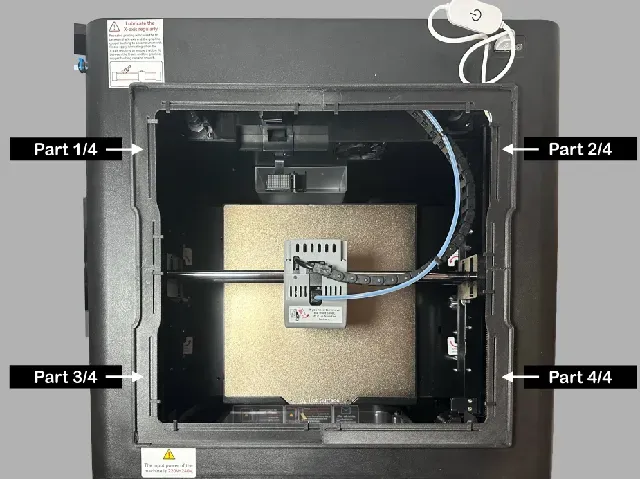
The files are split into 4 pieces, so they can be printed easily within the Q1’s build volume. Just glue the pieces together with a few drops of adhesive.
Important: Use a suitable filament (avoid PLA), especially if printing with the heated chamber. I personally used PET-CF, which works perfectly.
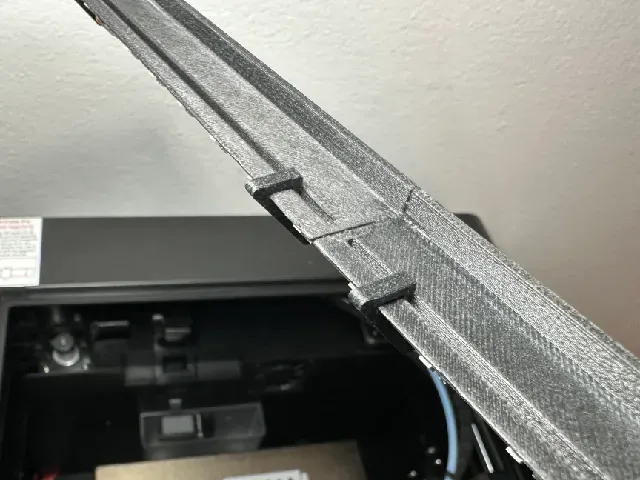
You’ll need about 120 cm of LED strip. I used an 8 mm wide strip with a small external controller to handle power and brightness adjustment. You can use any strip you prefer, as long as it’s no wider than 16 mm. The strip sticks in place with its own adhesive backing, and the cable passes neatly through a dedicated slot.
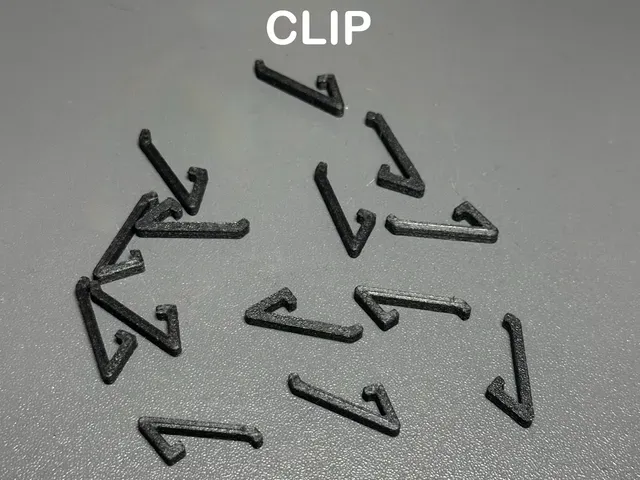
For extra safety, I also designed (optional) clips to secure the LED strip. If the adhesive weakens due to chamber heat, the clips will prevent the strip from falling and interfering with prints.
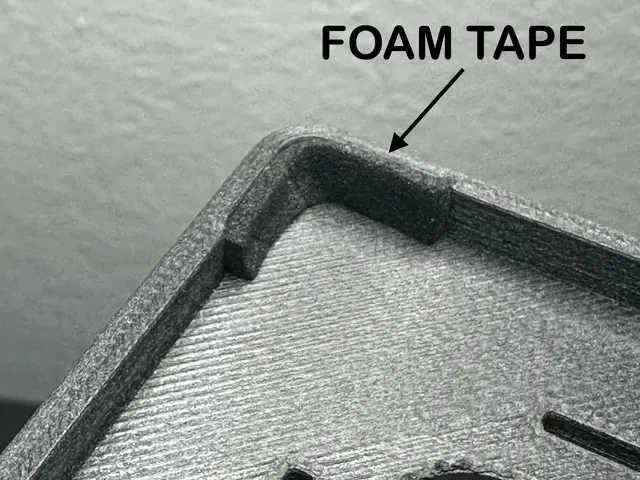
Additionally, you can apply thin foam tape to the four corners of the riser (as I did). This reproduces the original “feeling” when inserting the top cover and improves the overall fit. The riser works fine without it, but the foam provides a more refined finish.
⚠ Compatibility : This riser is designed for the Qidi Q1 Pro – 2nd revision (the model with Ethernet port and filament input on the side) . It has not been tested on the first model (with filament input at the back).
⸻
🇮🇹
L’illuminazione interna della Qidi Q1 non è delle migliori, soprattutto nei timelapse. La parte posteriore della testa di stampa rimane spesso in ombra, riducendo la visibilità e la qualità delle riprese.
Ho visto in giro altri progetti di illuminazione, ma quasi tutti erano invasivi o poco pratici (ad esempio richiedevano di accedere al retro della stampante per collegarsi al LED originale). Cercavo invece qualcosa di più semplice…
Da qui è nata l’idea: un piccolo riser progettato per sollevare il coperchio superiore e allo stesso tempo ospitare una striscia LED. In questo modo si ottiene un’illuminazione uniforme nella camera, aggiungendo anche qualche centimetro di spazio così che il tubo in PTFE non graffi il coperchio.
È una soluzione totalmente reversibile e non invasiva, proprio come desideravo. La striscia LED può essere alimentata sia tramite la porta USB superiore della stampante, sia con un alimentatore esterno.
I file sono divisi in 4 pezzi, così da poter essere stampati facilmente all’interno del volume della Q1. Basta unire i pezzi con qualche goccia di colla.
Importante: Stampare con un filamento adeguato (evitare PLA), soprattutto se si stampa con la camera riscaldata. Personalmente ho usato PET-CF, che funziona perfettamente.
Serve circa 120 cm di striscia LED. Io ho usato una da 8 mm con un piccolo controller esterno per accensione/spegnimento e regolazione della luminosità. Potete comunque usare quella che preferite, purché non superi i 16 mm di larghezza. La striscia si fissa con il suo biadesivo e il cavo passa attraverso un’asola dedicata.
Per maggiore sicurezza ho incluso anche delle clip (opzionali) per bloccare ulteriormente la striscia. Se il biadesivo dovesse cedere con il calore della camera, le clip impediranno che cada e crei problemi durante la stampa.
In aggiunta, potete applicare delle piccole strisce di nastro in schiuma sottile nei 4 angoli (come ho fatto io). Questo riproduce esattamente il “feeling” originale quando si inserisce il coperchio e migliora la sensazione di montaggio. Il riser funziona benissimo anche senza, ma il nastro aggiunge una finitura più curata.
⚠️ Compatibilità : questo riser è progettato per la Qidi Q1 Pro – 2ª revisione (il modello con porta Ethernet e ingresso del filamento laterale) . Non è stato testato sul primo modello (con ingresso del filamento sul retro).






Названия используются только для указания источника результата. Polyzon не аффилирован с перечисленными площадками.
Комментарии