
Бесплатно 
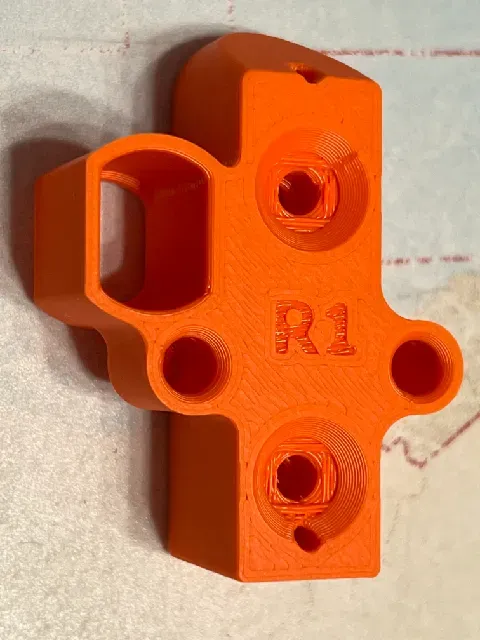
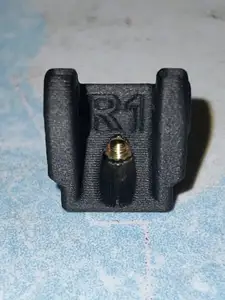
Prusa INDX tool dock with magnet install tool, with M3 hex nut cutout
Printables





Summary
After all the updates I should summarise what's now in this model:
- A minor remix of Prusa's original Tool Dock model to include magnet poke holes. As well as this simple remix, all the other STLs in this model include these holes.
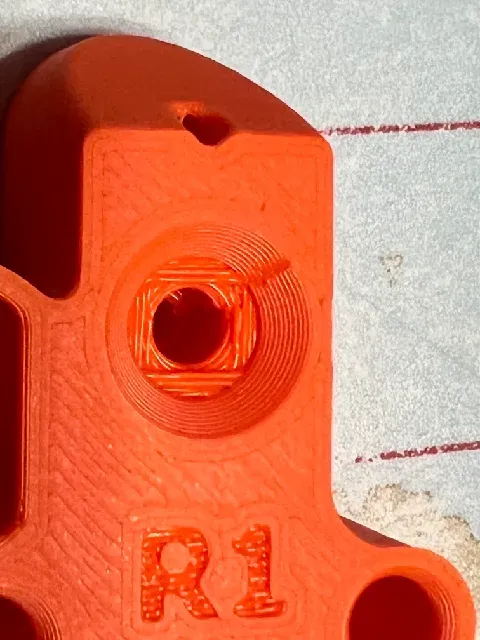
- An STL that allows screw-in inserts to be inserted from the front plate side of the tool dock. I've also now added a set of these that include numbers on the plate side, in case anyone wants to fit them to an acrylic plate that doesn't have etched numbers.
- An STL that allows screw-in inserts to be inserted from the tool side of the tool dock
- An STL that allows heatset inserts to be inserted from the tool side of the tool dock
- Two halves of a magnet assembly tool to aid with the insertion of the magnets. Two versions are supplied: One to suit generic 3mm dia x 8mm rod magnets, and one to suit 2.8mm dia magnets, based on a Discord report of a measurement on one of the original magnets recovered from a broken original tool dock.
Update 05SEP26
I added a set of numbered tool docks, in case they're useful for anyone doing the acrylic plate mod without etched numbers in the acrylic. The docks are the ones with the screw-in inserts inserted from the plate side, and with the built-in magnet poke holes. If there's any demand I'll happily add numbers to the other variants.
Update 19JUL26
Following feedback from user Hachiro, who posted that printing both the tool dock and the assembly tool in ASA leads to a very tight fit between the two, I have now done the same and confirmed the problem. My own testing was with ASA tool docks and a PETG assembly tool, and I think the slight shrinkage of the ASA tool dock disguised the fact that my modelled clearance gap wasn't sufficient. I have increased the clearance gap to solve this. The top has a little more clearance than the base, because its alignment is less critical.
Update 16JUL26
At the suggestion of Tommy_Prusa3D, no less, I've added models that allow the threaded inserts to be inserted from the tool side of the tool dock, rather than the more obvious front plate side. See 'Tool-side Threaded Inserts' description below. I promise I won't ever say 'final salvo' again :-)
Update 15JUL26
After a report from someone who's recovered the Bondtech supplied magnets from the original tool docks, I've made a couple of tweaks to the assembly tool. It seems that the Bondtech magnets might have a slightly smaller diameter - 2.8mm, versus the 3.0mm of the ones I purchased separately.
Update 13JUL26
I added a top piece for the magnet helper tool, so that the force needed to press the magnets in is applied only to the two halves of the helper tool - the tool dock inside is protected.
Update: 12JUL26
The 3mm dia x 8mm magnets are very tight in the modelled holes. They need to be to guarantee that they won't pull out when the tool is pulled away from the tool dock. But it makes their installation a bit tricky, so I've made a small tool that can help with this. See magnet_helper_tool_base.stl and magnet_helper_tool_top.stl, and the write-up below.
Update: 03JUL26
My final salvo in the battle of the Prusa INDX tool holders!
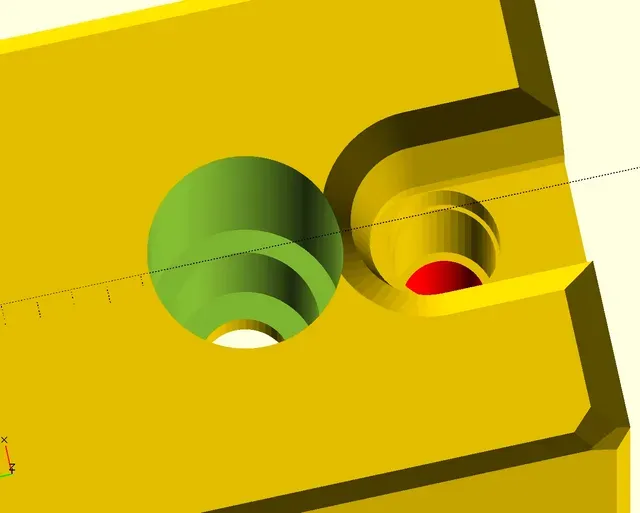
- I modified the screw holes to take screw-in threaded inserts. Other models have already offered the more widely used heat-set threaded inserts, which require a soldering iron to push them in, but I've come to prefer the screw-in variety as it's much harder to get the alignment wrong than with the heat-set insert. I modelled a thread to suit M3 screw-in inserts with an overall length of 6mm and an external M5 thread (0.5mm pitch). I used zinc-plated carbon steel inserts, which are the same ones I've used in my belt-tensioner-pulley remix . My model includes the same type of 'suspended hole helpers' that Prusa's original model uses, adjusted to suit the diameter of the inserts, such that supports aren't needed on the flats of the countersunk holes.
- I widened the magnet poke holes by a tiny amount so that the stiffer 2mm hex key can be used.
I've left the original STL here, but if you want a version without the insert holes I've also uploaded an STL with only the slightly wider poke holes.
Description
The kit-supplied tool holders have magnets inserted to hold the INDX nozzles in place when they're docked. There have been reports that some tool holders have the magnets inserted the wrong way, such that they repel rather than attract the nozzles. If you print replacements, either because of this fault or because you want the tool holders in a different colour or material, you're going to need to insert the magnets yourself. You can either butcher the original tool holders to gain access to the 3mm dia x 8mm rod magnets, or you can source your own - 2 per tool holder.
Whilst it should be simple to check the magnet polarity before insertion, if you need to remove the magnets to correct the polarity or to reuse them in a different print, you'll need a way to push them out without destroying the tool holder. This model includes a 2.3mm (now updated to 2.4mm) diameter hole so that you can insert a 1.5mm (now 2mm) Allen/hex key, better yet, a 2mm drift/punch, to push the magnets out.
Threaded Inserts
If you're unfamiliar with the screw-in inserts and are concerned that you might need a special tool to insert them, there's a simple makeshift way to insert them without any other tools - you need only a spare insert and an M3x8 screw.
Screw the spare insert onto the screw, with the wider, non-tapered end towards the screw head, and the slotted tapered end towards the end of the screw. I previously thought it best to put the slotted end towards the head, so that it could be used to unscrew the insert if it jammed in the piece, but I now think that the tapered end is less likely to jam in the first place because of the taper and the reduced contact area.
Next, screw the main insert onto the end of the screw, with the slotted tapered end furthest from the head. The slot and the taper are part of the thread-cutting design.
Then insert the tapered end into the threaded hole in the printed part and use a normal screwdriver to screw the whole assembly into the hole. The hole is sized to suit a 6mm long insert and it will stop turning once it reaches the end of the hole. Unscrew the makeshift insertion tool - screw+spare insert.
Tool-side Threaded Inserts
Threaded inserts that are inserted from the front plate side of the tool dock should provide plenty of pull-out resistance against the magnetic force of the nozzle tools - likely at least as much as Prusa's original design in which the screws cut their own thread into the plastic. Nevertheless, a little extra pull-out resistance can't hurt. So I've added a couple of models in which the inserts are inserted from the tool side of the tool dock, leaving ~1.5-2mm of plastic shoulder for the inserts to pull against. I've left the diameter of the hole in that shoulder the same as the original part, so it'll take a little effort to start the screw, but it will of course provide a little of the 'nyloc' effect to stop the loosened screw shaking loose.
I've provided two models: one for screw-in inserts and one for heatset inserts. In both cases I've made the hole that they drop into wide enough for them to drop in easily, before narrowing down to a screw thread or a plain cylinder depending on the model. In these models the length of the threaded insert is much less critical, since it will stop when it reaches the shoulder, with plenty of space above.
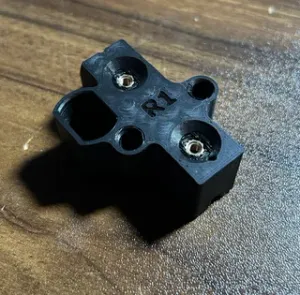
The screw-in insert is very simple to use. The heatset insert will require a very steady hand since the soldering iron tip or the insertion tool will be a close fit. I daren't make the holes any larger since one of them is close to the magnet hole and I didn't want to thin the separating wall too much. For my test I used a cap head screw in the insert so that the soldering iron tip didn't have to push in so far.
Tip: Once the inserts are in, run a long M3 screw all the way through from the tool side, to clear any plastic swarf in the shoulder section.
Photos: Heatset above, screw-in below.
The Magnet Helper Tool
See the update at the end of this section regarding the Bondtech 2.8mm diameter magnets.






Названия используются только для указания источника результата. Polyzon не аффилирован с перечисленными площадками.