
Бесплатно 
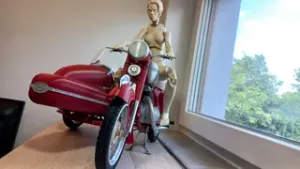
Project JAWA-ČZ KÝVAČKA 250/353.02 - PART No.10 - LAST ONE :)
Printables

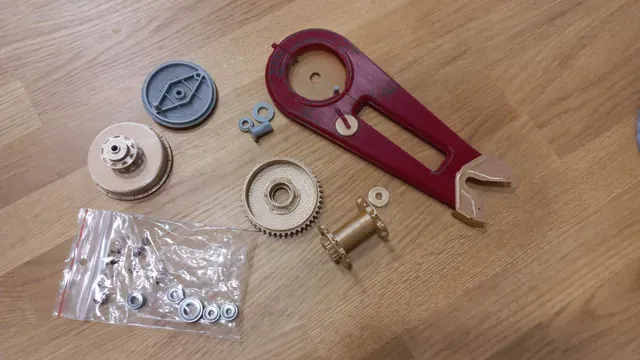







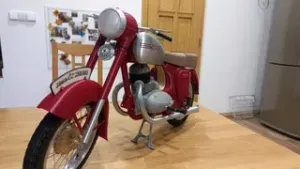
Here you are the 7th part of my Jawa-ČZ 250/353.02 build.
Hope the 6th part was fun for you :)
https://www.printables.com/cs/model/802455-project-jawa-cz-kyvacka-25035302-part-no6-rear-mud
As usual the model part consist a big parts but the very small also so pay attention to the description and attached pictures. As usual be extremely careful during the assembly itself and work slowly and cautiously. If you manage to damage or break some part despite being extra careful you should "weld" it with a soldering gun rather than gluing it with super glue.
For today I prepared to you the wheels - the most difficult parts of whole model so work slowly and carefully. Before each glue try to assembly all parts together and make sure that all parts fit.
If you will need more pictures for better understanding, you can see here:
https://www.rajce.idnes.cz/jawarmaniak/album/jawa-tisk
at first we started with the easier parts for frame - chain tensioners
Printing instruction:
- chain_tensioner_L - 1 piece, chrome PLA, 100% infill, 0.15-0.2 layer. - chain_tensioner_R - 1 piece, chrome PLA, 100% infill, 0.15-0.2 layer. Assembly instruction:
- Cut the head from 2pcs of screws M2 to get he threaded rod M2-12mm. - Glue this rods into printed holes in the both chain tensioners with super glue. - Set the parts aside for now.
at second we can print the chain guard
Printing instruction:
- chain_guard_top - 1 piece, red PLA, 100% infill, 0.15-0.2 layer. - chain_guard_bottom - 1 piece, red PLA, 100% infill, 0.15-0.2 layer. - control_cap - 1 piece, silver/light sand PLA, 100% infill, 0.15-0.2 layer. - rubber_stop - 2 pcs, black PLA/TPU, 20% infill, 0.15-0.2 layer. Assembly instruction:
- The contol_cap install into chain_guard_top. Be carefully, do not brake the holder of the cap. - Insert both rubber_stop s into both parts of the guard. - Set the parts aside for now.
at third we can start print the front brake shield
Printing instruction:
- front_brake_shield - 1 piece, grey PLA, 50% infill, 0.15 layer. - front_brake_cam_1 - 1 piece, grey PLA, 100% infill, 0.2 layer. - front_brake_cam_2 - 1 piece, grey PLA, 20% infill, 0.2 layer. - front_brake_lever - 1 piece, chrome PLA, 100% infill, 0.15 layer. - brake_shoes_pivot - 1 piece, grey PLA, 100% infill, 0.2 layer. Assembly instruction:
- Insert M2-10 screw into front_brake_cam_1 and fix it by super glue. - Glue front_brake_cam_1 and front_brake_cam_2 together into one piece. Be carefully and pay attention to the correct orientation of the hexagon. Look at the picture! - Glue brake_shoes_pivot into front _brake_shield . - Insert front _brake_cam into front _brake_shield_housing from inner side. - On the hexagon slide front _brake_lever and fix them by M2 nut - Set the parts aside for now. at fourth we can print the rear brake shield
Printing instruction:
- rear_brake_shield - 1 piece, silver/light sand PLA, 100% infill, 0.15 layer. - rear_brake_shield_housing - 1 piece, silver/light sand PLA, 100% infill, 0.2 layer. - brake_shoes_pivot - 1 piece, grey PLA, 100% infill, 0.2 layer. - rear_brake_cam_1 - 1 piece, grey PLA, 100% infill, 0.15 layer. - rear_brake_cam_2 - 1 piece, grey PLA, 100% infill, 0.2 layer. - rear_brake_lever - 1 piece, chrome PLA, 100% infill, 0.15 layer. - brake_lever_pin - 1 piece, grey PLA, 100% infill, 0.15 layer.
Assembly instruction:
- Glue together rear_brake_shield and rear_brake_shield_housing . - Glue brake_shoes_pivot into rear_brake_shield . - Insert M2-10 screw into front_brake_cam_1 and fix it by super glue. - Glue rear _brake_cam_1 and rear _brake_cam_2 together into one piece. Be carefully and pay attention to the correct orientation of the hexagon. Look at the picture! Do not mix up front and rear brake parts. They are not interchangeable! - Insert rear_brake_cam into rear_brake_shield_housing from inner side. - On the hexagon slide rear_brake_lever and fix them by M2 nut - Inset brake_lever_pin into rear_brake_lever - Set the parts aside for now.
at fifth we can print the rear brake drum
Printing instruction:
- rear_brake_drum - 1 piece, silver/light sand PLA, 50% infill, 0.15 layer. - rear_brake_drum_spacer - 1 piece, grey PLA, 100% infill, 0.2 layer. - rear_brake_drum_pivot - 1 piece, grey PLA, 100% infill, 0.2 layer. Assembly instruction:
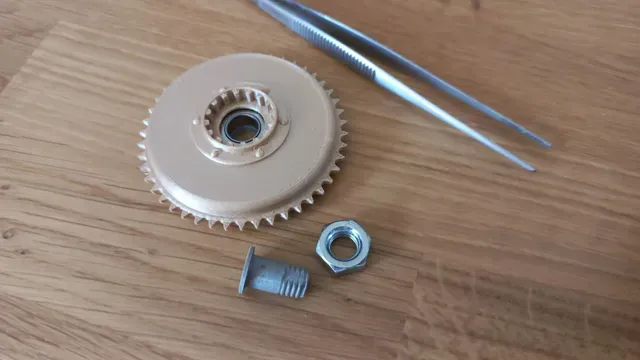
- Cut the thread M8 in the rear_brake_drum_pivot. - Inset ball bearing 688ZZ (8x16x5) into rear_brake_drum . - Insert rear_brake_drum_pivot and the rear_brake_drum_spacer. If is necessary you can fix them by super glue. - Set the parts aside for now.
at sixth we can start work on the rear wheel
Printing instruction:
- rear_wheel_hub_1 - 1 piece, silver/light sand PLA, 50% infill, 0.15 layer. - rear_wheel_hub_2 - 1 piece, silver/light sand PLA, 50% infill, 0.15 layer. - lubricator - 1 piece, grey PLA, 100% infill, 0.15 layer. - rear_wheel_bearing_cap - 1 piece, silver/light sand PLA, 100% infill, 0.15 layer. - rear_wheel_inner_spacer - 1 grey PLA, 50% infill, 0.15 layer. - rim - 1 chrome PLA, 50% infill, 0.15 layer. - spoke_nipple - 36 pcs, chrome PLA, 100% infill, 0.15 layer.
- tyre - 1 piece, black PLA/TPU, 50% infill, 0.15 layer. OR
- tyre_1 - 1 piece, black PLA/TPU, 50% infill, 0.15 layer. - tyre_2 - 1 piece, black PLA/TPU, 50% infill, 0.15 layer. I uploaded the tire in one piece and in 2 parts also. You can choose what is better for you. 2 parts are good for Mk3/4 steel plate but if you wan to try print from TPU or you have Prusa Mini printer you can cut the model into some smaller pieces in slicer.
- wheel_valve - 1 piece, black PLA, 100% infill, 0.15 layer. - rear_wheel_shaft - 1 piece, silver/grey PLA, 100% infill, 0.15 layer. - rear_wheel_spacer - 1 piece, chrome PLA, 100% infill, 0.15 layer. - rear_wheel_tool - 1 piece, PLA, 5-10% infill, 0.2 layer. Assembly instruction:
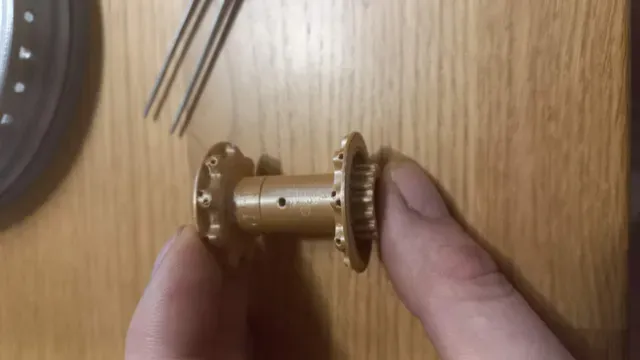
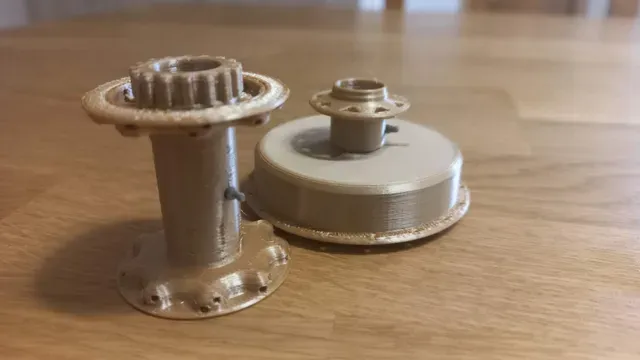
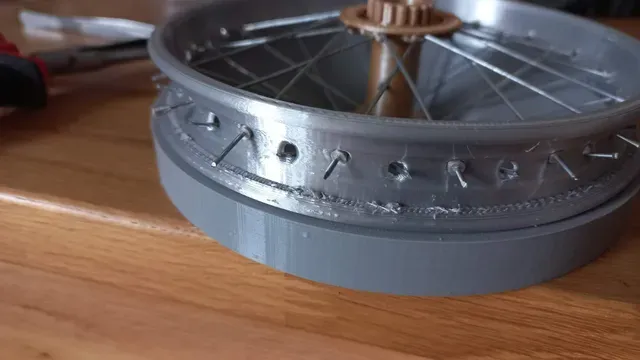
- Glue together rear_wheel_hub_1 + lubricator and rear_wheel_hub_2 . Pay attention to the correct position of each other! See picture below! - Prepare wires for wheel. You will need 36 pieces of stainless steel or zinc galvanized wire with a diameter of 1 mm and a length of 50 mm. - install the wheel hub into rear_wheel_tool. The teeth must point upwards. - Install the rim into rear_wheel_tool. - Gradually insert the wires into the hub and fix them with glue. Wires of the same position should pass through the rim through every fourth holes each time. If necessary, slightly adjust the position of the rim and the hub so that the angles, clamped by the wires, are uniform. - Slide the spoke_nipple s onto the free ends of the wires protruding from the rim . Push them all the way in. The ends should be flush with the rim wall. - Fix the wires and spoke_nipple s with glue. - Cut the protruding ends of the wires. - Glue the wheel_valve into the free hole in the rim. - Glue the tire on the rim. - install 2 ball bearings 685ZZ (5x11x5) into hub. - Install the rear_wheel_bearing_cap and rear_wheel_inner_spacer - Prepare threaded rod M5-173mm long and glue on one end rear_wheel_shaft - Set the parts aside for now.
at seventh we can continue with the front wheel
Printing instruction:
- front_wheel_hub_1 - 1 piece, silver/light sand PLA, 50% infill, 0.15 layer. - front_wheel_hub_2 - 1 piece, silver/light sand PLA, 50% infill, 0.15 layer. - lubricator - 1 piece, grey PLA, 100% infill, 0.15 layer. - front_wheel_bearing_cap - 1 piece, silver/light sand PLA, 100% infill, 0.15 layer. - rim - 1 chrome PLA, 50% infill, 0.15 layer. - spoke_nipple - 36 pcs, chrome PLA, 100% infill, 0.15 layer.
- tyre - 1 piece, black PLA/TPU, 50% infill, 0.15 layer. OR
- tyre_1 - 1 piece, black PLA/TPU, 50% infill, 0.15 layer. - tyre_2 - 1 piece, black PLA/TPU, 50% infill, 0.15 layer. I uploaded the tire in one piece and in 2 parts also. You can choose what is better for you. 2 parts are good for Mk3/4 steel plate but if you wan to try print from TPU or you have Prusa Mini printer you can cut the model into some smaller pieces in slicer.
- wheel_valve - 1 piece, black PLA, 100% infill, 0.15 layer. - front_wheel_shaft - 1 piece, silver/grey PLA, 100% infill, 0.15 layer. - rear_wheel_tool - 1 piece, PLA, 5-10% infill, 0.2 layer. Assembly instruction:





Названия используются только для указания источника результата. Polyzon не аффилирован с перечисленными площадками.