
Бесплатно 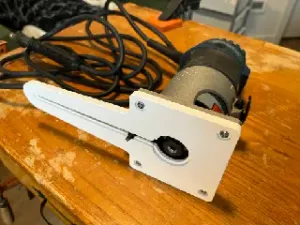
Circle Cutting Baseplate/Jig for Bosch Colt 1HP Palm Router PR20EVS
Printables


I had a couple small wooden parts that needed to be a custom thickness. I don't own a thickness planer. This jig allowed me to get the job done.
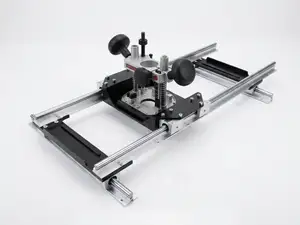
Operationally this works as follows: - tape down the part in question to a flat work surface. I happened to have a half-sheet of Melamine - choose and attach appropriate height spacer blocks ("shoe") - set the bit height in the router - run the entire jig across the flat work surface to do the planing operation. - adjust the bit height and repeat
To get a proper fit of the EMT into the printed parts, some sanding may be needed. See part "Sanding-Arbor" for that; cut a small piece of sandpaper, insert an edge into the slot in the arbor, curl it around the arbor. Then using a drill, sand the cylindrical inside surfaces of parts "Foot" and "GuideCollar" to fit as desired.
Note: the router isn't meant to slide along the EMT rails; the entire assembly there is moved across the work surface
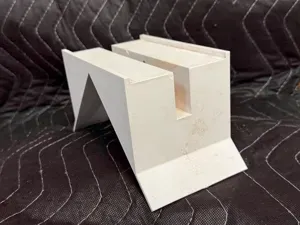
Three heights of the riser blocks ("Shoe") are included: 18mm, 30mm, 40mm.
If you want to adapt this to a different router, see drawing "BasePlate" for dimensions for mounting.
If you need different riser heights, see drawing "Show" for the as-designed top surface dimensions. Extrude a part to whatever height you need.
Other parts used - double-sided tape to hold down the wood in question (or hot glue gun glue applied at board edges) - 1/4" shank spoil board bit for the router - 3/4" (18mm) EMT conduit for the rails. - No. 8 machine screws and nuts to attach router Base to the GuideCollars - No. 6 screws to attach Shoe pieces to the Foot pieces. - flat surface to work on
My workflow - I used a machinist surface gauge [1] to probe the high spot of the board to be planed - I chose a stack of gauge blocks [2] matching the probed height - I dropped the router bit down on that gauge block stack, locked the height, then did a routing pass. - I then dropped the gauge blocks stack height by 0.5 mm (or 1.0 mm), reset the router bit height, and made another pass - repeat that until the full surface has been planed.
[1] https://littlemachineshop.com/products/surface-gage [2] https://www.thingiverse.com/thing:5437757


%2Fhttps%3A%2F%2Ffbi.cults3d.com%2Fuploaders%2F14001460%2Fillustration-file%2F8301f8d2-595a-4a68-97ad-f44f1a7b8b34%2Febe357d4f8d0ba962ca883e047ecda90_display_large.jpg&w=300)


Названия используются только для указания источника результата. Polyzon не аффилирован с перечисленными площадками.