
Бесплатно 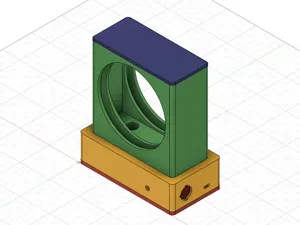
Soldering Fume Extractor USB-C Powered
MakerWorld


I hope you like my first upload. Please share some pictures, if you decided to make it!
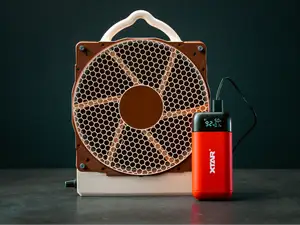
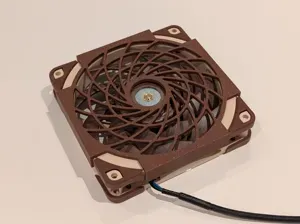
It uses Noctua's best 120mm fans, quiet enough to be used on half speed without any noise in a library.
You need to be able to solder to do this project. Print out every piece once, except the arm twice.
Part List: - Noctua NF-A12x25 G2 PWM (next gen 120mm fan) https://www.noctua.at/en/products/nf-a12x25-g2-pwm - Bolvunes MagSafe Powerbank Slim 5000mAh Qi2 (Power Delivery) https://www.amazon.de/-/en/Powerbank-Wireless-Charging-Magnetic-Portable/dp/B0FTMDSHTM - RUNCCI-YUN PWM Fan Speed Controller (DC, 0-12V) https://www.amazon.de/-/en/RUNCCI-YUN-Pack-Speed-Controller-Switch/dp/B0D8PRTCV7 - Taiss Toggle Switch Solder SPST (or similar, they seem to all have the same dimensions. Be sure to use some with pre-attached cables though, as soldering cables onto them directly broke two of my old ones.) https://www.amazon.de/-/en/Taiss-Toggle-Switch-Solder-KCD1-X-F/dp/B083NLCDQG - Dewlawn USB-C PD Trigger Board Module https://www.amazon.de/-/en/Trigger-Module-Switch-Delivery-Compatible/dp/B0GHJXTMNB - 9x M3x30 screws https://www.bauhaus.info/senkkopfschrauben/senkkopfschraube-ms/p/10774336 - spare cable piece (max 10cm necessary) - two component epoxy putty, something like this: (or whatever glue you like but this worked very well and is great to have anyways) https://www.amazon.de/gp/aw/d/B09ZLKHRT3 - regular two component epoxy glue - any small screwable connector for two wires, as this example: (the picture shows multiple that can be broken off) https://www.bauhaus.info/luesterklemmen/luesterklemme/p/12173090 - a metal file or similar - cutters that are strong enough to cut screws - optional: drill with 3mm width
If you are not from Germany, try to find the exact parts at your vendors. The design is very tight on space and might not fit other parts.
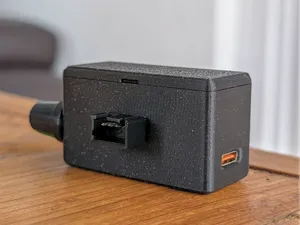
For the next part about assembly, refer to the attached professional wiring diagram :). Also, it makes sense to read everything before starting. - First check, if the screws fit through all bodies when they are stacked on top of each other. Mine didn't, so I used a 3mm drill to widen the holes. Now they still have to be screwed through the plastic, but it works easily. - Mount the arms (loosely first) by flipping one of them, so the mechanism locks in on each side when trying to open the arms. Hold the nuts with one finger inside and screw in the screws from the outside. You should see, that the screws are protruding into the space of the fan. Mark them, where they protrude from the nut, and cut off the rest, except for maybe 1mm. This is better done disassembled. File off sharp pieces. - Now mount the arms again, this time the screws should be almost flush with the nuts on the inside. Tighten the screws, until the arms have a nice resistance when opening them. Now put a tiny bit of two-component epoxy on the nut-screw-interface inside, so the screw won't come loose after a while, when opening and closing the arms multiple times. Let it dry and test the function of the arms. They are done now. - Push the nuts that came with the screws into the holes on the bottom of the main body. You might need to use a scalpel to open the holes up a bit after printing. - Put the midplate on the body part. - Run the fan's cable through the opening and leave it aside for now. Gently push the fan into the body and make sure that you push the silicone edges into it with your fingernails. The fan should not touch the screws from the arms. The fan should sit flush with the body and be tight enough to not fall out. If too loose, there are screw holes at the top, but I didn't need them. - Glue the USB-C cable that came with the powerbank into the little slot in the bottom. Make sure to let it cure while the powerbank is plugged in and the midplate is pushed down, as this ensures that it can later be inserted into the slot on the side and connect to the cable. The cable can handle power delivery (PD), which is essential here. Using another cable might not work, as USB-C is not standardized and you have to make sure it can handle PD. Also, this cable is very short which is a benefit in this tight housing. Trust me, cutting a longer cable and soldering it short does not work well. - Once hardened, connect the USB-C cable to the PD-Trigger. Look up the documentation to see which switches have to be turned on for 12V to be put out. The switches might have to be reversed (On to Off and vice versa), as the manufacturers apparently are stupid sometimes. - Sand off, file off, or use any other method, to remove the most protruding part of the metal pins underneath the PWM-Controller. Do not remove too much for it to stop working obviously, but with the entire length of pins it won't fit properly later. - Push the switch into the topplate. - Now preprare to solder. Solder some of the spare wire (maybe max. 5cm) to the PWM-Controller's positive side, making sure the cable faces away from the dial (If anything is unclear the cool wiring diagram probably helps). Make sure to look at which solder pad is the positive side. - Solder the rest of the spare wire to Ground (GND), again, facing away from the dial. Leave it a few centimeters long (maybe 5-7cm, see for yourself. It has to have enough length to reach the PD-Trigger but not waste space.) - Optional: Since we have a soldering iron, unsolder the LEDs from the PWM-Controller and PD-Trigger, as they waste energy. I heated them up until they broke, because removing them was difficult, and everything works normally. No more soldering necessary from now on. - Screw the cable, that was soldered onto the Ground side of the PWM-Controller, into the PD-Trigger Ground side. - Connect the negative switch side (technically it doesn't matter) to the screw-cable-connector-thing (Lüsterklemme). Connect the other side of the connector with the wire that is soldered onto the positive side of the PWM-Controller. - Screw the remaining side of the switch into the positive side of the PD-Trigger. The advantage of this design is, that you can entirely remove the topplate including switch using only a screwdriver, no desoldering necessary. - Screw the PWM-Controller into the midplate, using the nut that came with it. Now put on the dial cap if you like the look. It makes it easier to see what speed it is on. - Connect the fan cable to the 4-pin connector of the PWM-Controller. - Check, if everything is correct and it matches the wiring image. Better trust your understanding than my instructions. - Connect the powerbank and verify, that the switch, controller and fan works. The fan should be audibly loud on maximum setting. If not, you might not get 12V. - Carefully squeeze all cables underneath the topplate. This might be the trickiest part, since the cables really don't want that. - Once all cables are underneath, screw in the screws from the top. You should see them fitting into the nuts at the back.
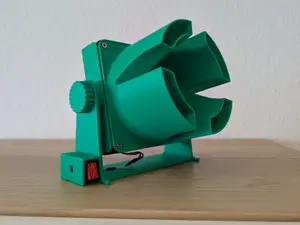
Your portable fan should be ready to go. I hope you enjoy it. The switch is for redundancy, because this way it won't accidentally turn on in a bag, and you can simply switch it off for a second when using the bathroom, switch it back on when coming back, and the speed will still be the same. For longer storage, press the switch, turn off the PWM-Controller and press the button of the powerbank at the back of the device twice. This will turn off the powerbank. Or take out the powerbank. Also, charge it separately via USB-C. To activate it again if the back button is pressed twice, take out the powerbank for one second and plug it back in. The green light indicates, if PD works. The device can probably run two days non-stop on high power, it is pretty efficient.
Hopefully this will make you able to survive the climate change a little longer. But remember, that we should all fight against the man-made climate change, even if this fan is super cool (literally).
Note: I have no affiliation with any product mentioned, nor with Noctua. I am not making money from this design. The tribal on the topplate is from my old Gameboy, please don't sue me for it.


Названия используются только для указания источника результата. Polyzon не аффилирован с перечисленными площадками.