
Free 
Table Saw Tilt/Elevation Hand Wheel (1/2" shaft)
Thingiverse
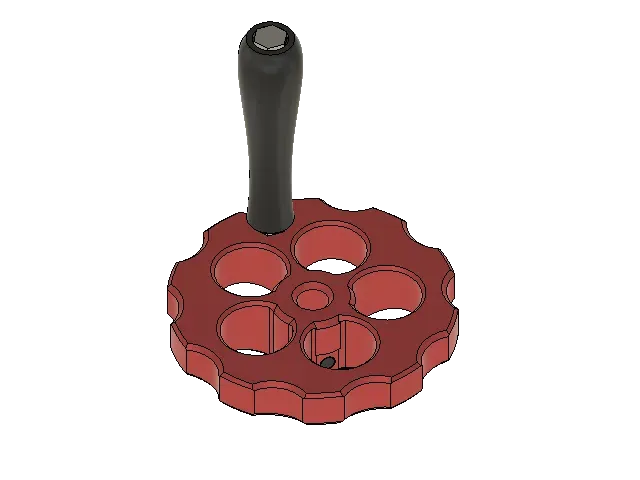
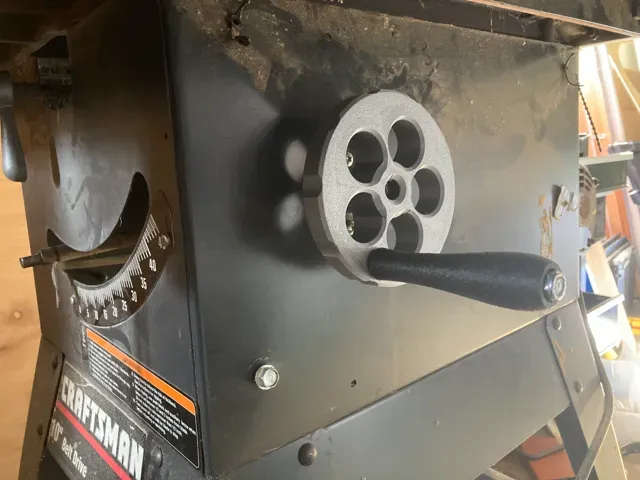
I designed this as a replacement for a Craftsman 10" belt-drive table saw model 113.299315 - but it's very likely to work on any saw with a ½" tilt/elevation shaft.
Additional hardware needed:
- (1x) ¼"-20 coarse thread Square Nut - (1x) 1/4"-20 x 1/2" Internal Hex Coarse Plain Socket Set Screw - (1x) 5/16"-18 Hex Head Bolt - (1x) 5/16"-18 Hex Nut - (1x) 5/16"-18 Nylon Lock Nut
Printing Suggestions:
I used PETG, 0.2mm Layer Height, 6 Perimeters and 5 top/bottom layers, with a 10% cubic infill. The high number of perimeters really help with keeping the part strong in the places where the most force is exerted.
Print the Hand Wheel with the larger face on the build plate. No supports are necessary. Consider a brim when printing the handle, with the narrower end on the buildplate.
Assembly:
The Square Nut is inserted in the pocket near the center hole on the rear of the wheel. For me, it was a snug fit and did not require any glue. Be sure that the hole in the collar aligns with the nut and you can see clearly through to the center.
Next, thread the Set Screw through the side of the collar, and through the nut, but not so far that it protrudes into the center hole. This wll leave room for the shaft.
Insert the 5/16" Hex bolt from the top (wide part) of the handle so that the head is in the indentation, then thread on the 5/16" hex nut at the other end. Be sure to leave the nut loose enough that the handle can freely spin on the bolt.
Insert the threaded end of the handle assembly through the flat side of the wheel, pressing the hex nut into the matching recess, then install the 5/16" lock nut on the opposite side, tightening so that the bolt is secured. Check that the handle still spins freely on the bolt.
Finally, align the part of the collar containing the set screw with the flat-ground part of the shaft, and press into place. Use a 1/8" hex driver to tighten the set screw, which will press into the shaft and push against the square nut, locking the wheel in place.
0.2mm layer, 6 walls, 15% infill I used PETG, 0.2mm Layer Height, 6 Perimeters and 5 top/bottom layers, with a 10% cubic infill. The high number of perimeters really help with keeping the part strong in the places where the most force is exerted.
Print the Hand Wheel with the larger face on the build plate. No supports are necessary. Consider a brim when printing the handle, with the narrower end on the buildplate.






Names are used only to indicate the source of a result. Polyzon is not affiliated with the listed sites.